AWS
This document provides step-by-step instructions for creating a Cloud CE instance in AWS using the EC2 service. The guide is designed for clarity and ease of use, ensuring that both novice and experienced users can follow along seamlessly.
A Cloud CE (Customer Edge) instance serves as a virtualized network device, typically used for routing, VPNs, and other edge networking functions. AWS EC2 enables the deployment of these instances in the cloud, providing scalability and flexibility. This guide outlines the process to configure and verify a Cloud CE instance in AWS.
Creating CE Instance
-
Open your web browser and visit the AWS Cloud website.
-
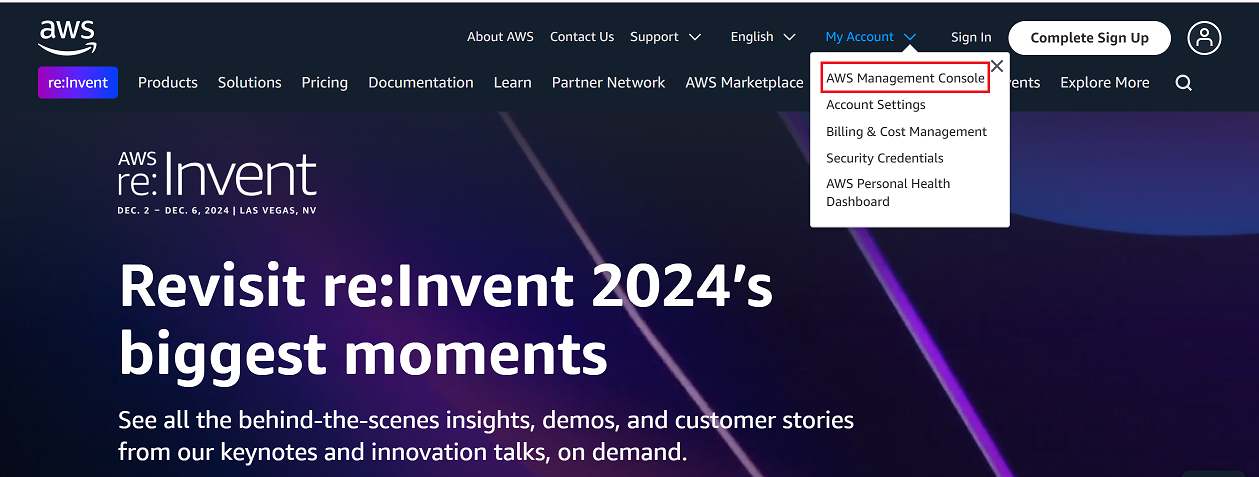
Go to the My Account > AWS Management Console.
-
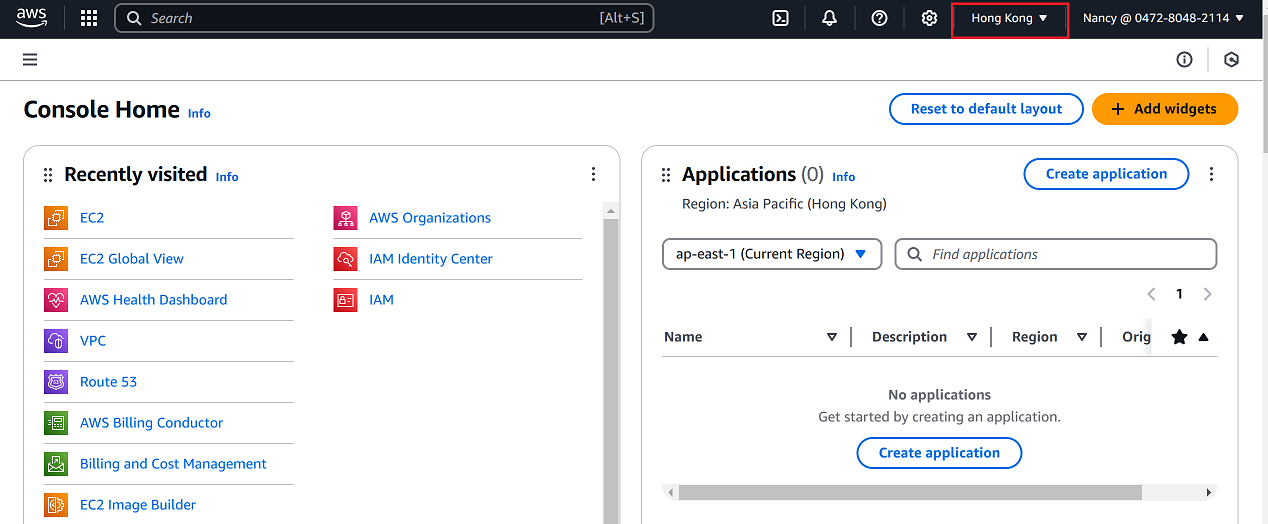
In the top-right corner, change the region to your desired location (i.e, Hong Kong) as shown in the reference image.
-
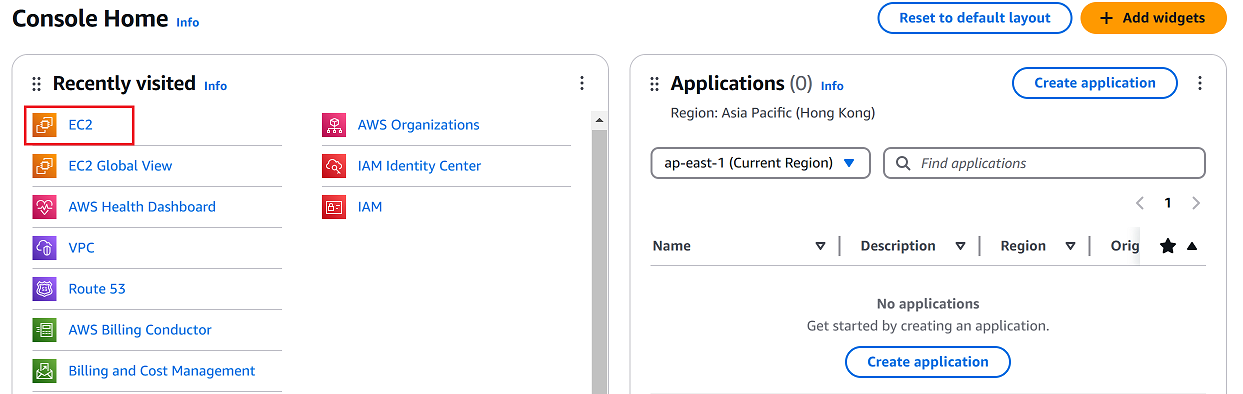
From the AWS Management Console, click on EC2.
-
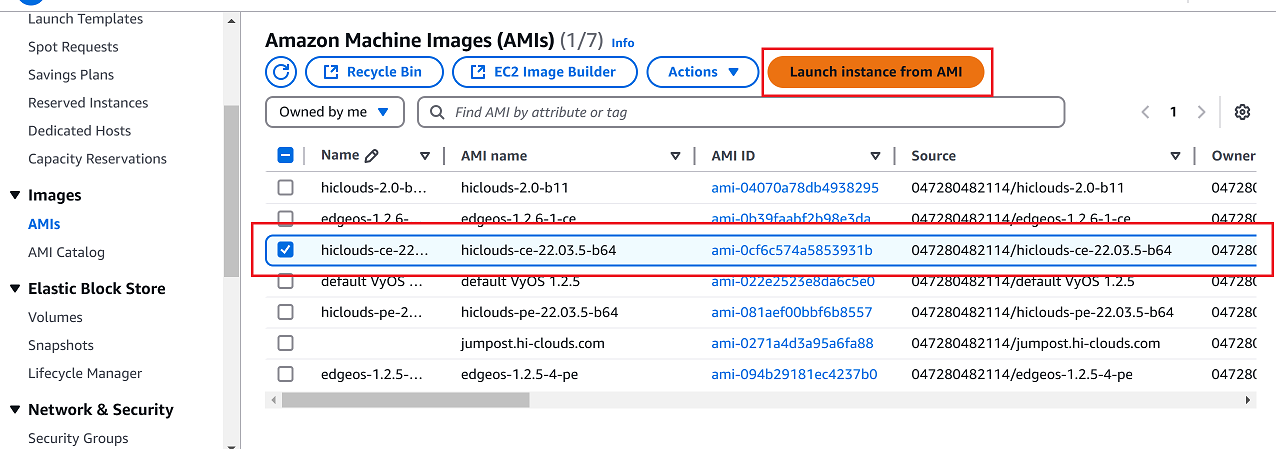
In the EC2 dashboard, select Images > AMIs from the left-hand menu.
-
Find the desired Amazon Machine Image (AMI) for the CE instance.
-
Select the checkbox next to the selected AMI and click Launch Instance from AMI on the right-hand panel.
-
Provide the following information on the instance configuration page:
-
Name: Enter a name for your instance (i.e.,
test-ce1).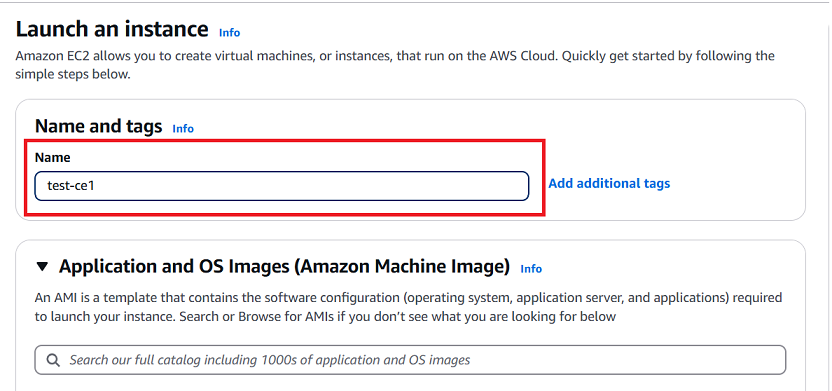
-
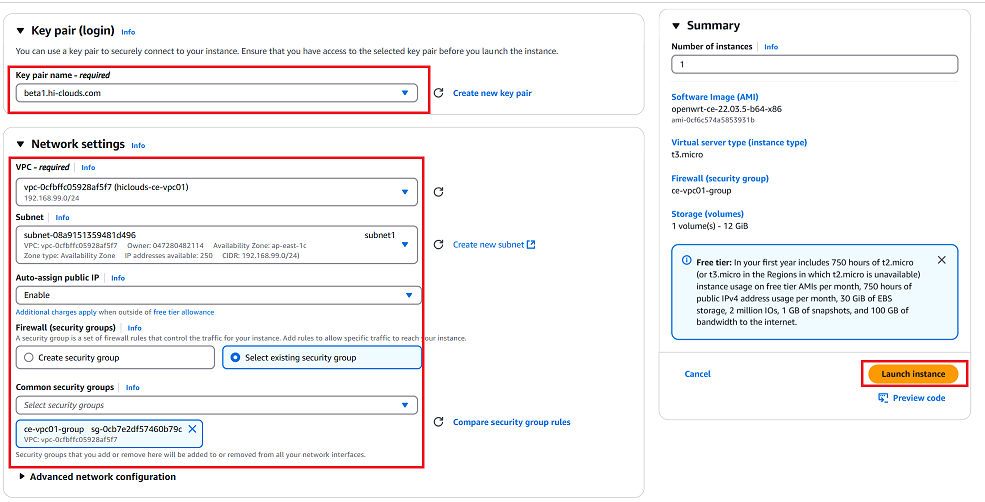
Key Pair: Select the appropriate key pair for authentication (i.e.,
beta1.hi-clouds.com). -
Network Settings:
- Click the Edit button under network settings.
- VPC: Select the desired VPC (i.e.,
vpc-0cfbffc05928aff7 (hiclouds-ce-vpco1)). - Subnet: The subnet is selected automatically by default.
- Auto-assign Public IP: Enable this option if it is disabled by default.
- Firewall (Security Group): Select an existing security group (i.e.,
ce-vpco1-group sg-0cb7e2df57460b9c).
-
-
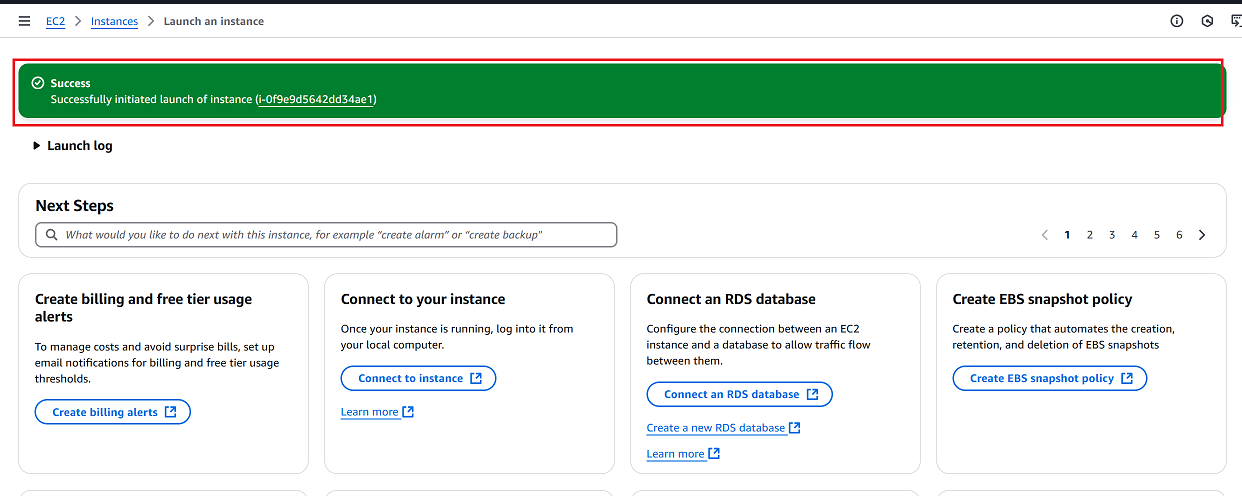
Review all details and click Launch Instance.
-
Once the instance is successfully created, you will see a confirmation message Successfully initiated launch of instance (i-0f9e9d562dd34ae1).
-
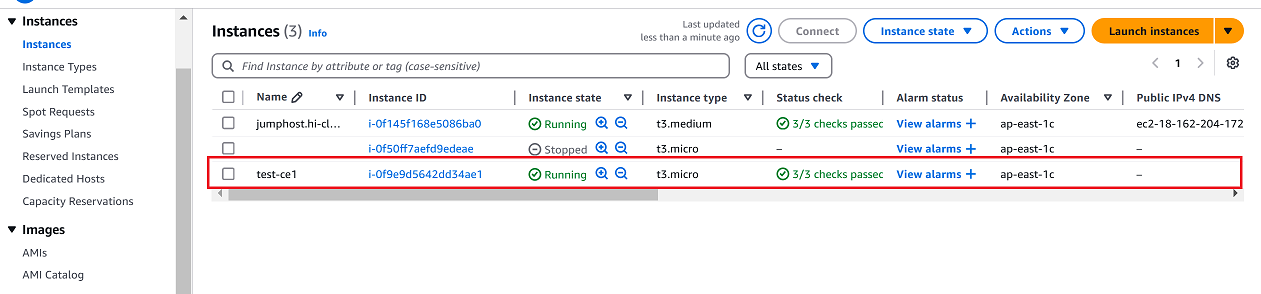
Navigate to the Instances tab.
-
Verify that the newly created instance appears in the list.
Verify the CE Instance
-
Use the public IP address to establish an SSH connection to the instance. Once connected, check the MAC address of the network interface.
-
Once the CE is successfully created, proceed to the hiCLOUDS platform to verify its configuration.
-
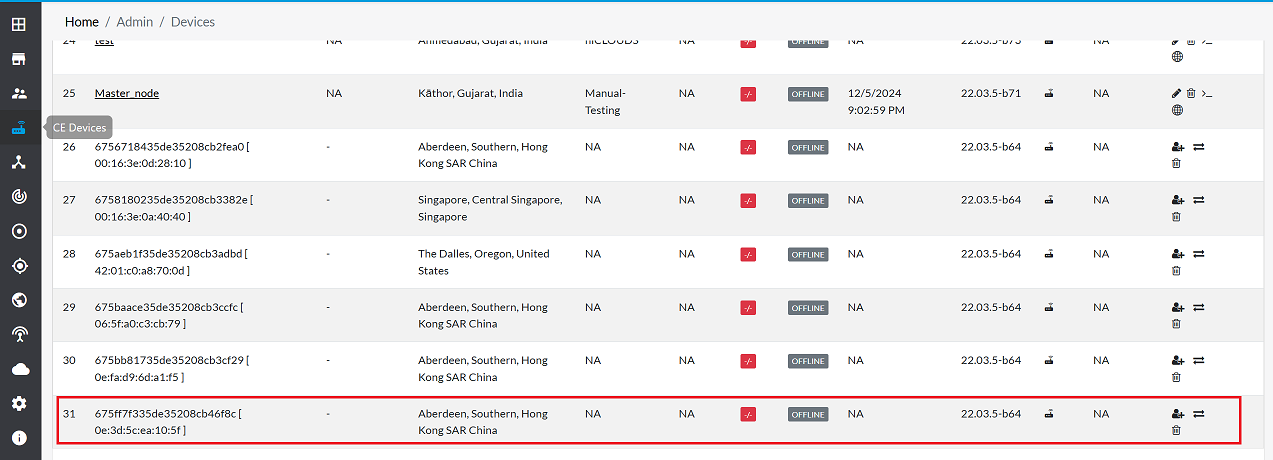
Go to Login > CE Devices > ALL.
-
Make sure that the newly created CE instance appears in the list of devices.
FAQs
Q:1 How do I verify the MAC address of the network interface?
Ans: After SSHing into the instance, use the ifconfig or ip link command to view the MAC address.
Q:2 What happens if I forget to enable Auto-assign Public IP?
Ans: You won’t be able to connect to the instance over the internet. Update the network interface settings to assign a public IP.
Q:3 Can I use a different AMI for the CE instance?
Ans: Yes, ensure the AMI is compatible with your CE requirements.