CGW IP Pool Management
This document provides step-by-step instructions for managing the CGW (Customer Gateway) IP pool, including assigning, viewing, and removing IP addresses for devices in the network. The document also outlines key features and includes FAQs to help users navigate the platform effectively.
What is Cloud Gateway (CGW) IP Pool?
A Cloud Gateway IP pool is an administration system for public IPs that are assigned to devices that connect to customer networks. Thus making data communication cross-network without restriction and providing secure VPN links between customer network and provider network.
Why Use Cloud Gateway IP Pools?
A cloud gateway IP pool thus simplifies the management of the associated IP addresses of various devices spread over numerous network edges and ensures that there will be a simple way through which each device in the network can be efficiently connected, monitored and even secured. Efficient way of allocation as well as IP address monitoring. CGW IP pools also improve IP address utilization as they allow network administrators to easily allocate their required IP addresses, monitor them without hassle, and then release them after use.
Relationship between PE IPs and User IPs
-
Provider Edge (PE) IPs are public IPs assigned to specify an edge device of the service provider. The function of an edge device is to act as a gateway between the network of the provider and the network of the customer.
-
Customer Edge (CE) User IPs are essentially an allocation of PE IPs designated to particular devices in the customer network. They allow the devices of the customer securely reach the network provided by the service provider.
This relation between PE and CE IPs allows the flexible, secure management of IP and supports connectivity between the networks.
Key Features:
- Assigning Public IPs: Seamlessly assign public IPs to CE devices from the PE CGW IP pool.
- Monitoring Allocated IPs: View and track all allocated IPs for CE devices under their respective PE devices.
- IP Removal: Easily delete any IP from the PE CGW IP pool, ensuring no unused IPs remain.
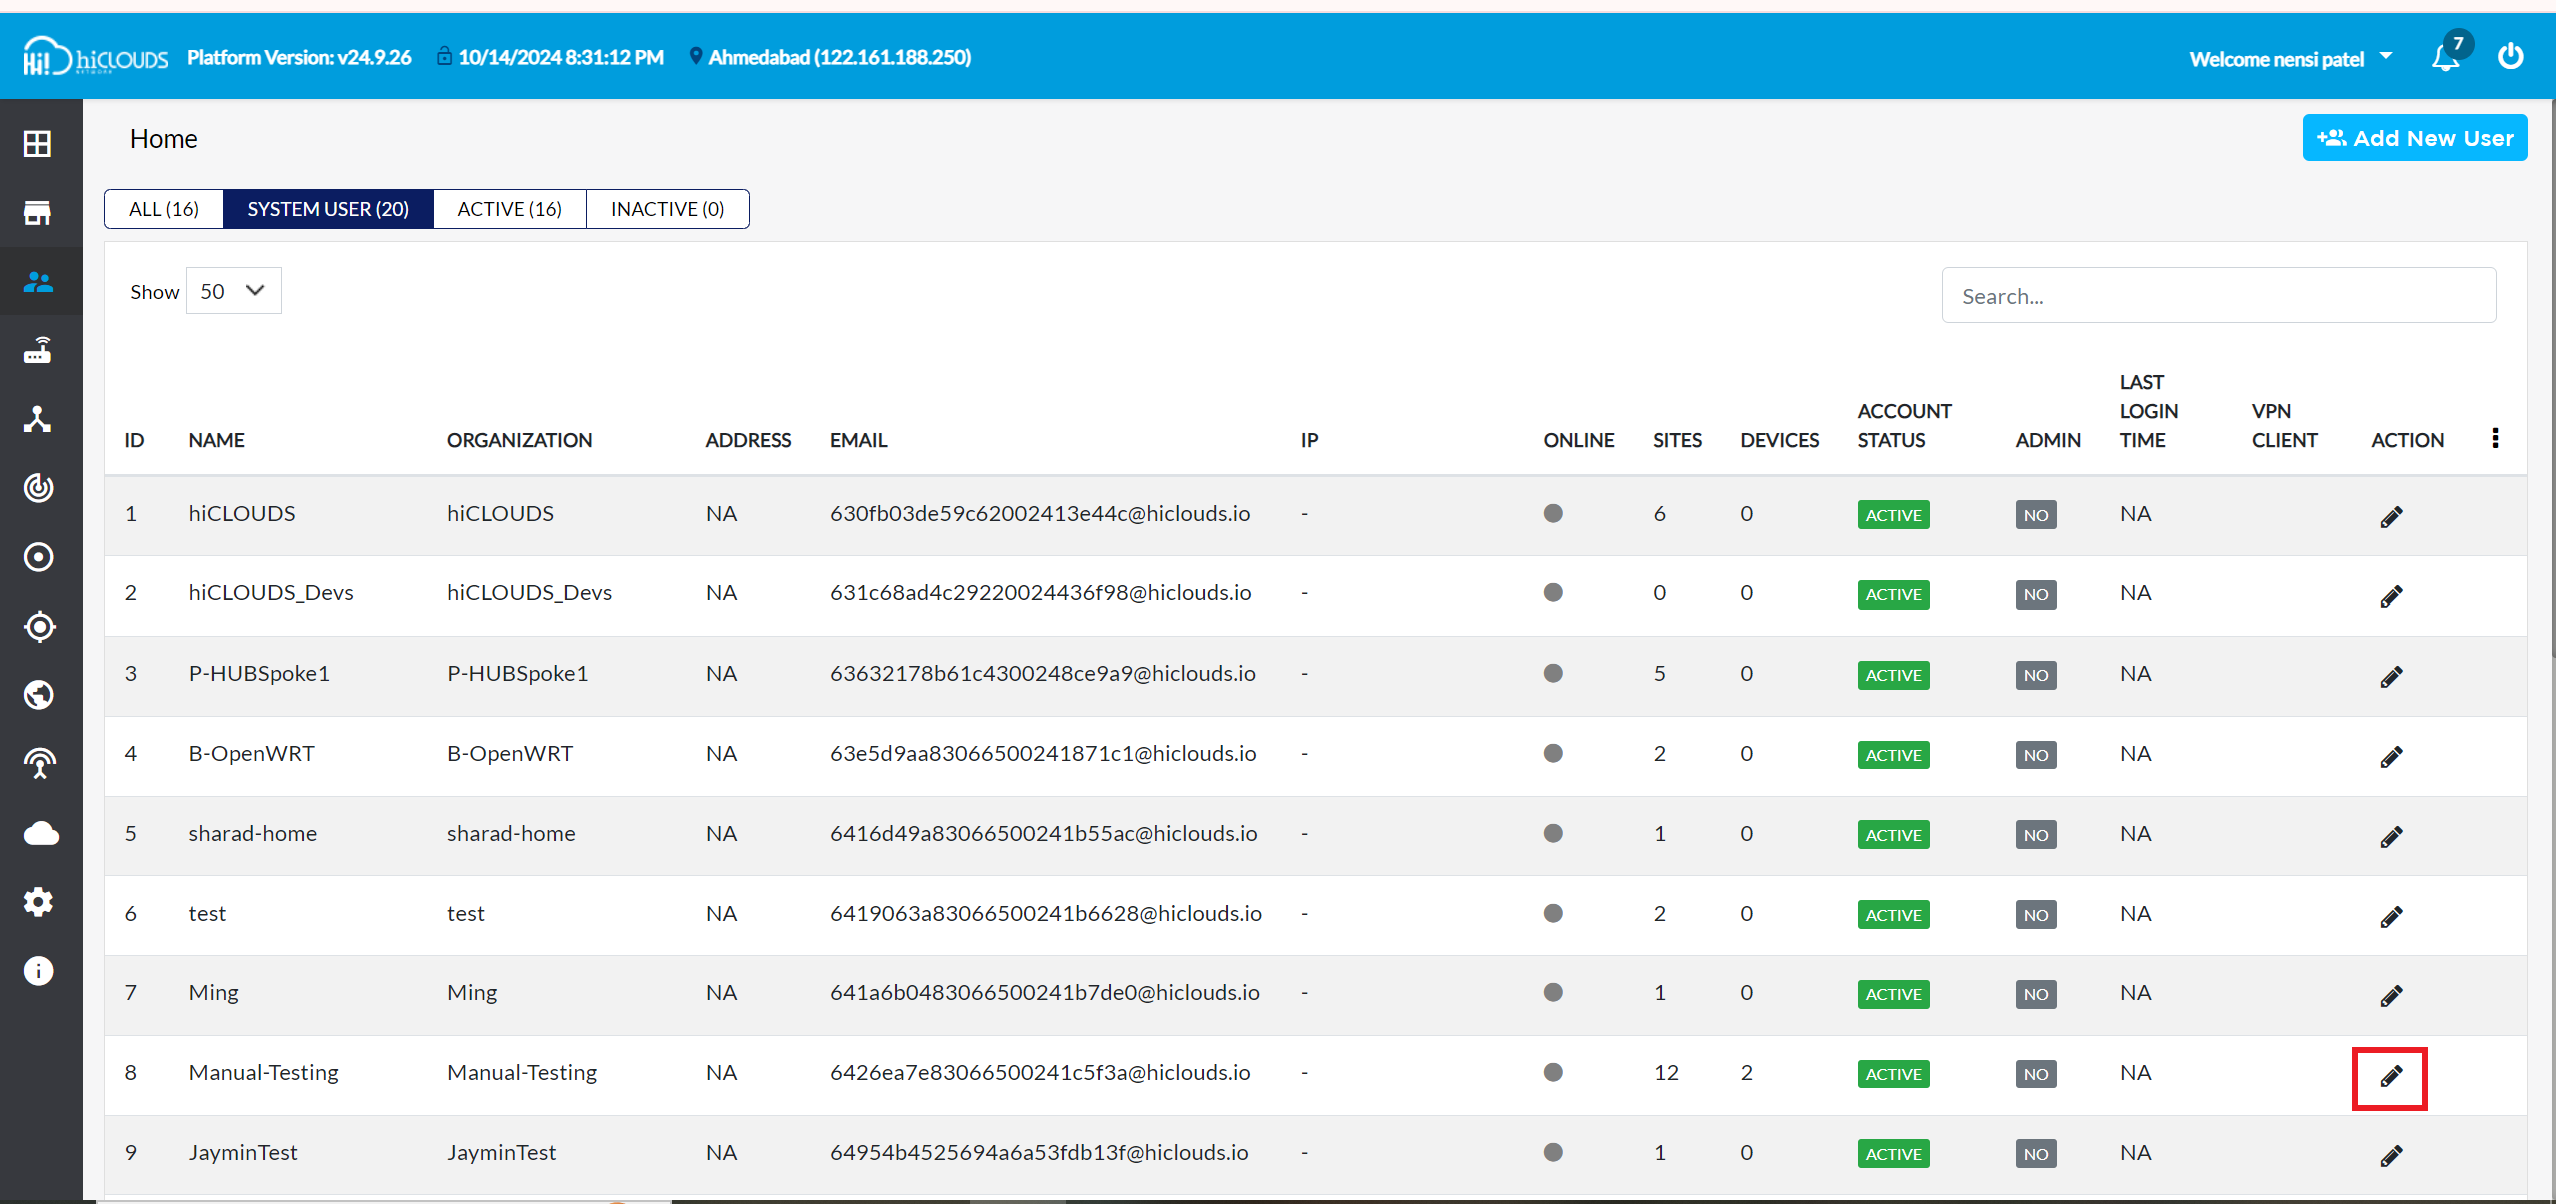
Steps to Assign IP to a Device
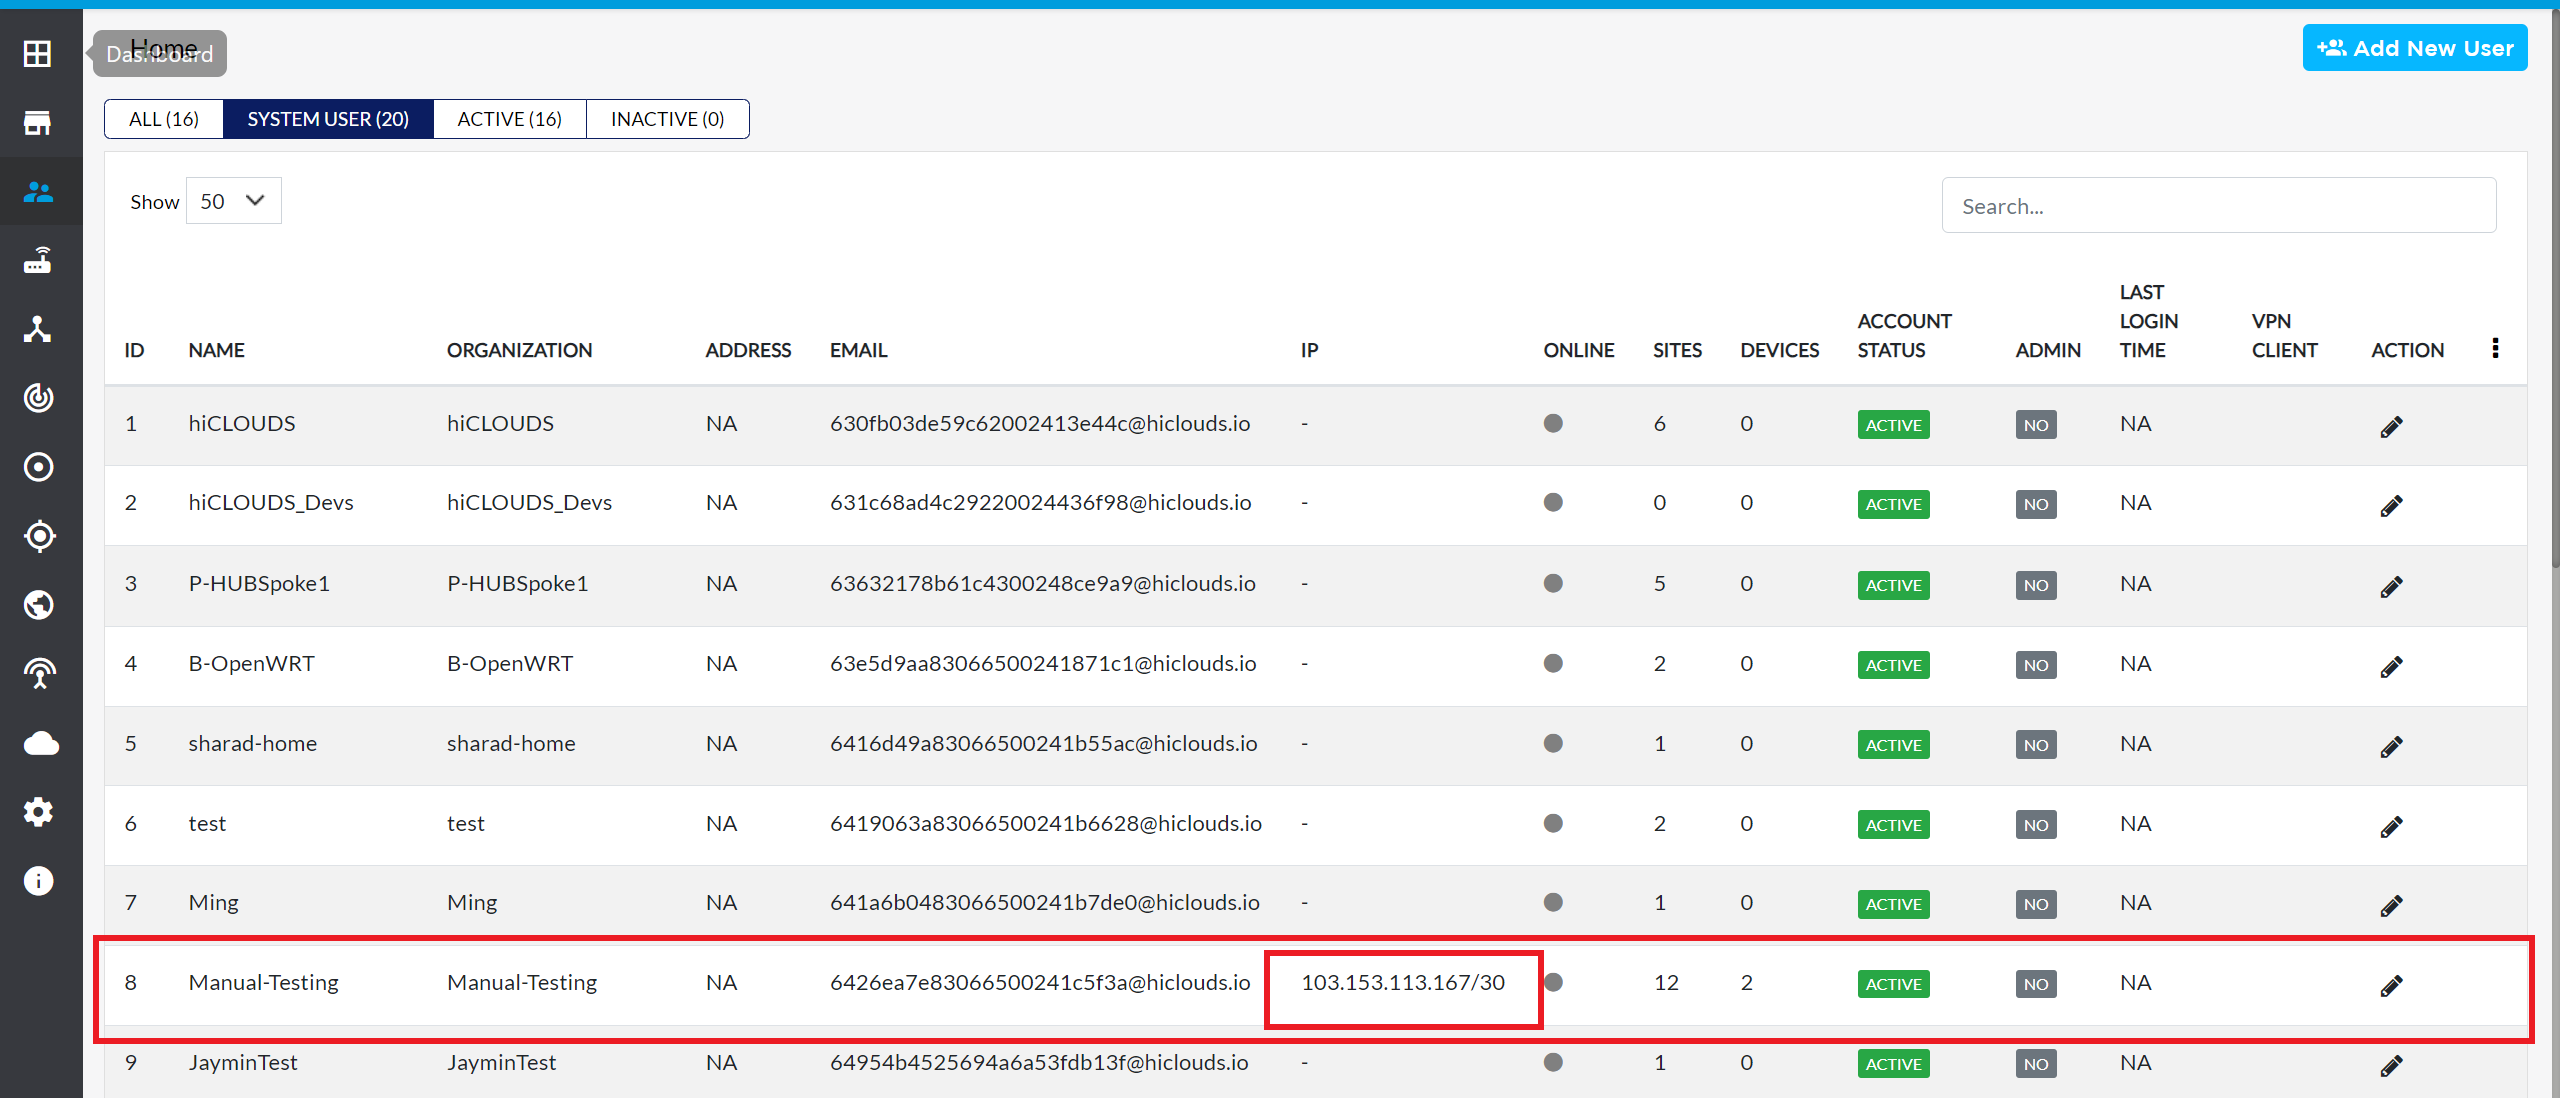
Log In and Access the System User Tab
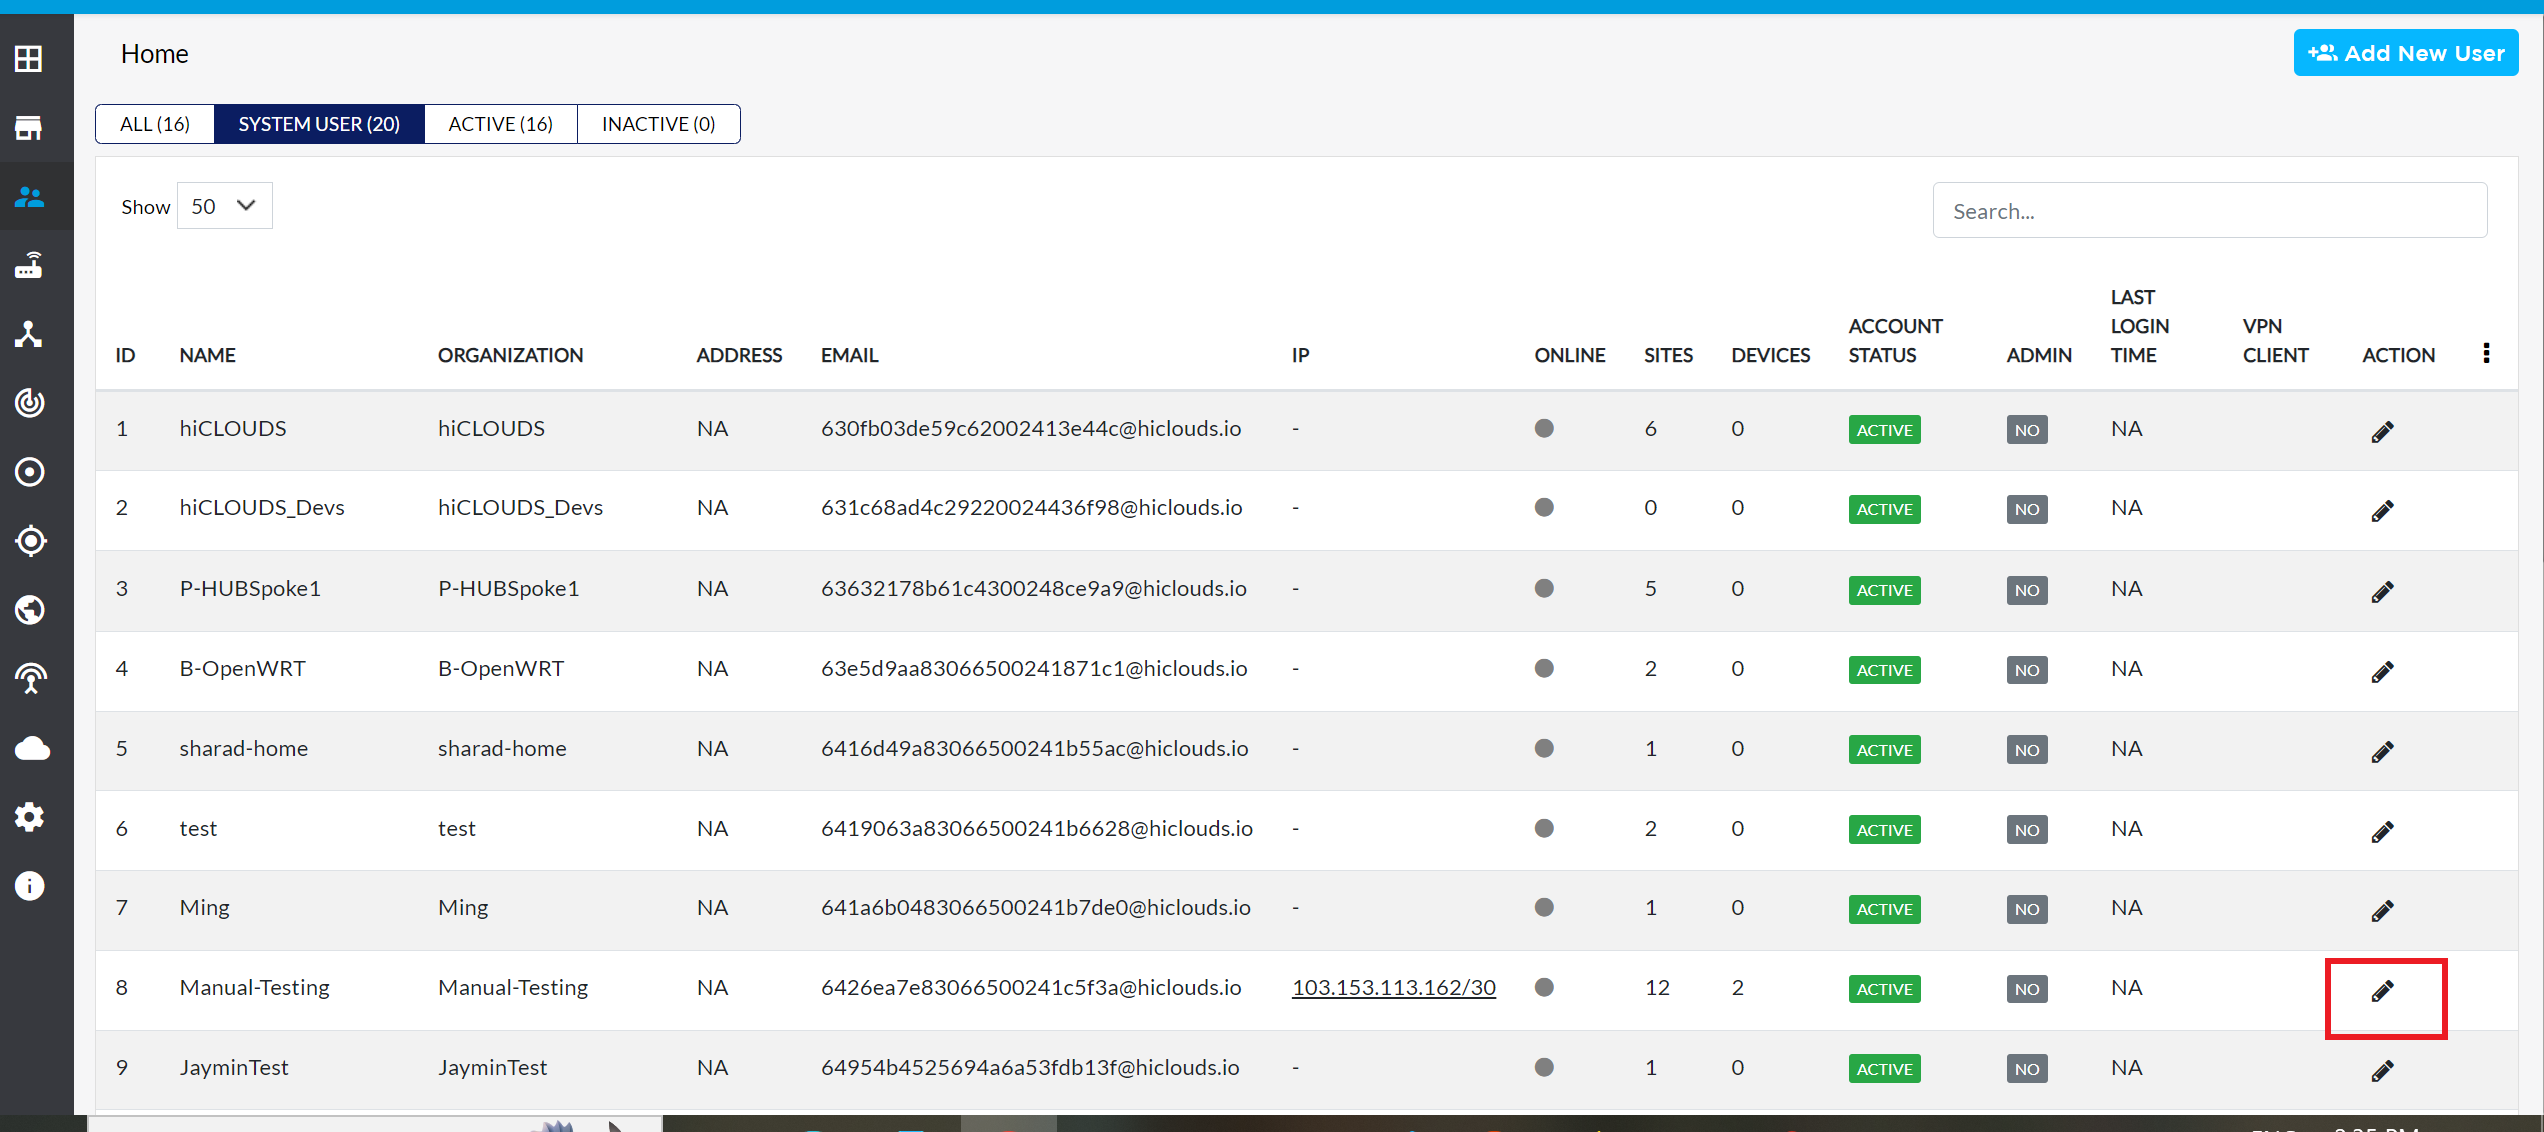
- Log in to the platform and navigate to the System User tab under the User menu.
Edit the Device
-
Click the Edit button to the right of the user.
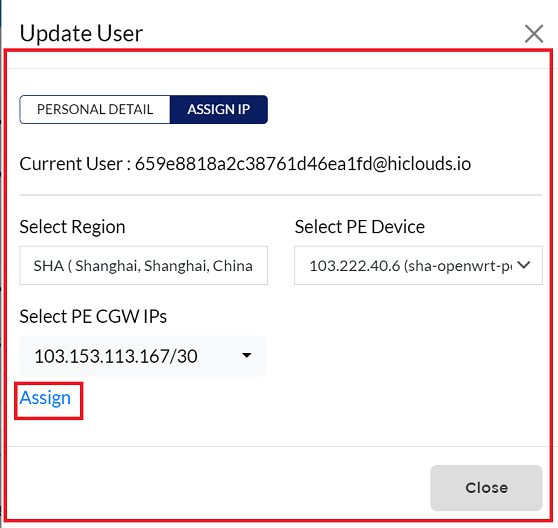
Assign IP to the Device
-
Go to the Assign IP tab and follow these steps:
- Fill in the details:
- Select Region: Enter the appropriate region.
- Select PE Device: Choose the relevant PE (Provider Edge) device.
- Select PE CGW IPs: Enter the public IP from the PE CGW IP pool and click Assign.
Confirm the IP Assignment
-
Once the IP is assigned, click the Close button.
-
Refresh the page to confirm that the IP appears on the screen.
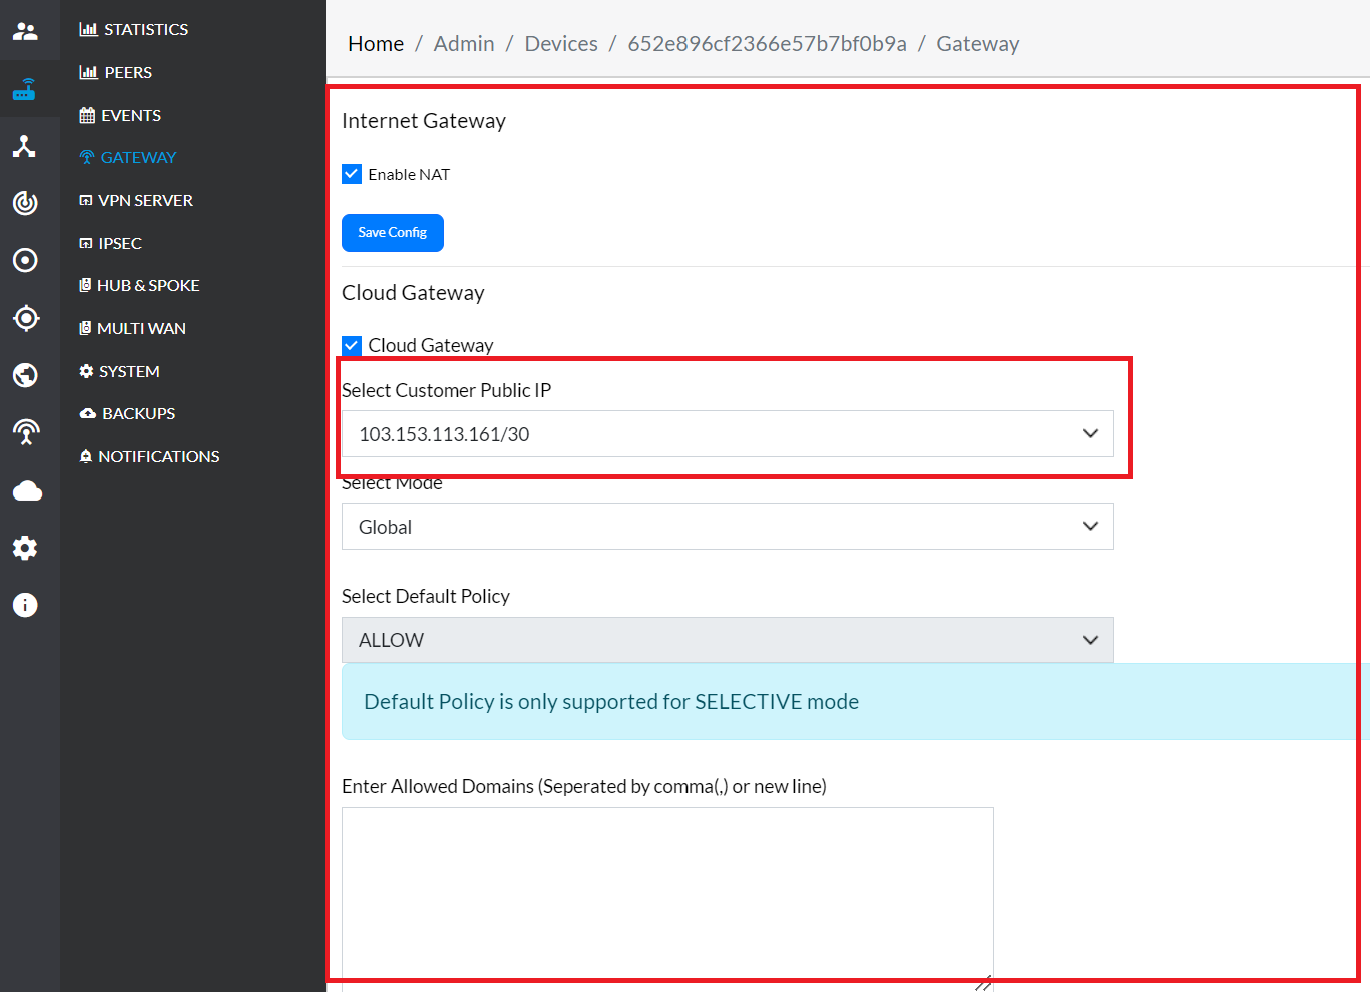
Enable the Gateway for the Device
- Now, navigate to the Gateway section under the CE Device menu:
-
Choose the device.
-
Enable the gateway under its configuration.
-
The assigned IP should appear in the Customer Public IP field. Select the IP.
InfonotesEnsure that the VPN link is active before enabling the gateway. If the VPN link is not active, first link the VPN to the PE device.
-
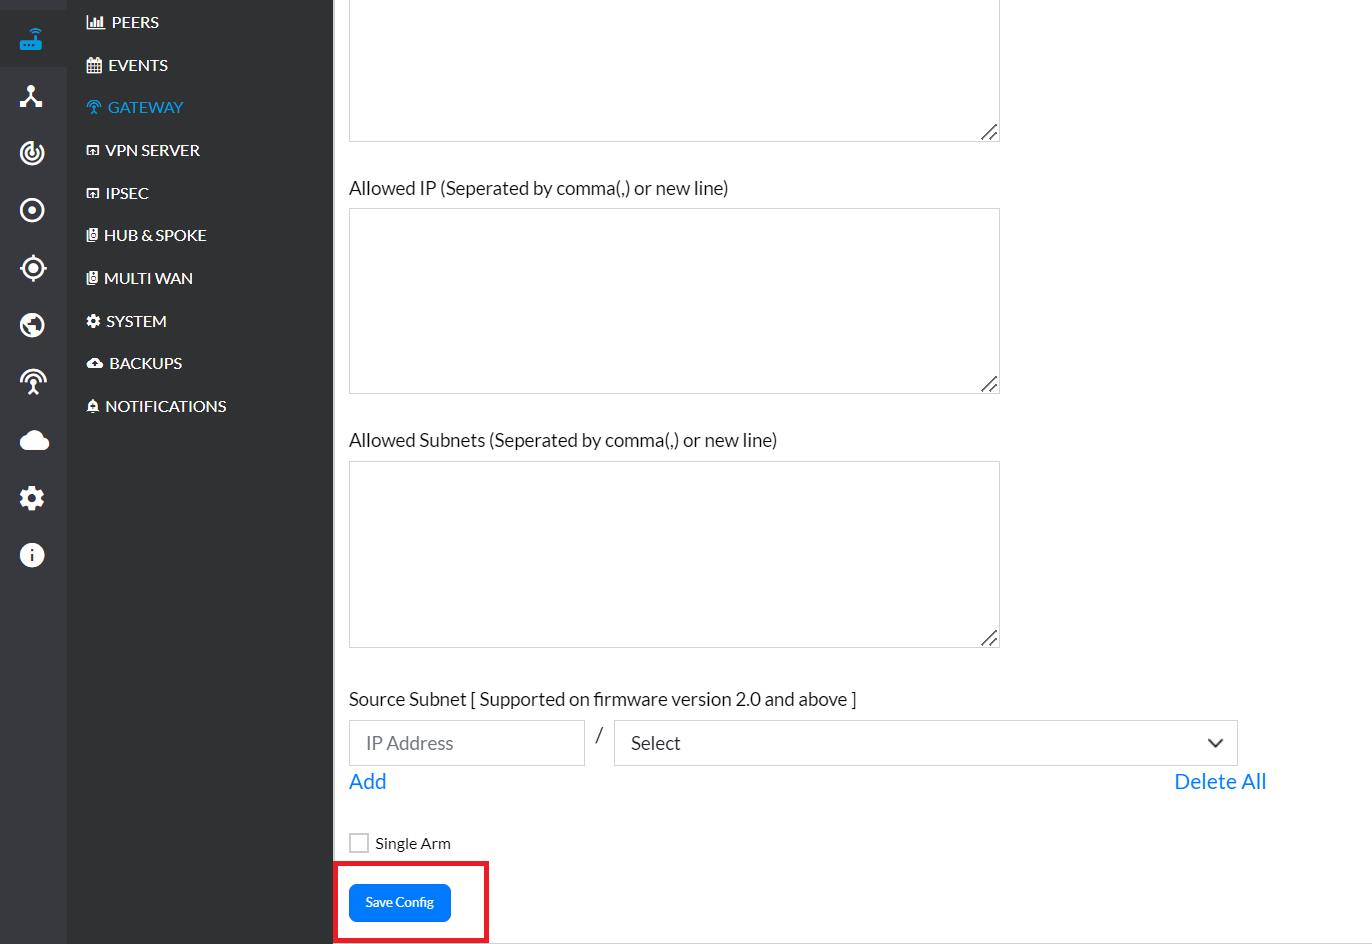
Save the Configuration
-
Finally, click Save Config to apply the changes.
Viewing the PE CGW IP Pool
-
Navigate to the PE CGW IP Pool menu.
-
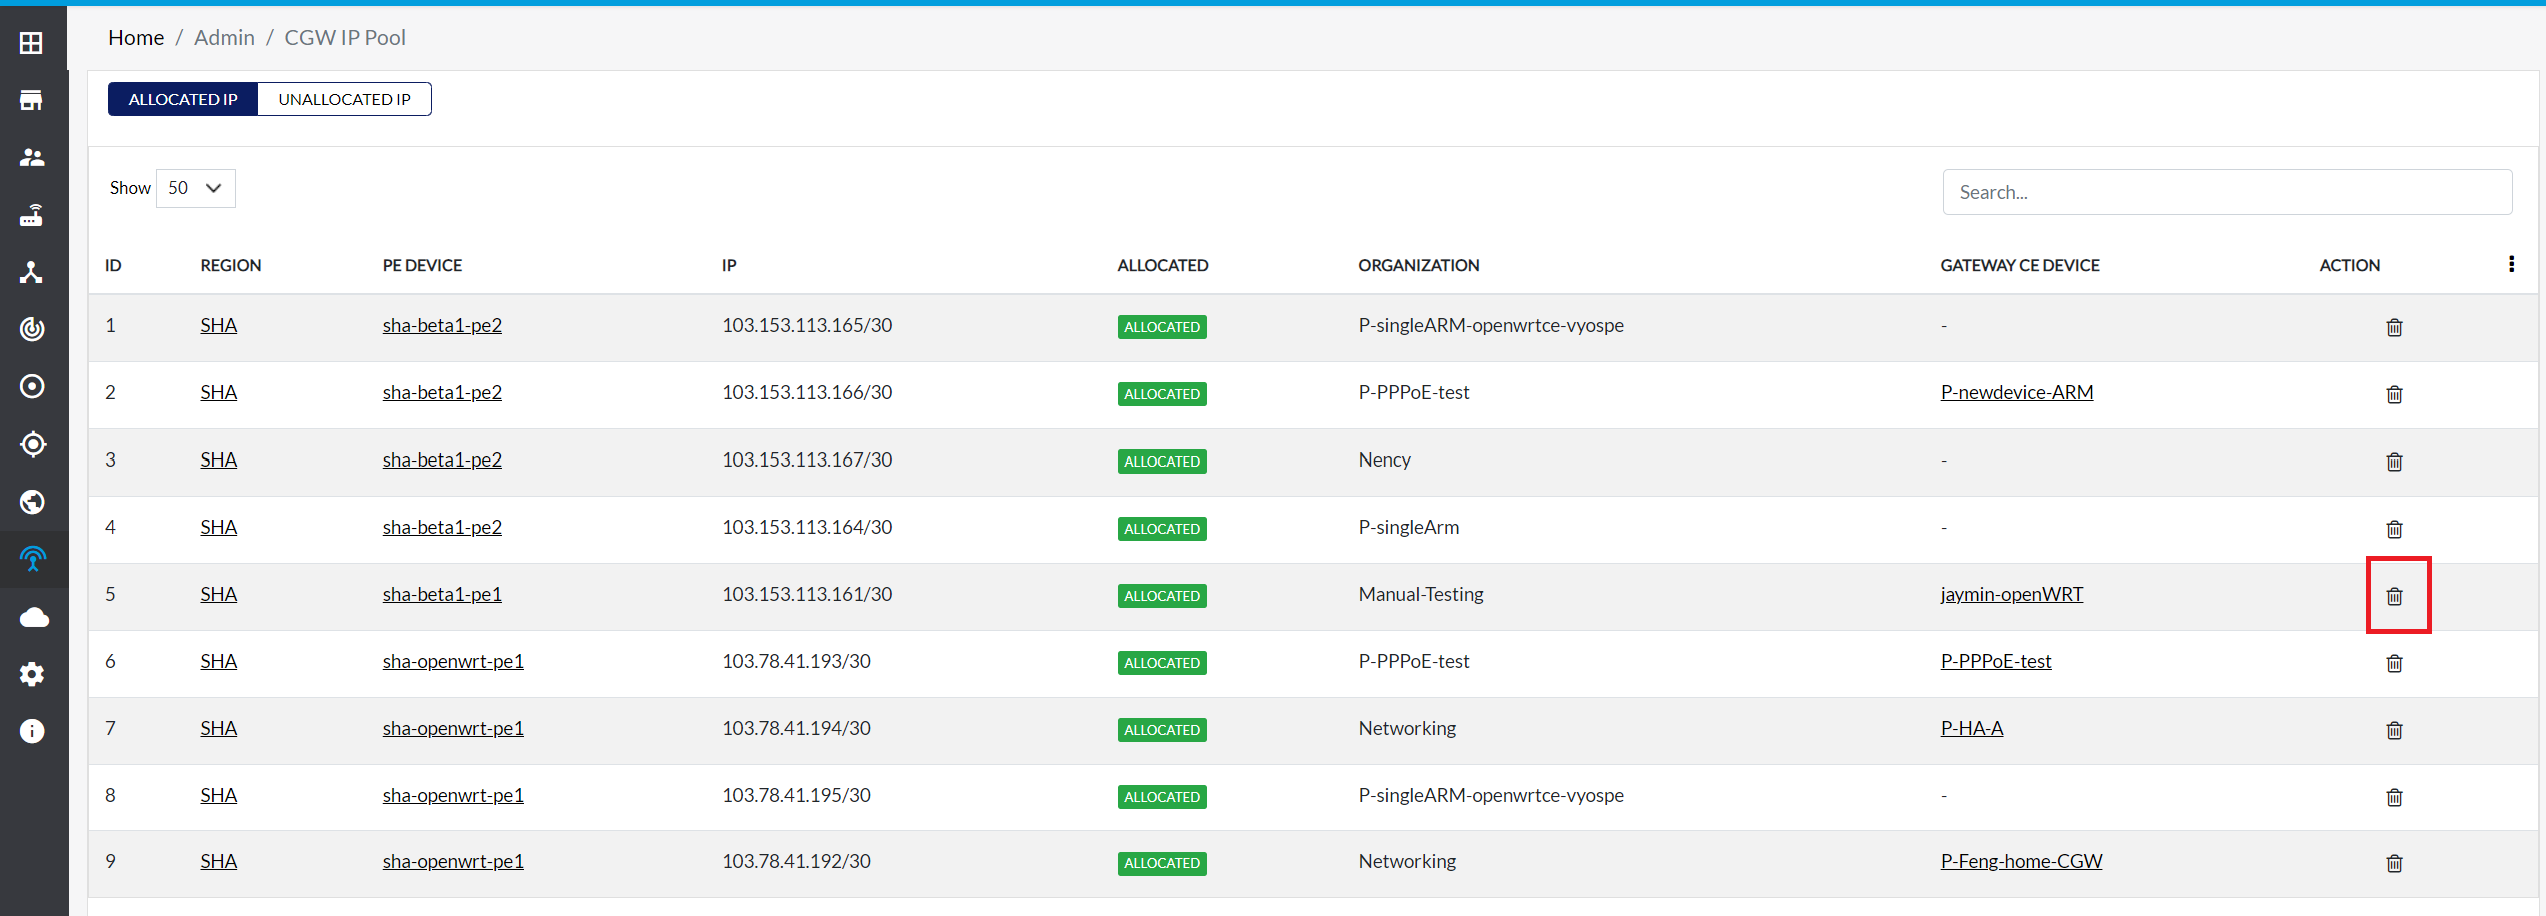
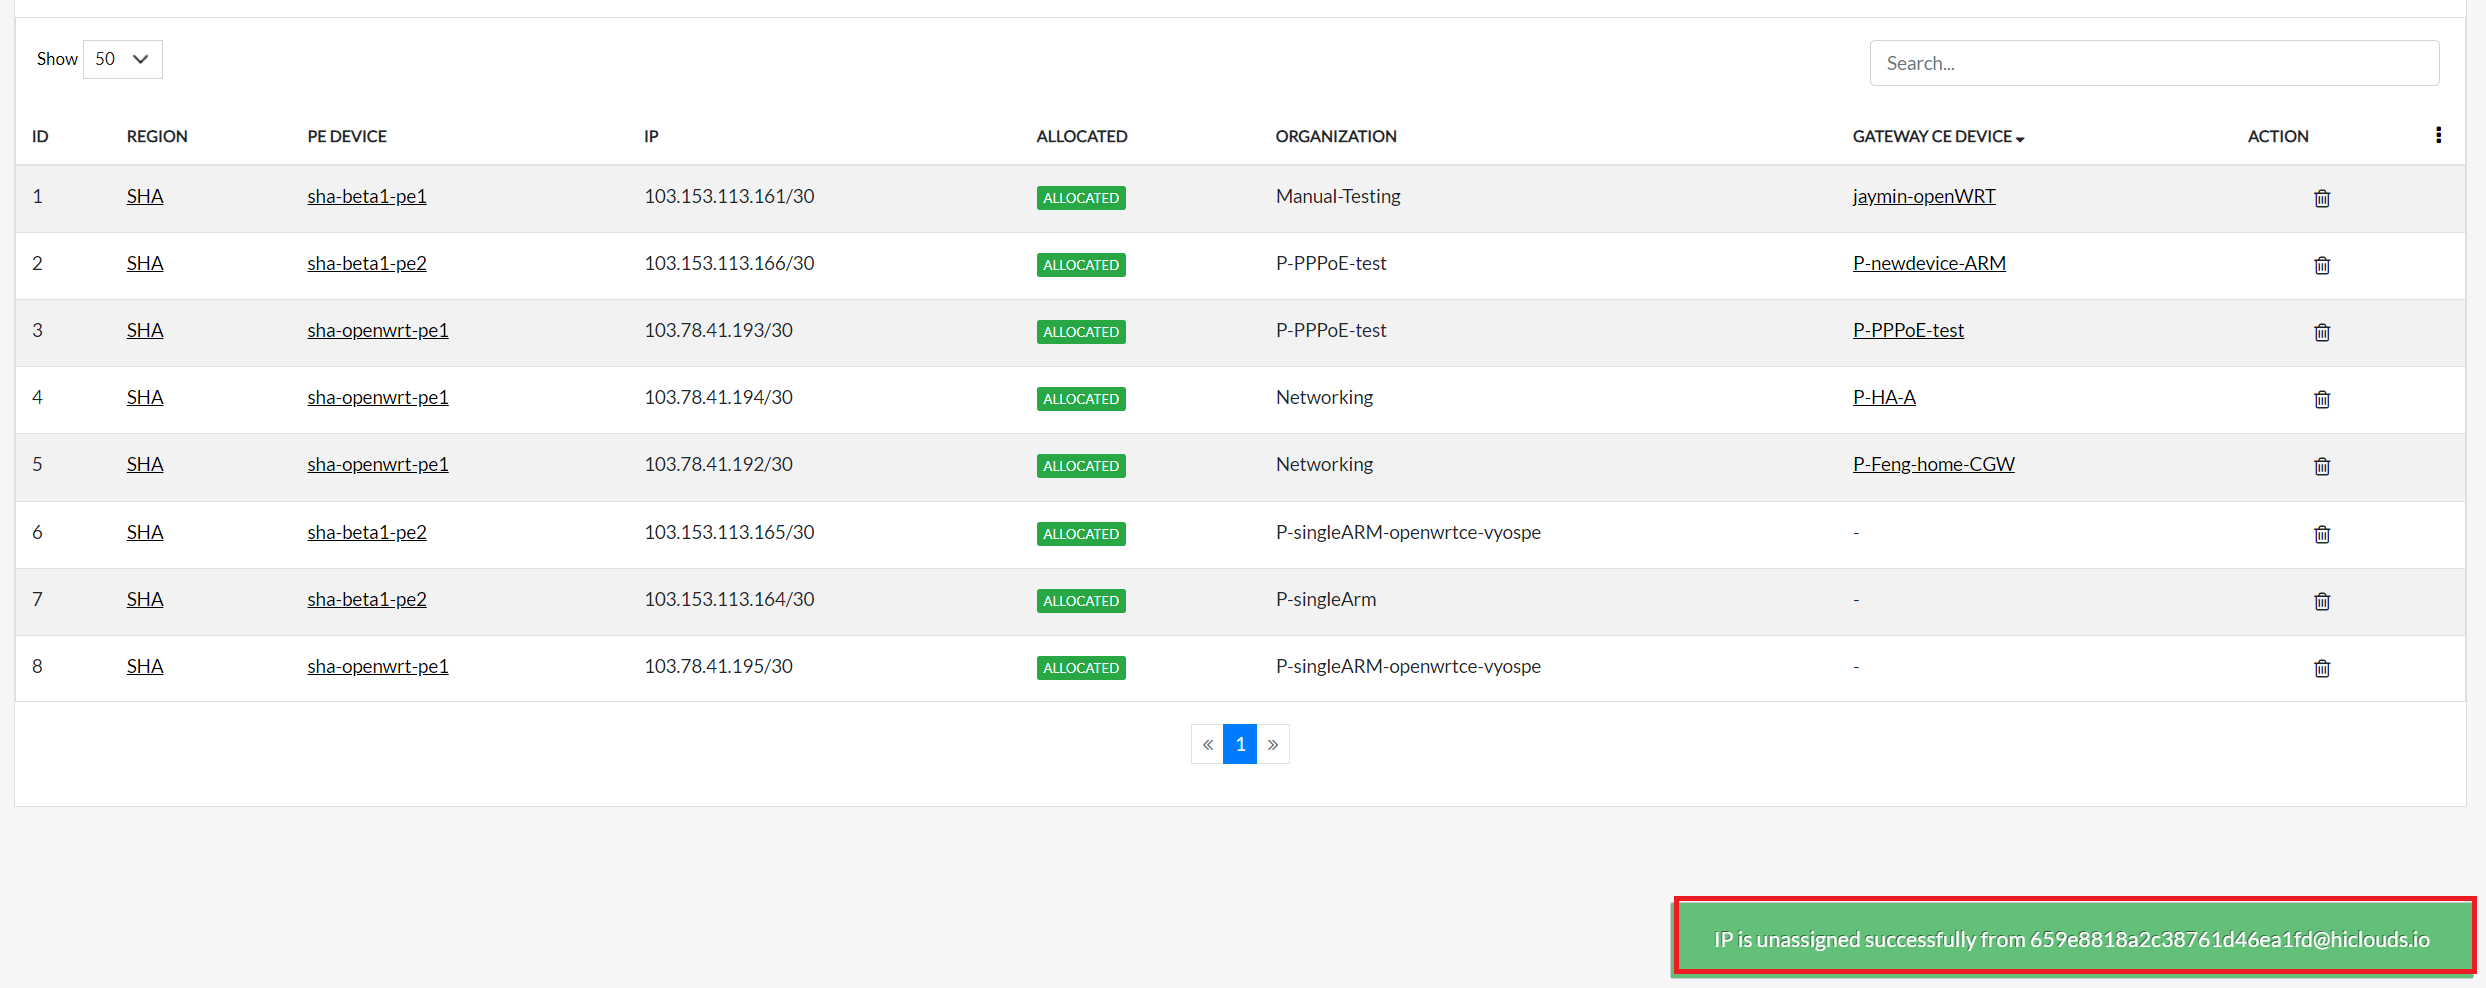
In the Allocated IP section, the gateways for the allocated CE (Customer Edge) devices are listed under their corresponding PE devices.
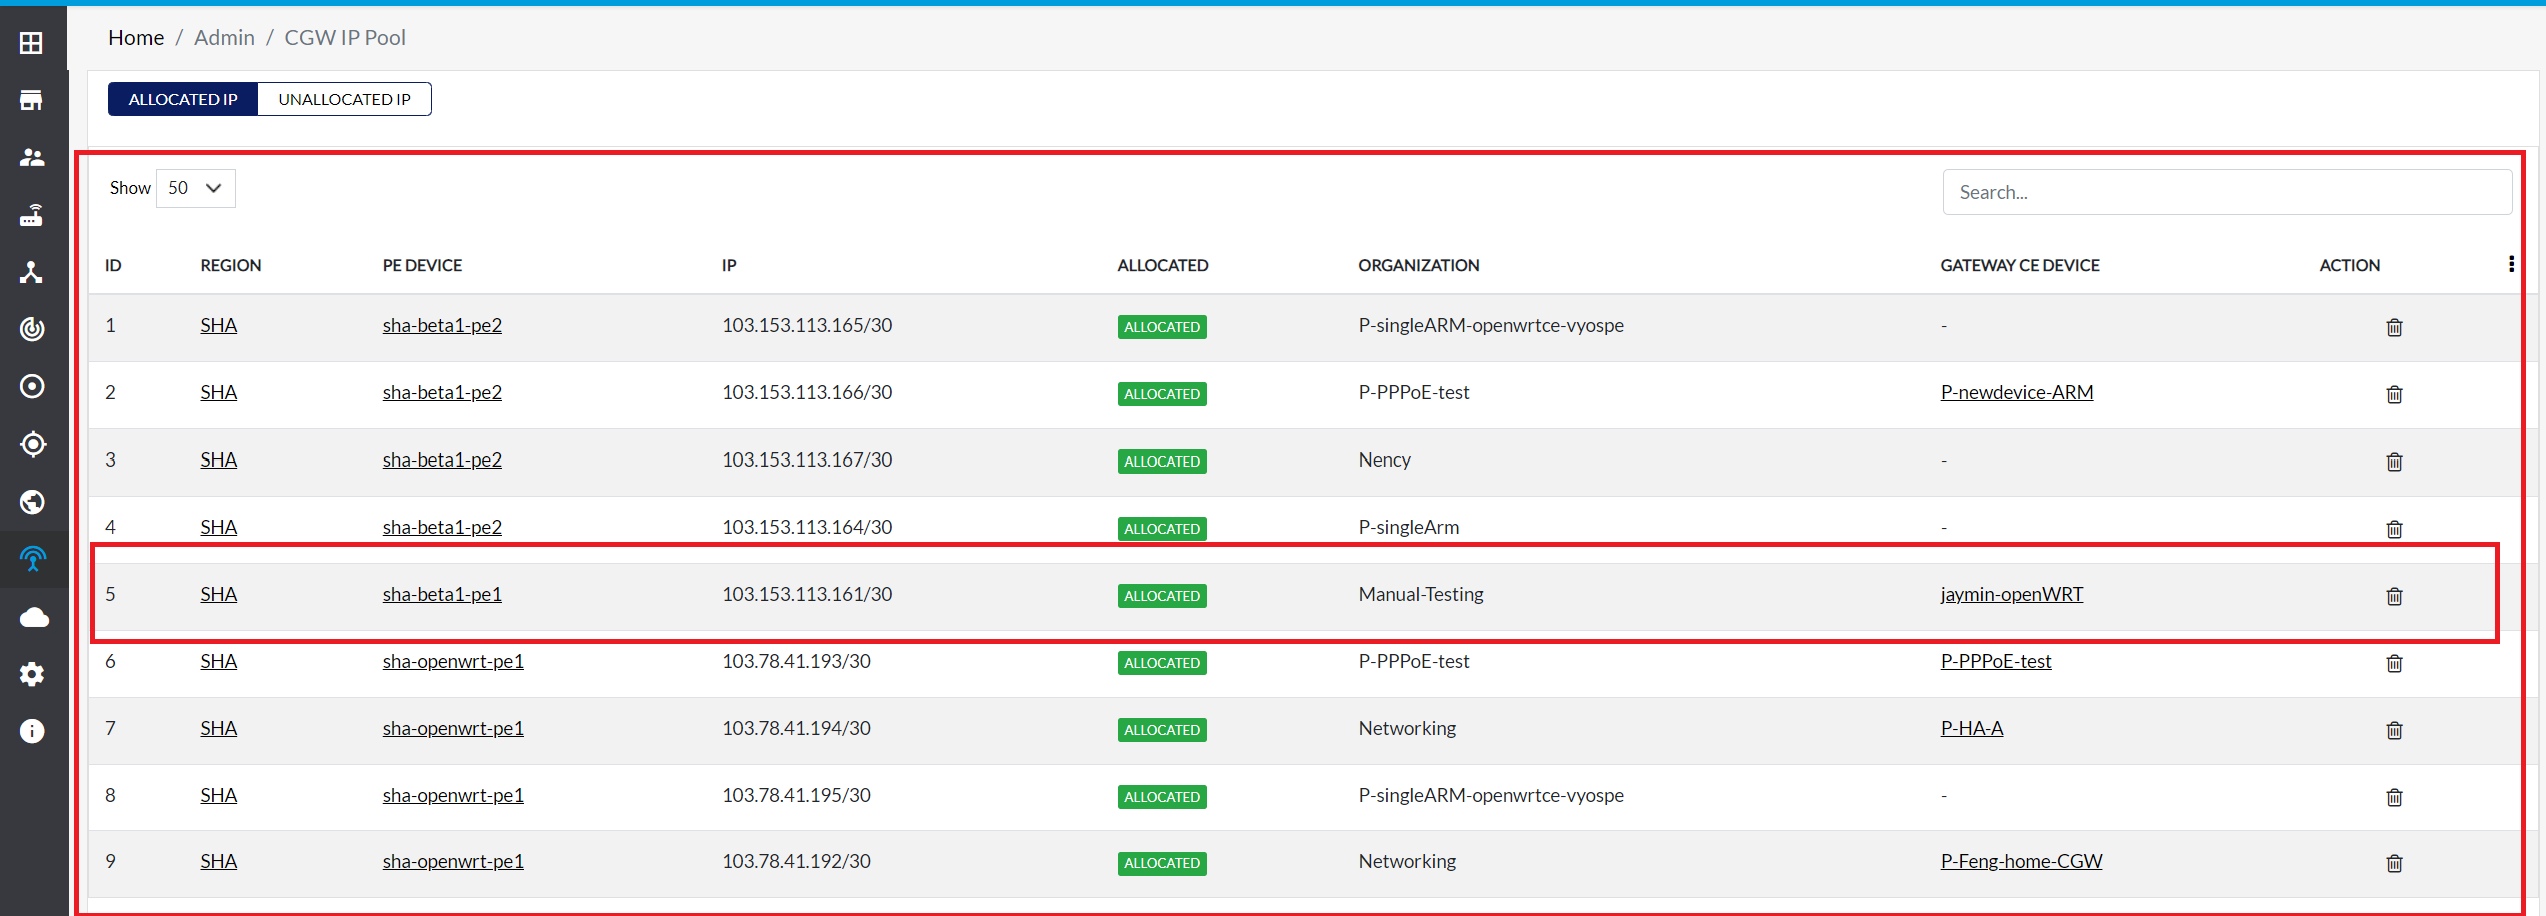 link-pe-info
If a PE router is assigned a specific IP, ensure that the corresponding link configuration also connects to the same PE. For example, if the assigned IP is for PE sha-openwrt-pe1 (SHA), the link configuration must also reference this specific PE. Do not link or configure it with any other PE.
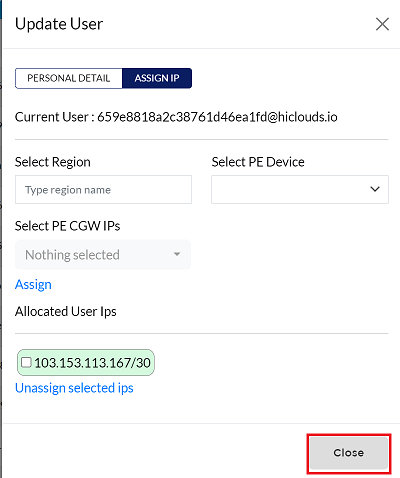
Unassigning an IP Address
Navigate to the System User Tab
-
Go to the user > system user tab > [username/email/id] > edit button.
Unassign the IP
-
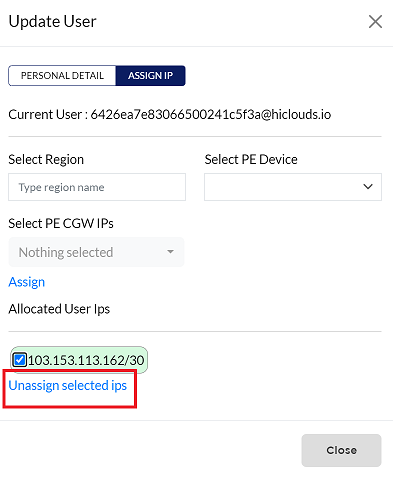
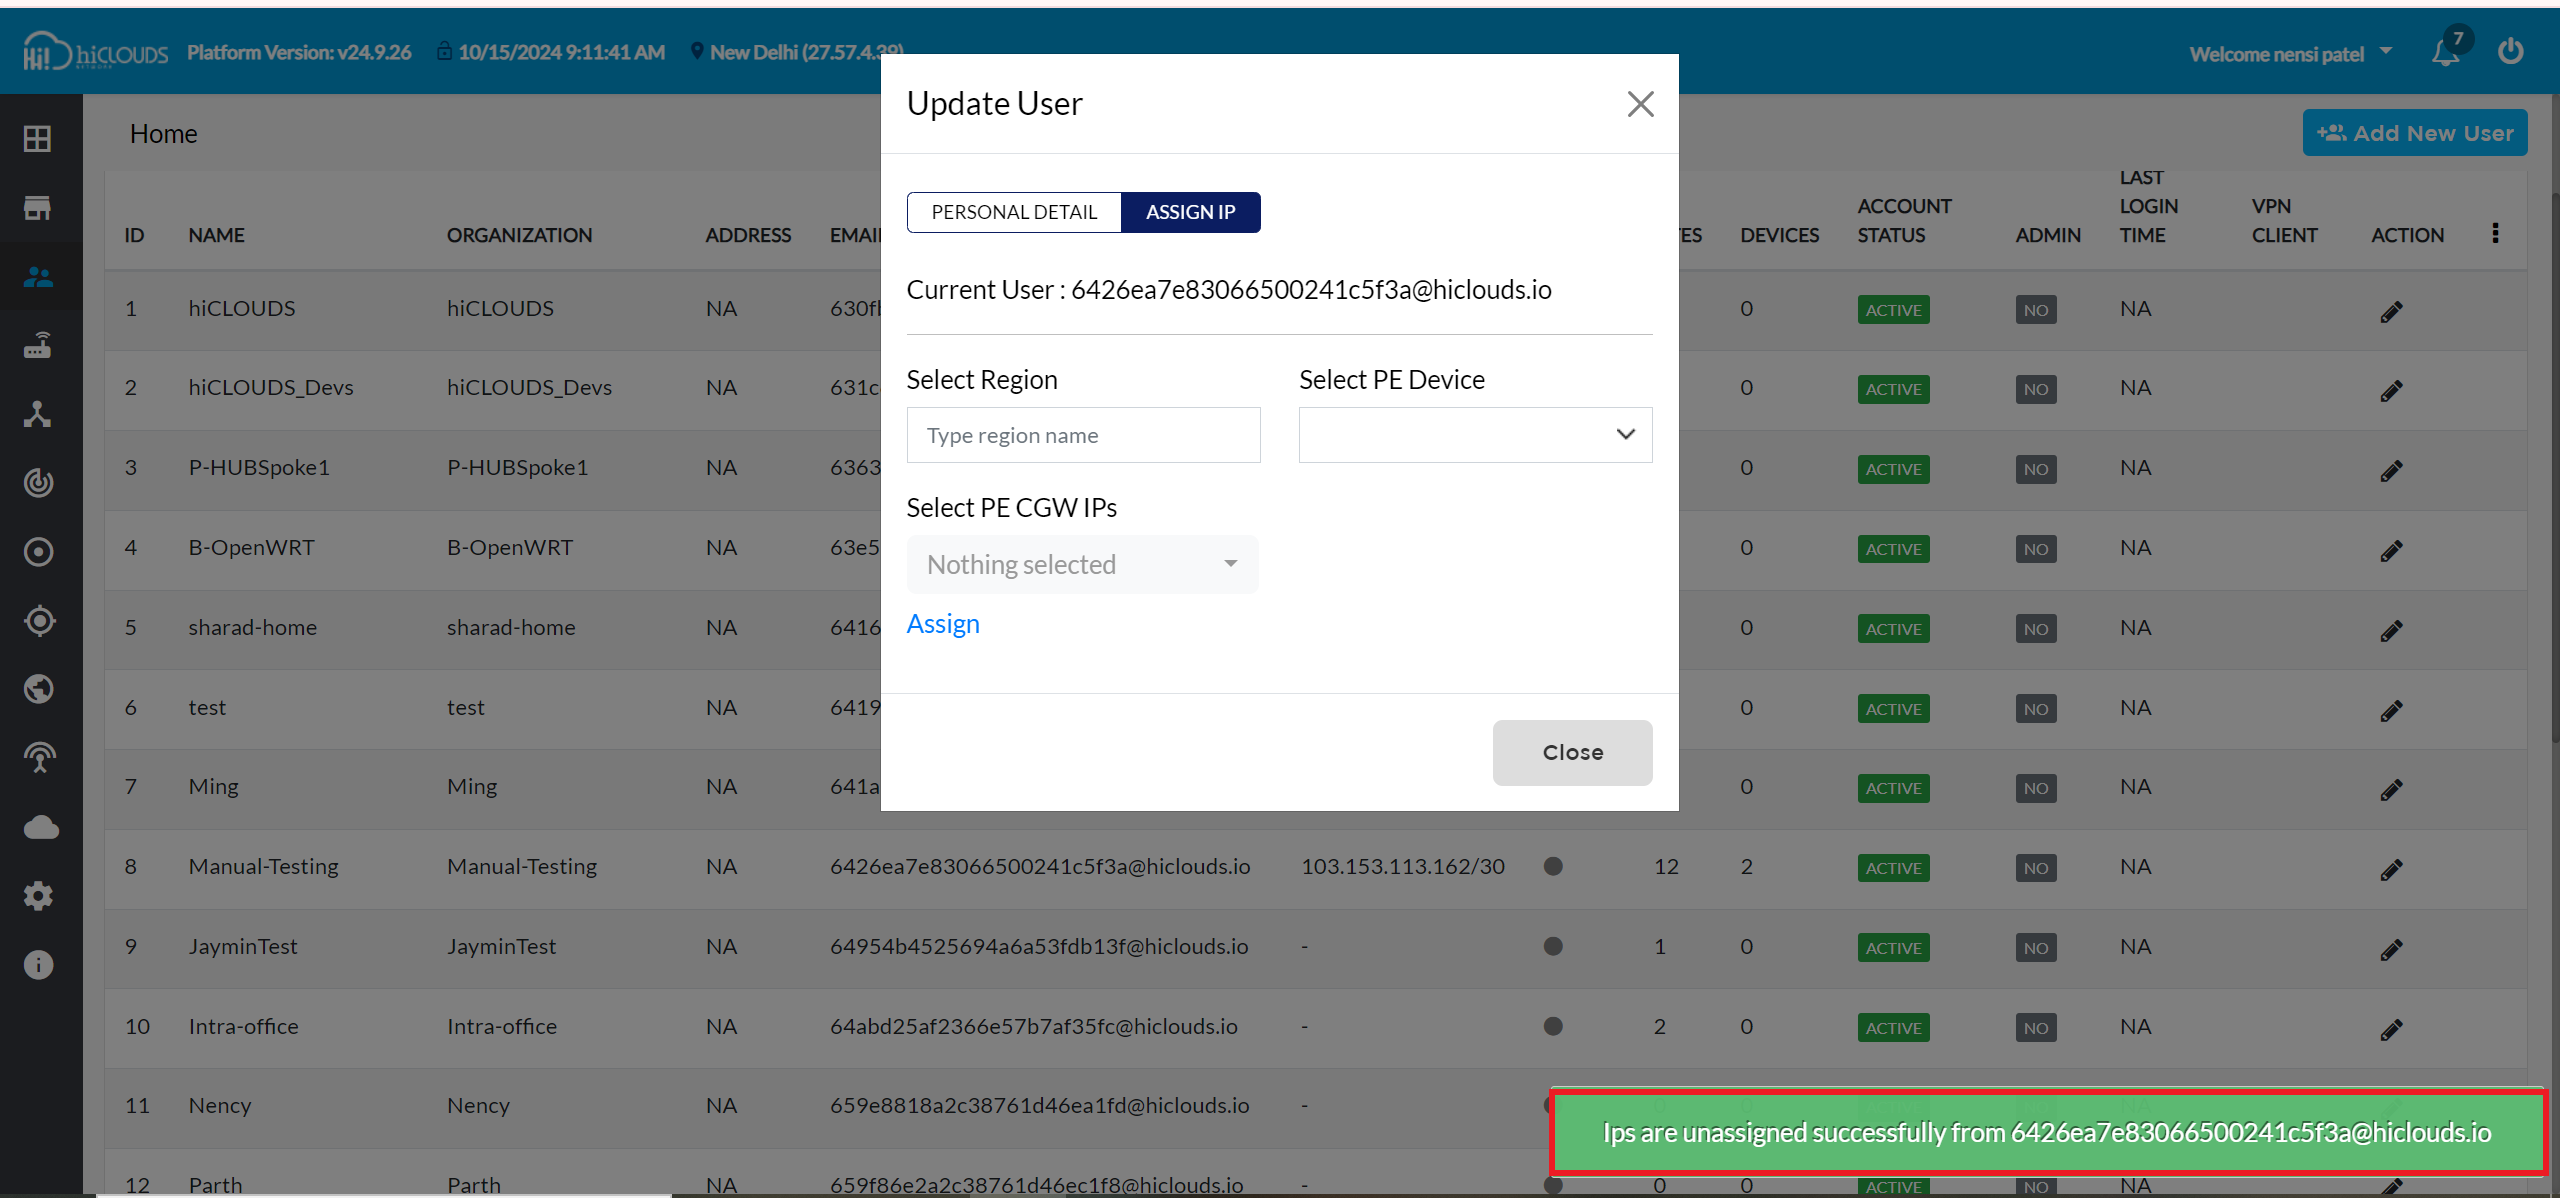
In the Assign IP tab, select the desired IP and click Unassign selected ips.
assign-ipBefore unassigning an IP, verify if the public IP is selected in the Gateway menu under the CE device. If the IP is selected, deselect it in the Gateway configuration. The IP cannot be unassigned until it is removed from the Gateway menu.
-
Once the IP is successfully Unassigned, a message will appear saying, Ips are unassigned successfully from 6426ea7e83066500241c5f3a@hiclouds.io
Deleting an Allocated IP from the PE CGW IP Pool
Locate and Delete the IP
-
In the PE CGW IP Pool menu, find the IP you want to delete.
-
Click the Delete icon next to the IP.
-
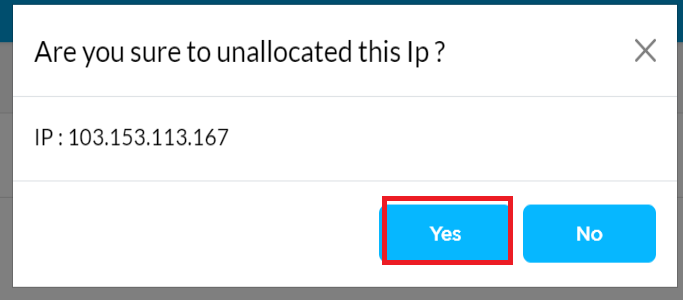
A confirmation message will appear. Click Yes button.
Confirm Deletion
- Once the IP is successfully removed, a message will appear saying, IP is unassigned successfully from 659e8818a2c38761d46ea1fd@hiclouds.io
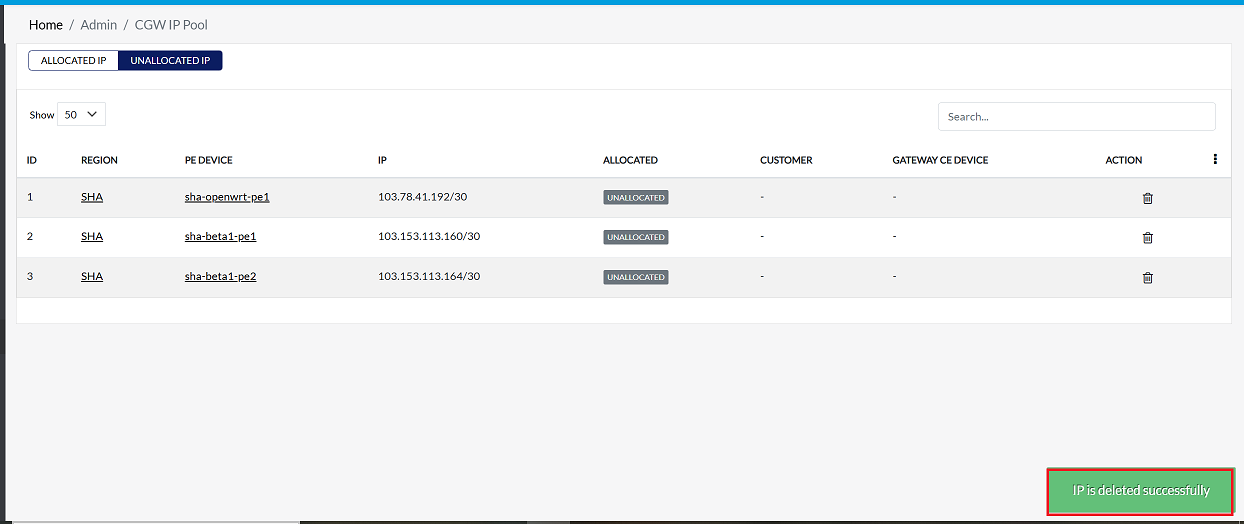
Deleting an Unallocated IP from the PE CGW IP Pool
Locate and Delete the IP
-
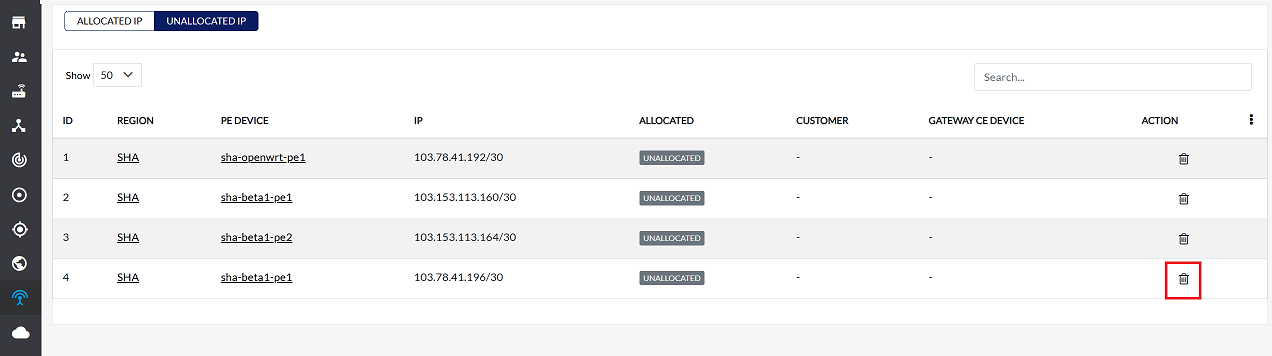
Go to the PE CGW IP Pool menu > Unallocated IP tab.
-
Click the Delete icon next to the IP.
-
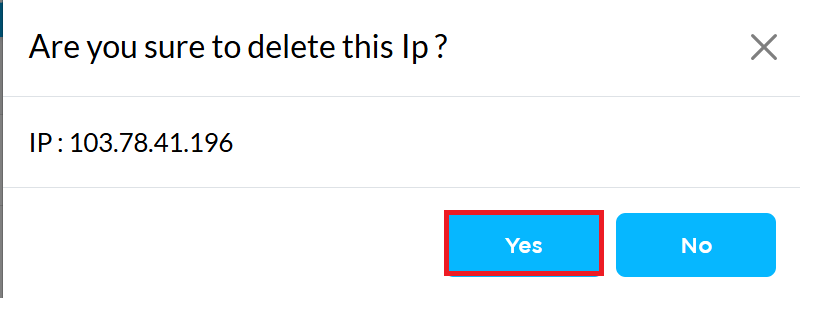
A confirmation message will appear. Click Yes button.
Confirm Deletion
-
Once the IP is successfully removed, a message will appear saying, IP is deleted successfully