DNS
DNS (Domain Name System) is a main networking service that converts domain names into IP addresses, facilitating intercommunication among devices. Below are steps for configuring DNS settings on your CE device.
DNS Settings
-
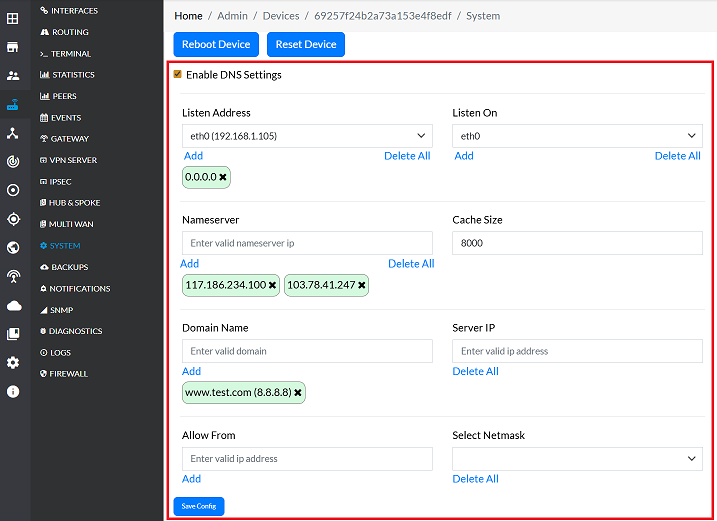
Go to Login > CE Device > [Select CE] > System.
-
To configure DNS on the device, follow these steps:
- Toggle the DNS IP Enabled option to enable the DNS configuration section.
-
Fill in the Required Details:
Enter the following information:- Listen Address: Specify the IP address to which the local DNS server will connect and listen for incoming DNS queries.
- Listen On: Define the interface where the DNS server will operate.
- Nameserver: The IP address of the upstream DNS server(s) that the CE device will query for domain resolution. Configure multiple for redundancy. Provide the IP address for that. (i.e,
117.186.234.100,103.41.247.1) - Cache Size: Defines the maximum capacity (number of queries) for the local DNS query cache. A larger cache can improve response times by storing more resolution locally. Set the size for it. (i.e,
8000) - Domain Name: This is the DNS server that is authoritative for or will serve/resolve a specific domain name. Enter the domain name for it. (i.e,
www.test.com) - Server IP: Enter the IP address and network mask of the local DNS server. (i.e,
8.8.8.8) - Allow From: Specifies the source IP addresses or network ranges that are permitted to send queries to this DNS server.
- Select Netmask: Select the appropriate netmask for the network configuration.
Mandatory-Field-RegistrationAfter entering details for fields such as Listen Address, Nameserver, Domain Name, Server IP, and Allow From, look for and click the Add button located beneath the input field. This action registers the entered detail before saving the entire configuration.
-
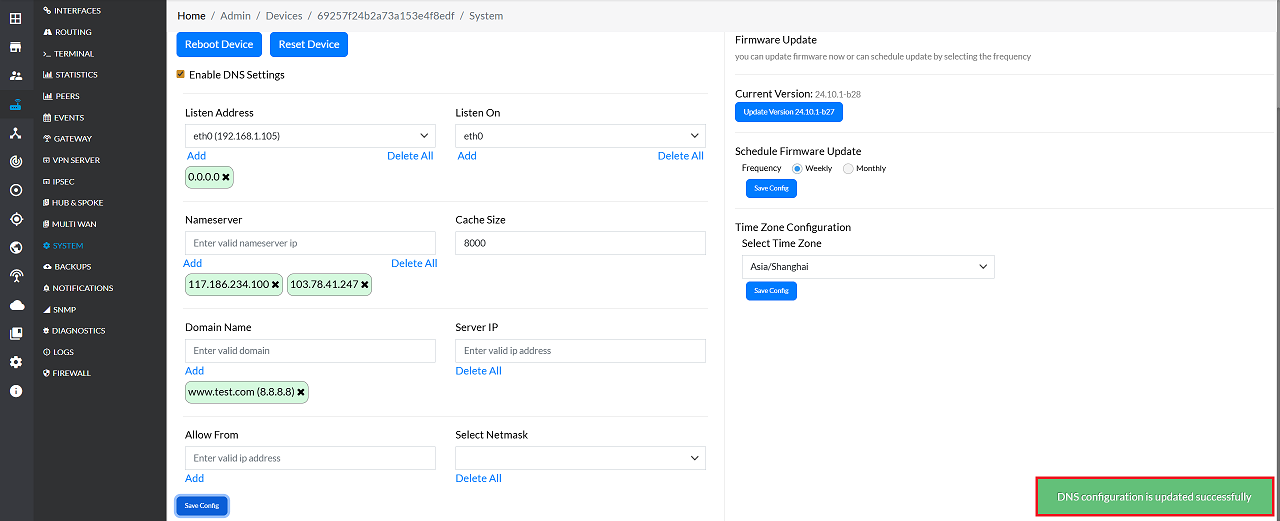
Click the Save Config button to apply the changes.
-
After saving, a message will appear on the screen stating DNS configuration is updated successfully.
Important Notes for Users
- Ensure that at least one valid Nameserver is configured — otherwise DNS resolution will fail.
- If you are unsure which DNS servers to use, contact your network administrator or ISP.
- Avoid entering incorrect or unreachable IPs as Nameservers; this may cause browsing and service interruptions.
- Configure multiple Nameservers for better redundancy and reliability.
- Use the Allow From option carefully — granting access to unknown networks may create security risks.
- Always click the Add button after entering IP-based fields — otherwise the values will not be registered.
- Apply changes during maintenance windows where possible to avoid user impact.
- Verify connectivity after saving settings using tools such as Ping or Domain Lookup (if available).
FAQs
Q1: What is the purpose of the "Listen Address" and "Listen On" fields?
Listen Address – Defines the specific IP address on which the local DNS server will accept queries. This ensures the DNS service is bound to the correct IP and avoids conflicts with other services. Listen On – Specifies the network interface (e.g., eth0, eth1) where the DNS server will operate. This determines which interface handles DNS traffic.
Q2: What is the difference between "Nameserver" and "Server IP"?
Nameserver – Refers to the upstream DNS servers (e.g., 117.186.234.100, 103.41.247.1) that the CE device queries to resolve domain names. These provide external resolution and redundancy. **Server IP – Refers to the local DNS server’s own IP address and netmask. This is the address the CE device advertises internally for clients to send DNS queries.
Q3: How do I know how to change the cache size value?
Cache Size defines how many DNS query results can be stored locally. A larger cache improves performance by reducing repeated queries to upstream servers. Recommended values depend on usage: Small networks – 1000–2000 entries. Medium networks – 4000–6000 entries. Large networks – 8000+ entries for high query volume. If unsure, start with 8000 (as in the example) for balanced performance and adjust based on observed query load.