VPN Server
A vpn establishes a secure connection between the internet. All data traffic is routed through the VPN through an encrypted virtual tunnel, which hides the IP address and makes its location invisible to everyone when using the Internet.
Enabaling VPN Server
Navigate to Configuration Settings
-
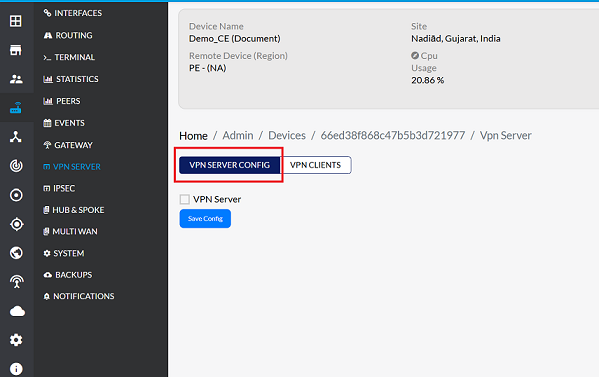
Go to Login > CE Devices > [Select CE] > VPN Server > VPN Server Config.
Enable the VPN Server
-
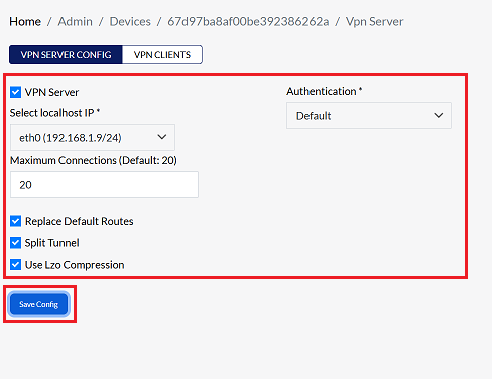
Enable VPN Server: Check the box to activate the VPN server. Once enabled, additional configuration fields will become visible.
-
Localhost IP Selection: Choose the appropriate localhost IP from the dropdown list (e.g., eth0 (192.168.1.9/24)).
-
Authentication: Choose the appropriate authentication method from the available options based on your requirements. For detailed guidance on the supported authentication types and their configuration, refer to the documentation provided in the following link: Authentication
- Office365:- Connect using Office365 authentication.
- LDAP:- Use LDAP directory services for authentication.
- Default:- Use the system's standard authentication method for Platform VPN Users.
-
Maximum Connections (Default: 20):- Enter the maximum connections. The maximum connections parameter is fundamentally set to 20 by default, which can be increased or decreased as per your requirements.
-
Replace Default Routes:- When connected to a VPN (Virtual Private Network), this option allows all internet traffic from the client to be sent through the VPN server.
-
Split Tunnel:- Split tunneling allows the client to decide which internet data will use the VPN and which data will use the internet directly. This means only the necessary data will be sent through the VPN, while the remaining data will go directly to the internet. As a result, the client's internet connection will be faster.
-
Use LZO compression:- "Enable LZO compression algorithm" means start using the LZO compression algorithm.
-
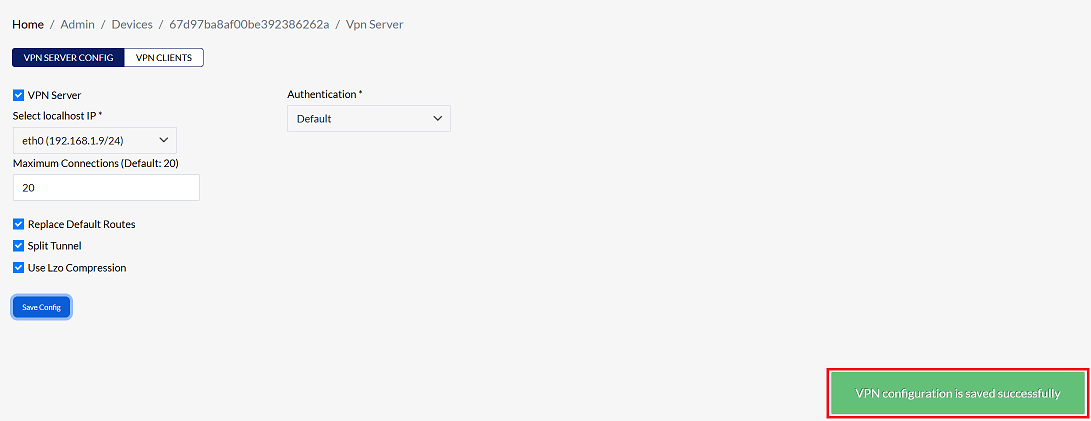
click on the Save Config to apply the changes.
-
By clicking on Save Config, a message will appear on the screen indicating that the VPN configuration is saved successfully.
Important Notes for Users
- Ensure proper authentication configuration before enabling the VPN server to prevent login failures.
- Use Split Tunneling carefully. If disabled, all traffic will pass through the VPN, which may reduce internet speed.
- Do not exceed the Maximum Connections limit, as extra users will be unable to connect.
- Choose the correct Localhost IP, especially if multiple interfaces exist.
- VPN performance depends on network bandwidth and latency.
- Use strong authentication credentials to enhance security.
- Configuration changes require saving — otherwise, they will not be applied.
- Disconnect clients safely instead of terminating sessions abruptly.
FAQs
Q1: What are the available authentication methods?
The VPN Server supports multiple authentication methods to validate users securely: 1. Office365 – Uses Office365 credentials for authentication, integrating with Microsoft’s identity services. 2. LDAP – Leverages LDAP directory services, allowing centralized authentication through an organization’s directory. 3. Default – Uses the platform’s built‑in authentication system for VPN users. Administrators can select the method that best fits their environment and security requirements.
Q2: Can I change the default number of maximum connections?
Yes. The Maximum Connections parameter is set to 20 by default, but it can be increased or decreased based on your needs. If you expect more users to connect simultaneously, increase the value. If you want to restrict access or limit resource usage, decrease the value. Adjusting this parameter ensures the VPN server can handle the desired number of concurrent client connections efficiently.