Organizations
Organization This module can also be used to register a company, institution or business entity as a primary organization in the enterprise system. Once an organization is created, all relevant users and devices are associated with it. Resource allocation, access control management and data reporting for each organization are handled centrally by this framework. This partitioning model ensures that there are no issues like data isolation between different clients or departments in a multi-tenant environment, and cross-access or data leakage is avoided.
What is an Organizations
In this system, the Organization acts as an independent operational entity under which resources like Users and Devices are mapped. For example, when an Organization named Apex Connect Ltd is created, that Organization acts as a Logical Resource Container, in which the following assets can be associated:
-
Users
-
Devices
Based on this structure, the management of resources in the entire system becomes possible according to Hierarchical and Systematic Control Flow.
Why do we need an Organizations
The system supports Multi-Client and Multi-Tenant management, which means that different companies or clients can be managed on a single platform in a completely segregated environment. Users and devices can be logically grouped according to their organization, which makes resource management more structured and efficient. Access control and security mechanisms are tight, so that data of each organization can be accessed only by authorized users. Reporting and scalability modules allow usage, activity tracking and performance reports to be generated for each organization.
Organization Listing
Follow these steps to view the details of all the organizations present in the system:
-
Login to the system successfully. The Dashboard will open as soon as the user logs in.
-
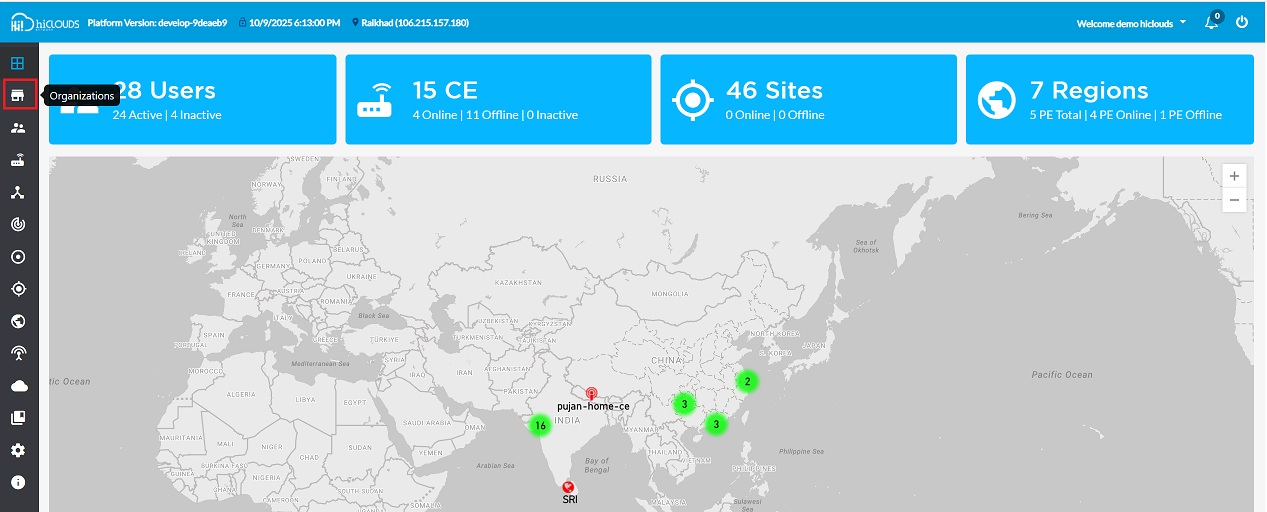
On the Dashboard, click on the Organizations option in the left navigation menu as shown in the image.
-
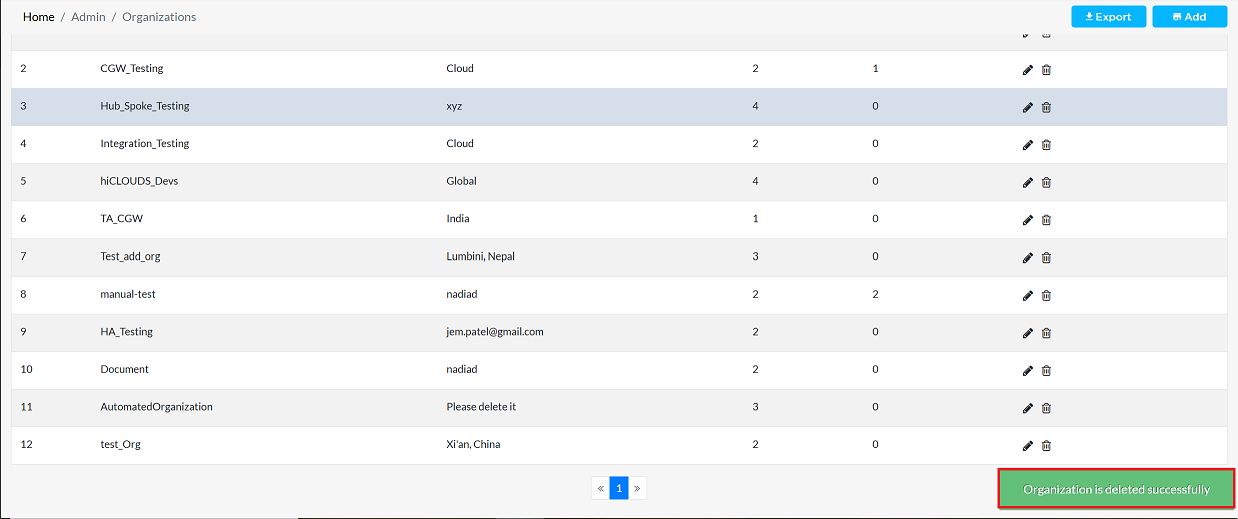
Clicking will open the Organization Listing grid, where a list of all the organizations will be displayed.
-
On the top-right corner of the grid, Export and Add buttons are provided.
- To export the organization data, click on the Export button and refer to the Export Documentation for detailed steps.
- To add a new organization, click on the Add button and follow the steps mentioned in the Create Organization guide.
Listing Grid Details
The following information is displayed in the Organization Grid:
Field Name Description Name The name of the organization. Address The physical address of the organization. Users The number of users associated with this organization. Devices The number of devices associated with this organization. Action Options to perform actions on the organization, such as editing or deleting. Tabs
Tab Name Details All This tab displays all organizations, both active and inactive. Active This tab will only show organizations that have a status of Active and that have active devices. Inactive This tab will only show organizations that have a status of Inactive or that have inactive devices. 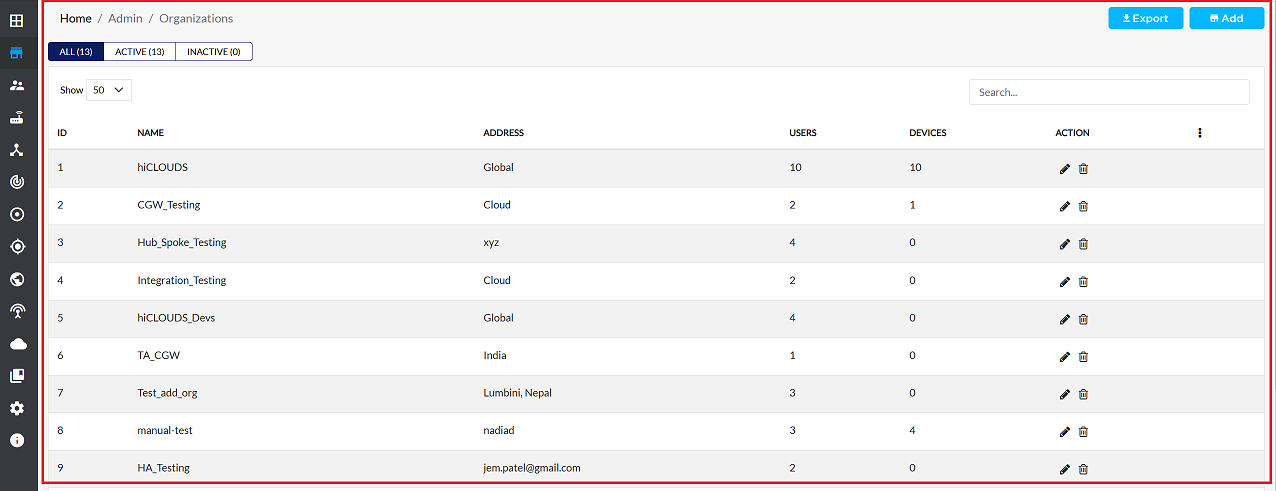
Creating an Organizations
Follow the steps below to create a new organization:
-
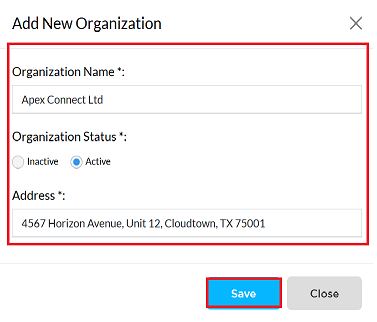
In the organization listing grid, click the Add button in the upper right corner.

-
To successfully add the organization to the system, please fill in the following information carefully:
- Organization Name: Enter the exact and legal name of the company or organization. (Example: Apex Connect Ltd)
- Organization Status: Select the current operational status of the organization. If the organization is currently operational, select 'Active'. If it is not currently operational, select 'Inactive'. (Example: Active is selected)
- Address: Enter the complete and accurate physical address of the organization. (Example: 4567 Horizon Avenue, Unit 12, Cloudtown, TX 75001)
-
After filling the required details correctly, carefully check all the information filled in once to ensure that it is correct. If correct, click on the Save button to store the organization's data in the system and complete the registration process.
-
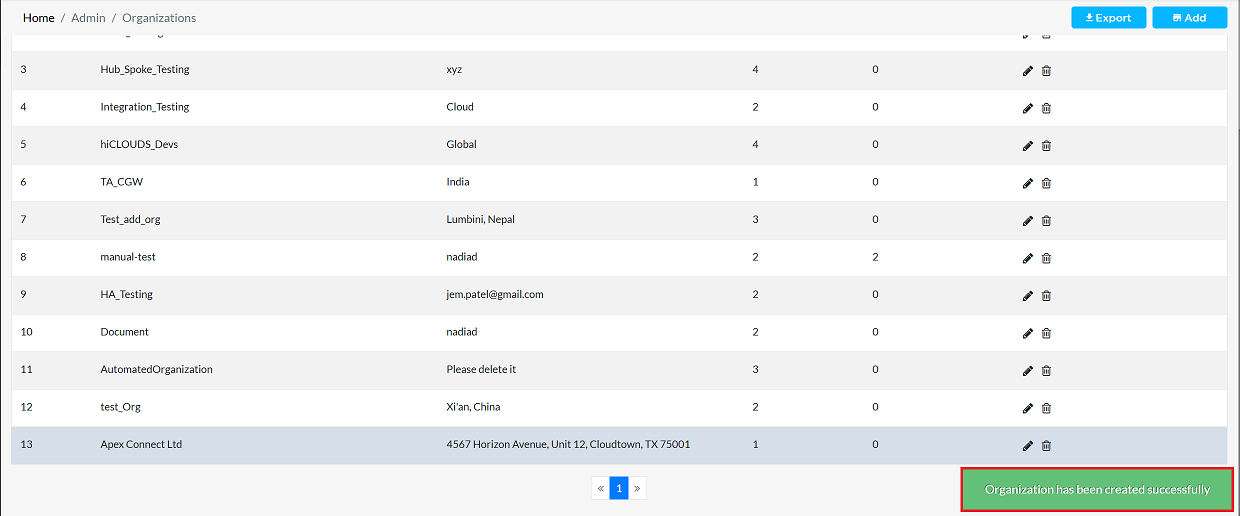
After the organization is successfully created, a message will appear on the screen saying Organization has been created successfully.
Editing an Organizations
To update the details of any organization, follow these steps:
-
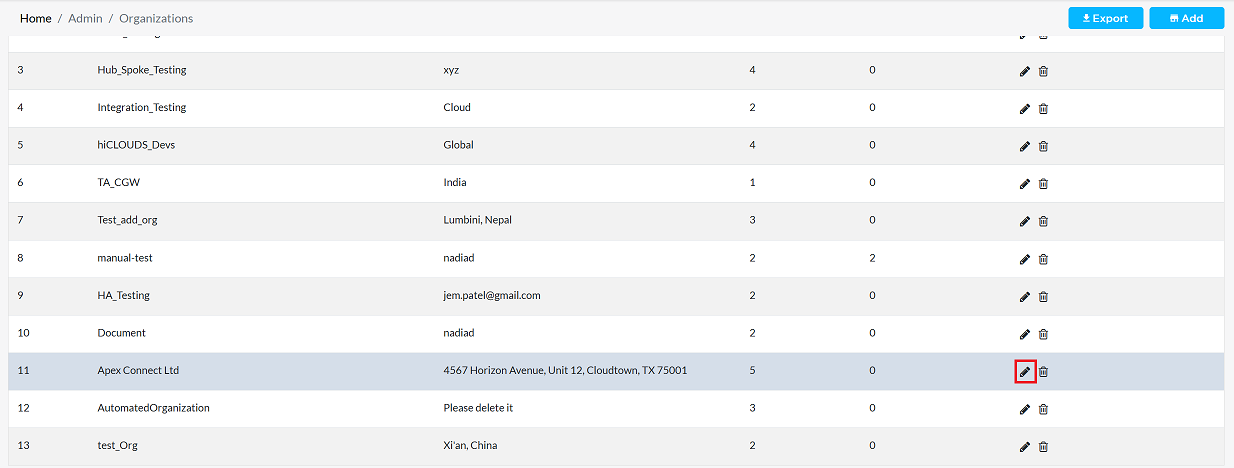
Click on the Edit option in the 'Action' column on the right side of the row of the organization to be edited.
-
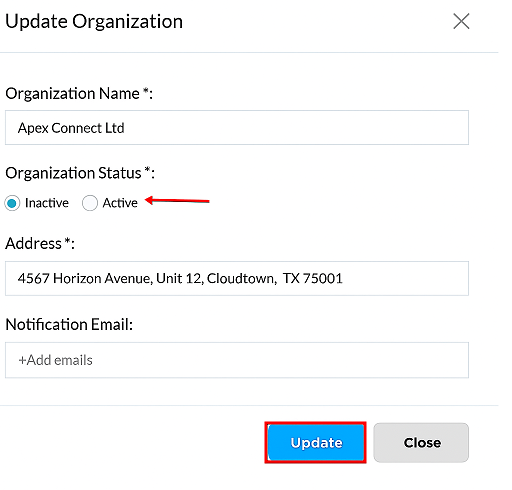
Edit the organization details as needed. The following details can be updated:
- Organization Name: If a name change is required, enter the new name here.
- Organization Status: In this update, the organization status has been changed from Active to Inactive.
- Address: Enter the organization's new or updated address.
- Notification Email: A notification email can also be added while editing. For more information about notification emails, see the Notification email document.
-
In this update, the organization status has been changed from Active to Inactive, while other details (such as name, address, notification email) have been kept as it is as they do not need to be changed.
-
After making all the necessary changes, click on the Update button to apply them.
-
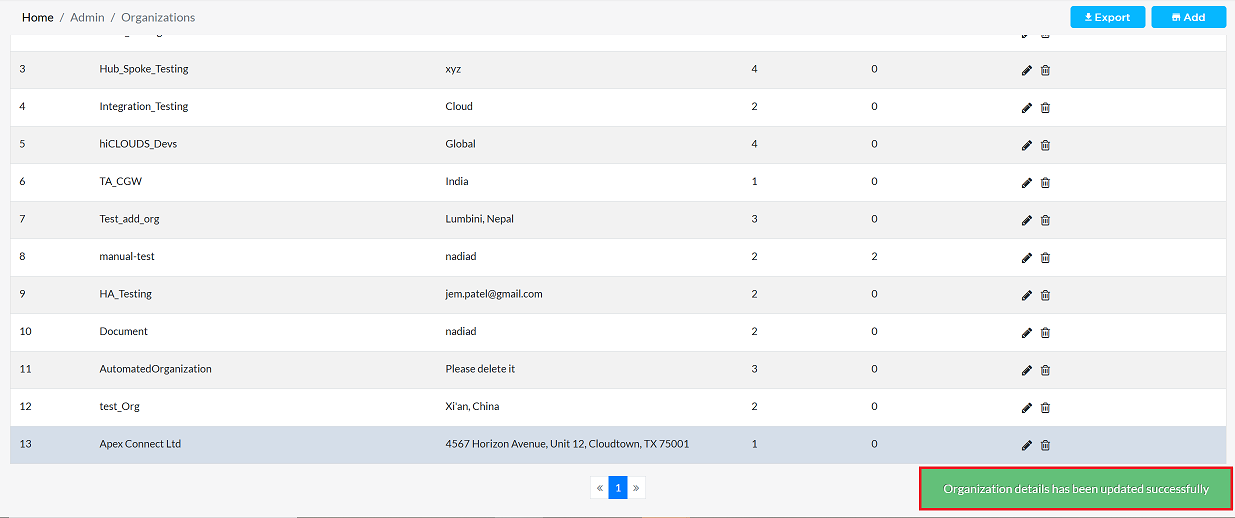
After the organization has been successfully updated, a message will appear on the screen saying Organization has been updated successfully.
Deleting an Organizations
To delete any organization, follow these steps:
-
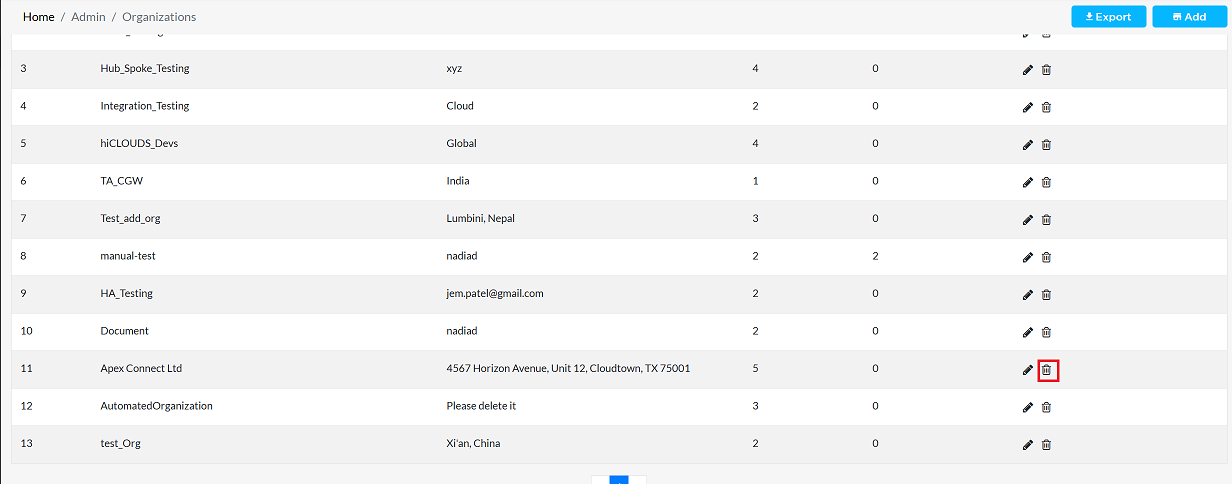
Click on the Delete option in the 'Action' column in the row of the organization to be deleted.
-
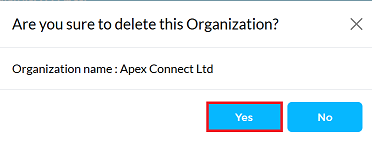
By clicking on the Delete option, a confirmation message popup will open on the screen. This popup asks to confirm the deletion action again, which prevents accidental deletion.
- The organization has two options available:
- Confirm Delete: If the organization really wants to delete the information, click on the Yes button in the popup.
- Cancel Delete: If not intended to delete or clicked by mistake, click on the No button to cancel the action and keep the information safe.
- The organization has two options available:
-
Decision taken in the image As mentioned, the Yes button has been clicked in the image. This means that the deletion action has been confirmed by the organization and the relevant data will be removed from the system.
-
After the organization has been successfully deleted, a message will appear on the screen saying Organization has been deleted successfully.
Important Notes for Users
- Deleted organizations cannot be restored.
- Only users with required admin permissions can edit or delete.
- Keep organization names consistent and accurate.
- Use Inactive status if you're unsure about deleting.
FAQs
Q:1 What is the purpose of the Organization module?
The purpose of the Organization module is to register companies or organizations as primary entities in an enterprise system and act as a logical container for users, devices, and other resources. This ensures data isolation, resource management, and secure access control in a multi-tenant environment.
Q:2 Can multiple organizations be managed in one system?
Yes, the system supports multi-client and multi-tenant management. This allows different companies or clients to be managed on a single platform in a completely separate and secure environment.
Q:3 Who can create or edit an organization?
Only platform admin users can create or edit organizations through the system's access control and security mechanisms.
Q:4 Can I change the status of an organization from Active to Inactive?
Yes, the Active status can be changed to Inactive through the 'Organization Status' field while editing the organization. Doing this changes the administrative status of the organization.
Q:5 Is it possible to recover a deleted organization?
Typically, once an organization is deleted, it is permanently removed from the system and cannot be directly recovered. This is why a confirmation popup appears before deletion. You may have to rely on system backup policies for data recovery.