Users
What is Users
A user is an individual or entity who can log in to the system and access specific features or resources assigned to them, such as viewing the customer view for customer-focused interactions.
Why do we need Users
Users are essential for:
- Defining access levels and permissions.
- Ensuring secure interactions by authenticating identities.
- Supporting customer-focused operations by assigning roles and responsibilities.
- Managing resources such as sites, devices, and VPN access.
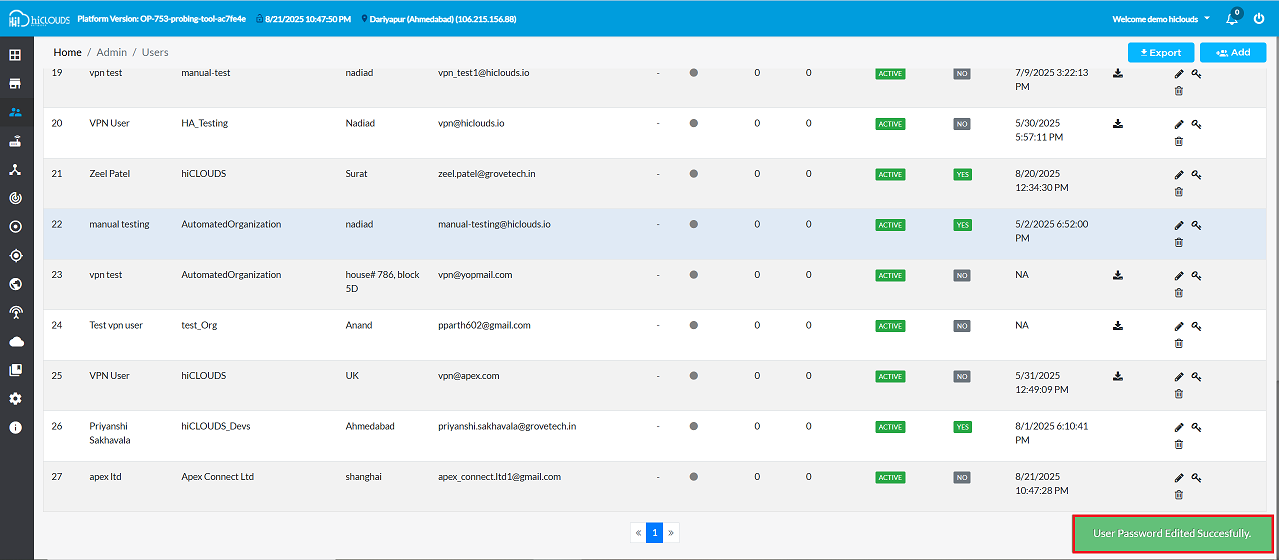
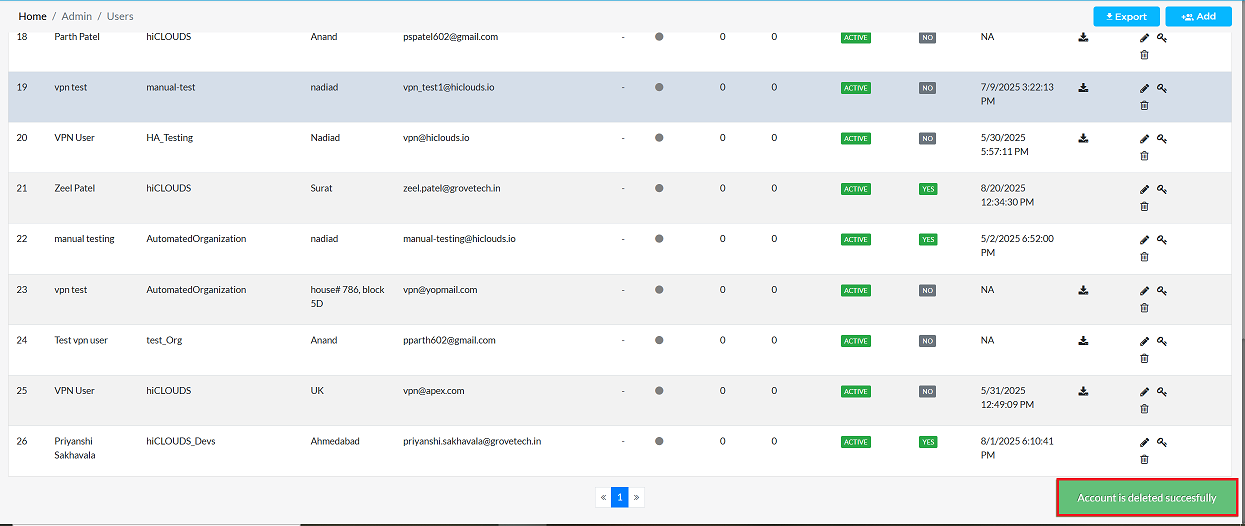
User Listing
Follow these steps to view the details of all the user present in the system:
-
Login to the system successfully. The Dashboard will open as soon as the user logs in.
-
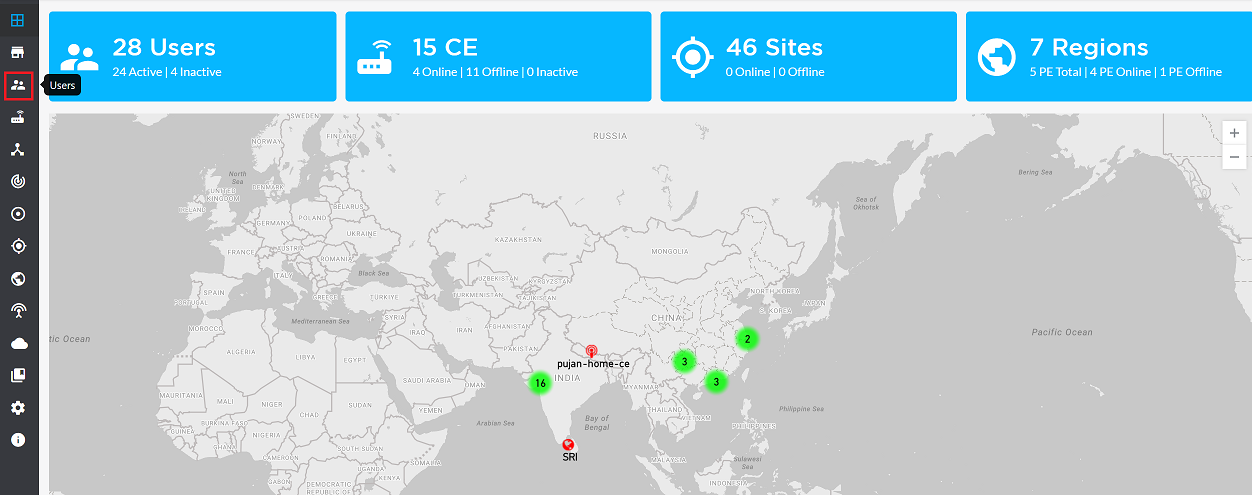
On the Dashboard, click on the Users option in the left navigation menu as shown in the image.
-
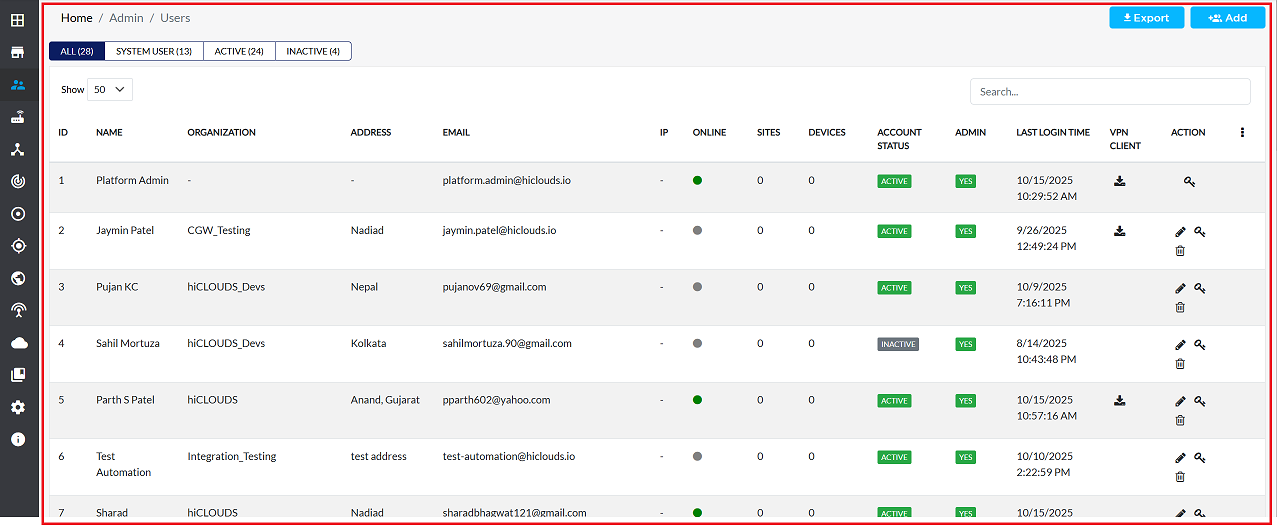
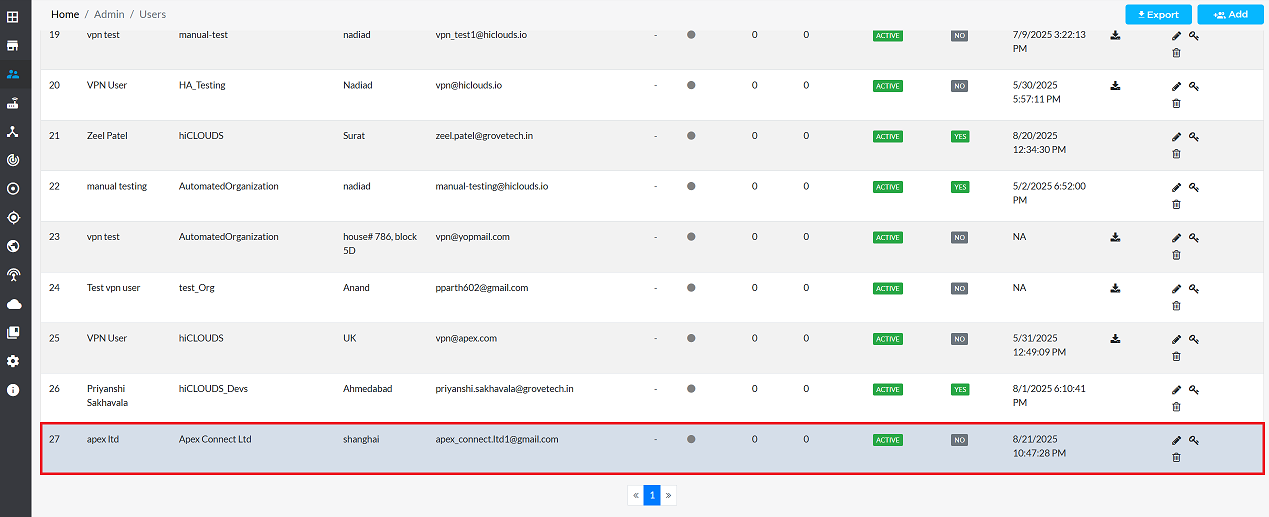
Clicking will open the User Listing grid, where a list of all the user will be displayed.
-
On the top-right corner of the grid, Export and Add buttons are provided.
- To export the users data, click on the Export button and refer to the Export Documentation for detailed steps.
- To add a new user, click on the Add button and follow the steps mentioned in the Create user guide.
Listing Grid Details
The following information is displayed in the User Grid:
| Column Name | Description |
|---|---|
| ID | Unique system-generated User ID |
| Name | Full name of the user (First Name + Last Name) |
| Organization | Organization the user belongs to |
| Address | Registered address of the user |
| Login email ID | |
| IP | Last logged-in IP address (if applicable) |
| Online | Indicates whether the user is currently logged in |
| Sites | Number of assigned sites (if applicable) |
| Devices | Number of assigned devices |
| Account Status | Active / Inactive |
| Admin | Yes / No (whether the user has admin privileges) |
| Last Login Time | Timestamp of the most recent login |
| VPN Client | Displays whether VPN access is enabled |
| Action | Provides Edit / Change Password / Delete buttons for management |
Tabs
| Tab Name | Details |
|---|---|
| All | Displays all users in the system |
| System User | Displays only system-generated or admin-level accounts |
| Active | Shows only users whose accounts are currently active |
| Inactive | Shows only users whose accounts are disabled or blocked |
Creating User
Follow the steps below to create a new user:
-
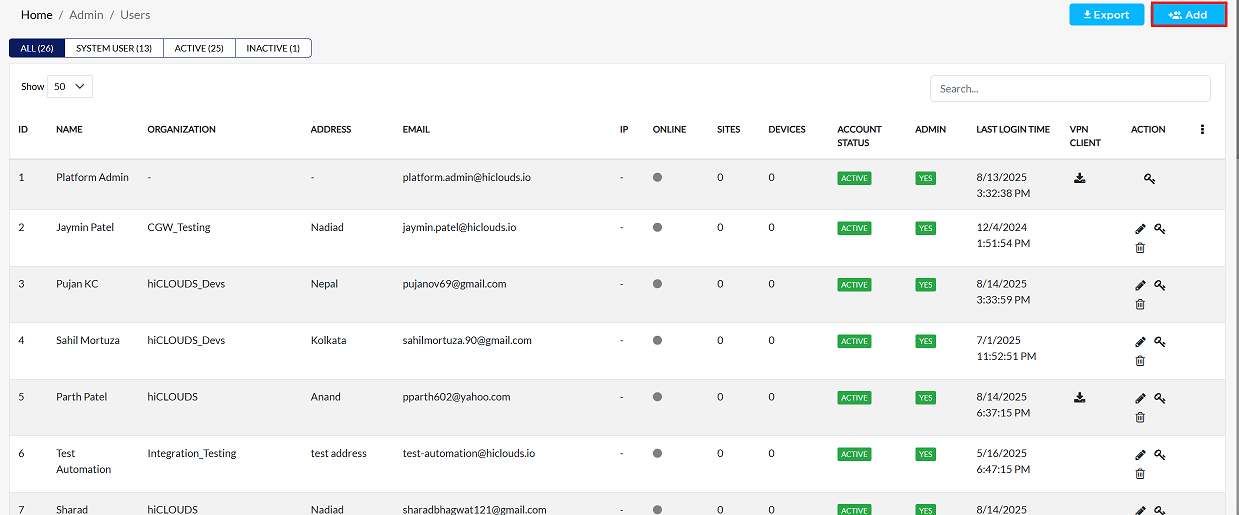
In the user listing grid, click the Add button in the upper right corner.
-
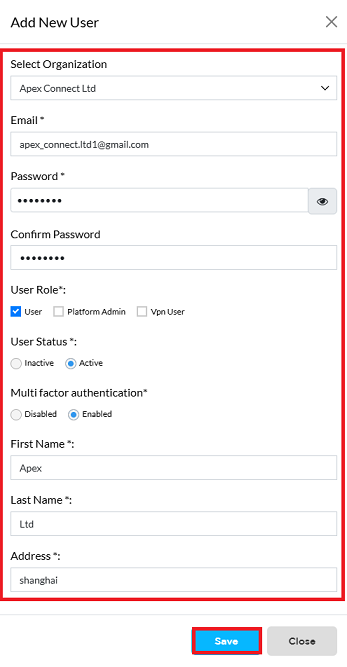
To successfully create a new user account in the system, please follow the steps below and fill in the required information carefully:
-
Select Organization: Choose the organization this user belongs to from the dropdown list (i.e:- If the user works for Apex Connect Ltd, select Apex Connect Ltd).
-
Email Id: Enter the user's unique and valid Email ID. This will typically be used as their login username (i.e:- apex_connect.ltd1@gmail.com).
-
Password: Create a secure Password for the new user.
-
Confirm Password: Re-enter the password exactly as typed in the previous step to Confirm Password and ensure accuracy.
-
User Role: Select the appropriate User Role from the available options. The options are typically (1) User, (2) Platform Admin, and (3) VPN User. For a standard user account, click on the User role.
-
User Status: Define the operational status of the account by selecting User Status.
- To allow the user to log in immediately, click on Active.
-
Multi factor authentication:- Multi-factor authentication (MFA) adds an extra layer of security by requiring a second verification step in addition to the password to verify the user’s identity. This prevents unauthorized access to the account, even if someone knows the password. To enable multi-factor authentication for added security, click the checkbox next to Enabled.
-
First Name: Enter the user's First Name (i.e: Apex).
-
Last Name: Enter the user's Last Name (i.e: ltd).
-
Address: Enter the user's physical or primary Address (i.e: Shanghai).
-
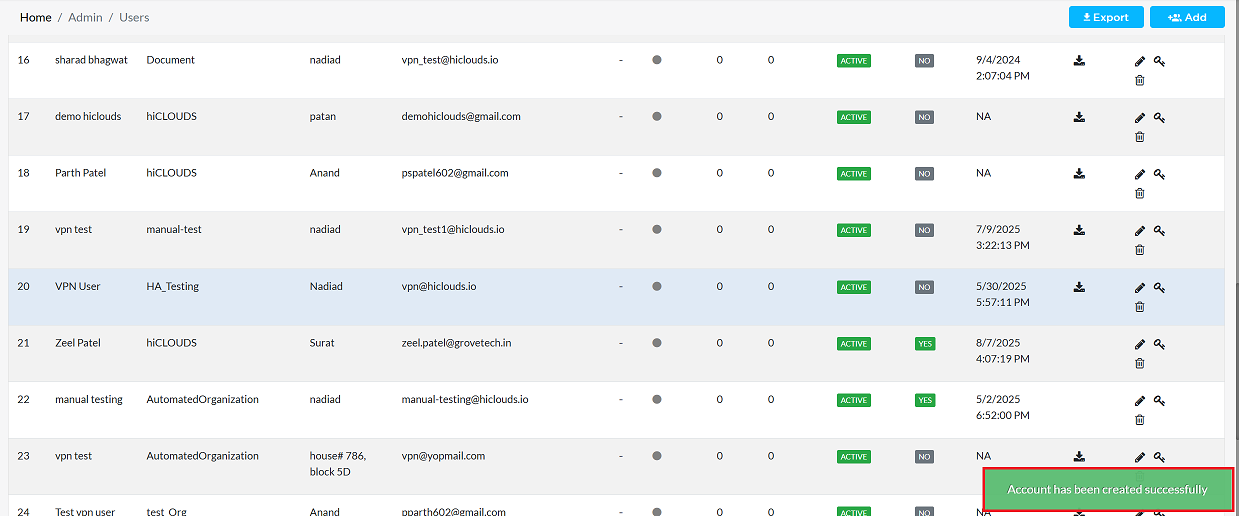
After filling in all the required details correctly, carefully check all the information entered to ensure it is accurate and complete. Once confirmed, click on the Save button to store the new user's data in the system and complete the account creation process.
-
-
After clicking on Save, the message Account has been created successfully appears on the screen.
-
After that Will be able to view the new User ID.
-
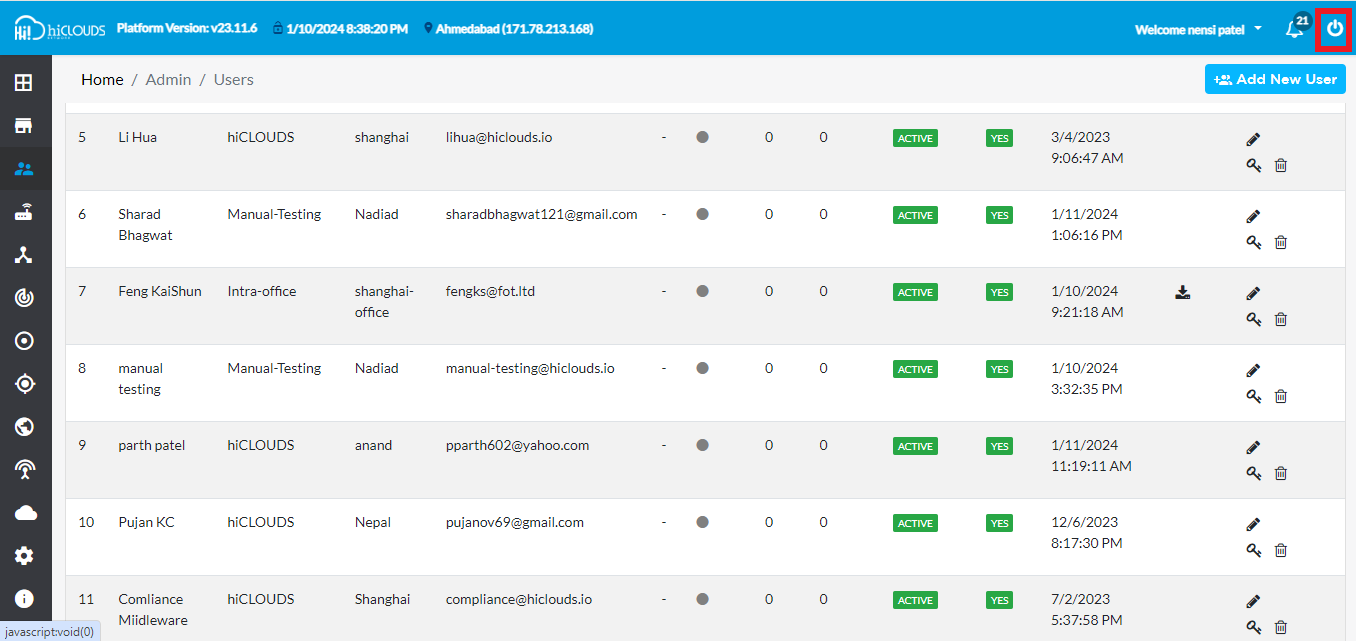
Next, navigate to the Logout button, typically located on the right side of the screen, and click it to end the current session.
-
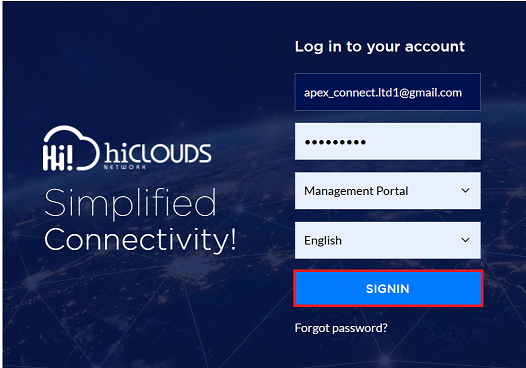
On the sign-in screen, enter the Email ID and Password for the new user account and click the SIGN IN button.
-
Upon successful sign-in, the user will be automatically directed to the dashboard.
Editing User
To update the details of any user, follow these steps:
-
Click on the Edit option in the 'Action' column on the right side of the row of the user to be edited.

-
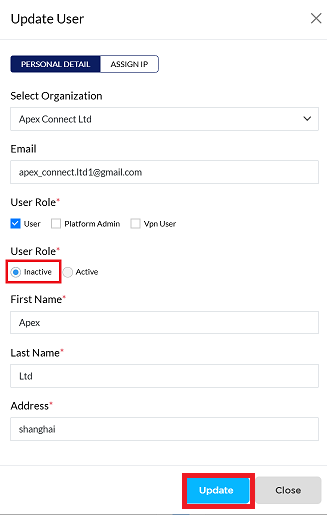
Edit the user details as needed. The following details can be updated:
- Organization Name: Enter the new organization name here if a change is required.
- Email: Enter the new primary email address if a change is required.
- User Role: Enter the new role or confirm the existing one.
- User Status: In this update, the User Status has been changed from Active to Inactive.
- Multi-factor Authentication: Enter the new status (i.e., Enabled/Disabled) if a change is required.
- First Name: Enter the new first name here if a name change is required.
- Last Name: Enter the new last name here if a change is required.
- Address: Enter the user's new or updated address.
In this specific update, only the User Status has been changed from Active to Inactive. All other user details (Organization, Email, User Role, Multi-factor Authentication, First Name, Last Name, and Address) have been kept as is, as no further changes were required.
-
After making all the necessary changes, click on the Update button to apply them.
-
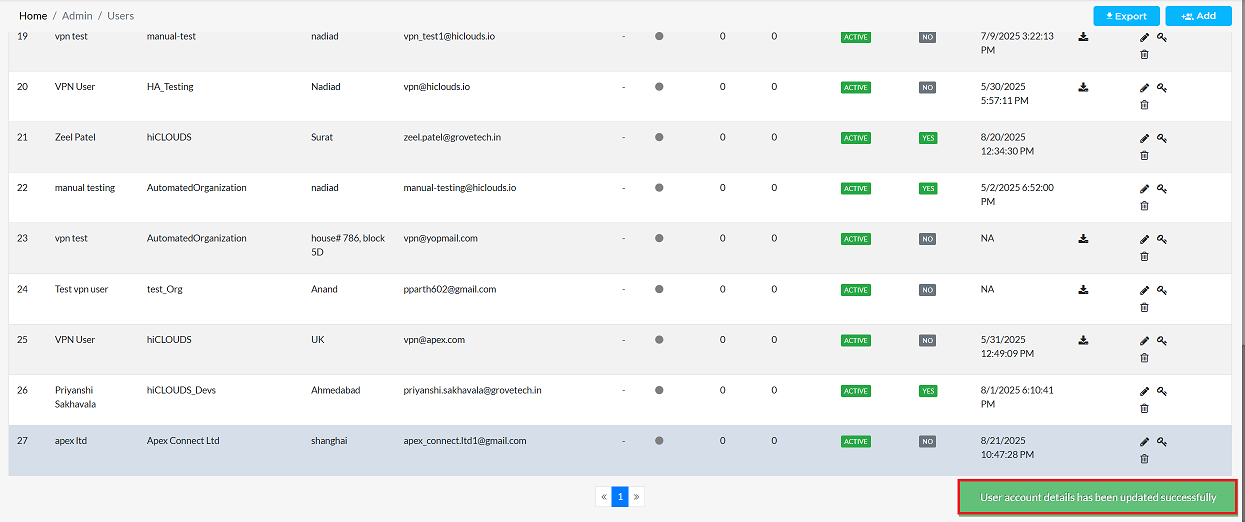
As soon as the Update button is clicked, a message will appear on the screen indicating that the Organization details have been updated successfully.
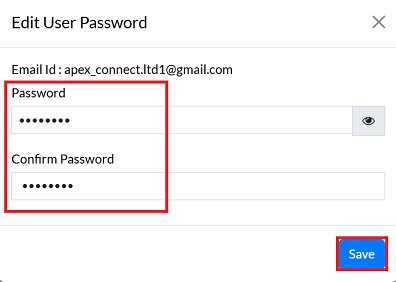
Changing User Password
Here's a more informative and structured way to present the steps for editing a user's password:
-
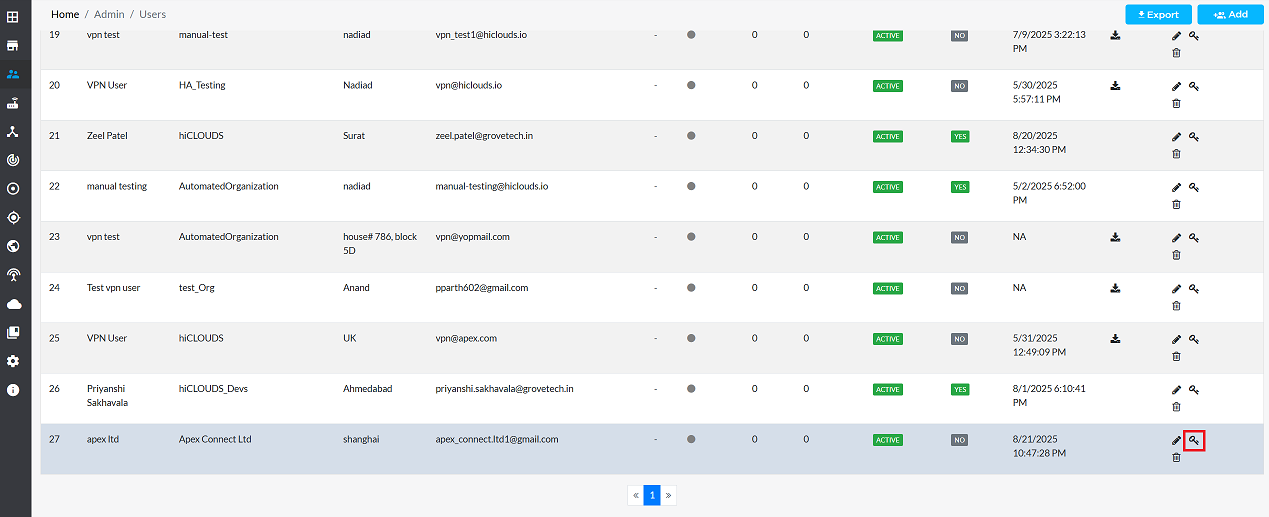
Click on the Key icon located on the right side of the user's details. This action will open the password editing interface.
-
Enter and Confirm the New Password
- Enter the new password into the Password field.
- Re-enter the exact same password into the Confirm Password field to ensure accuracy and prevent errors.
-
Click on the Save button to apply the new password.
-
After successfully saving, a confirmation message, User Password Edited Successfully, will appear on the screen, indicating that the user's password has been updated.
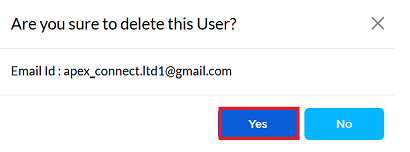
Deleting User
To delete a User account, follow these detailed steps:
-
Click on the Delete option in the 'Action' column in the row of the user to be deleted.

-
By clicking on the Delete option, a confirmation message popup will open on the screen. This popup asks to confirm the deletion action again, which prevents accidental deletion.
-
The user has two options available:
- Confirm Delete: If the user really wants to delete the information, click on the Yes button in the popup.
- Cancel Delete: If not intended to delete or clicked by mistake, click on the No button to cancel the action and keep the information safe.
-
Decision taken in the image As mentioned, the Yes button has been clicked in the image. This means that the deletion action has been confirmed by the user and the relevant data will be removed from the system.
-
After the organization has been successfully deleted, a message will appear on the screen saying Account is deleted successfully.
Important Notes for Users
- mail ID must be unique for every user. Duplicate email IDs are not allowed in the system.
- User Roles define access levels. Make sure the correct role (User / Platform Admin / VPN User) is selected during creation or editing.
- Inactive users cannot log in. Updating a user’s status to Inactive immediately blocks their access.
- Passwords must be strong and should follow the organization's password policy for security purposes.
- Deleted user accounts cannot be recovered. Once deleted, all associated access and login rights are permanently removed.
- Multi-factor Authentication (MFA) is recommended for enhanced account security.
- User details should be accurate, especially Email, Name, and Organization, to avoid login or assignment issues.
- VPN User role should be assigned only when VPN access is required.
- Only authorized users with proper permissions can create, edit, or delete users.
FAQs
Q:1 What is the difference between a "User," "Platform Admin," and "VPN User"?
Here are the main differences between the three user roles: User: This is a standard account, with limited access to only the features and resources assigned to them. Platform Admin: This user has system-wide administrative privileges, such as managing users and organizations. VPN User: A user with this role has VPN access enabled, which is required for secure remote connections.
Q:2 Can I create multiple users with the same email address?
The email ID acts as the user's login username and must be unique in the system. A different and valid email ID is required for each user.
Q:3 What should I do if I forget my password?
If a password is forgotten, the "Forgot Password" option on the login screen (if available) must be used, or the system administrator must be contacted to reset the password using the steps in the "Changing User Password" section. To reset the password, refer to the Forgot Password document.
Q:4 How can I change a user's role after their account has been created?
A user's role can be changed using the steps in the Editing User section: In the user listing grid, click Edit under the 'Action' column. Change the option in the edit form. Click the button to apply the change.