AWS
This document provides step-by-step instructions for creating a Cloud PE instance in AWS using the EC2 service. The guide is designed for clarity and ease of use, ensuring that both novice and experienced users can follow along seamlessly.
A Cloud PE instance is a virtual machine deployed in the AWS cloud environment, typically used for network processing or other computational tasks.
Creating PE Instance
-
Open your web browser and visit the AWS Cloud website.
-
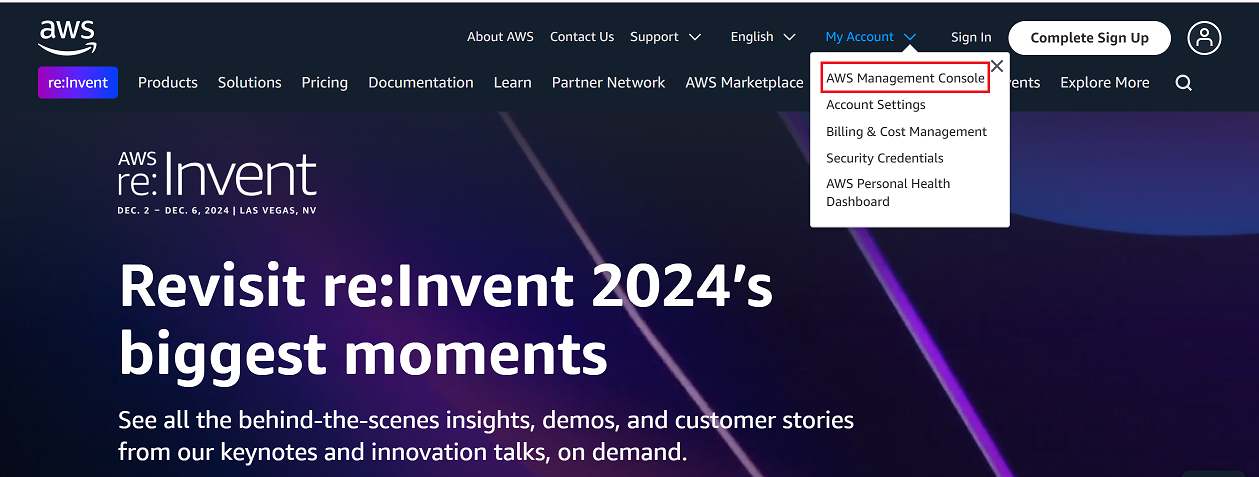
Go to the My Account > AWS Management Console.
-
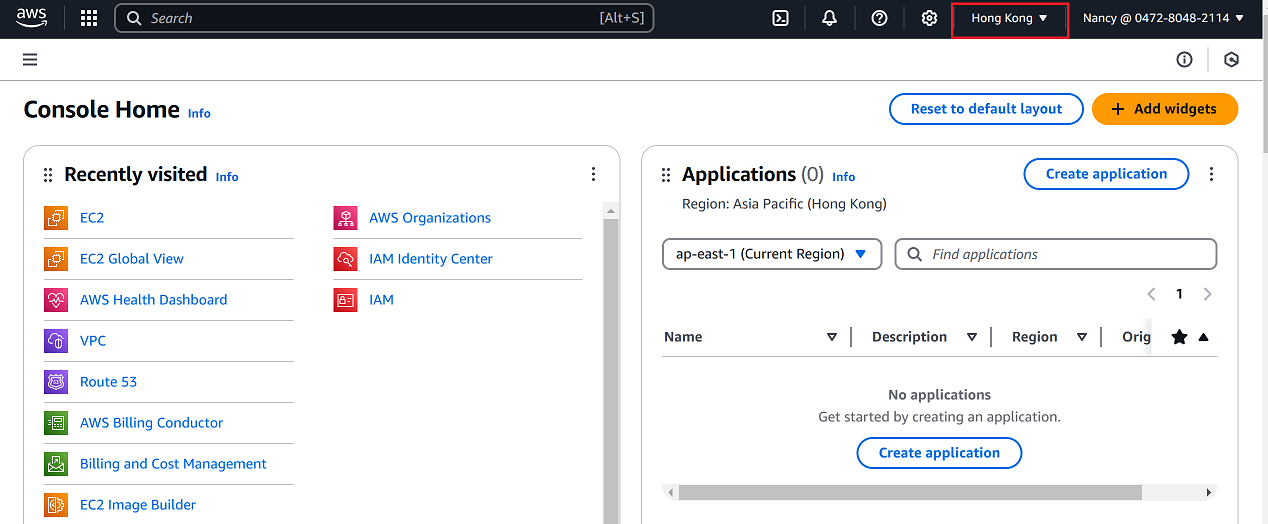
In the top-right corner, change the region to your desired location (i.e, Hong Kong) as shown in the reference image.
-
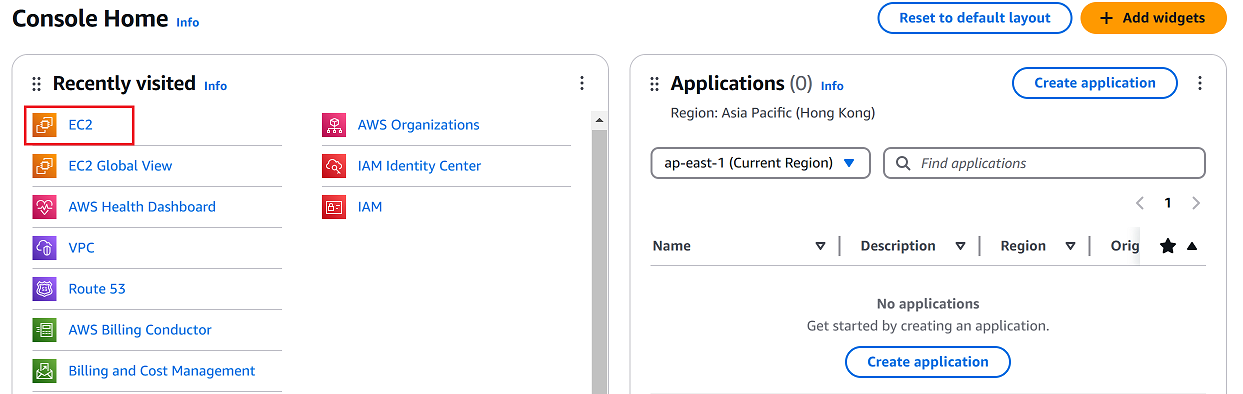
From the AWS Management Console, click on EC2.
-
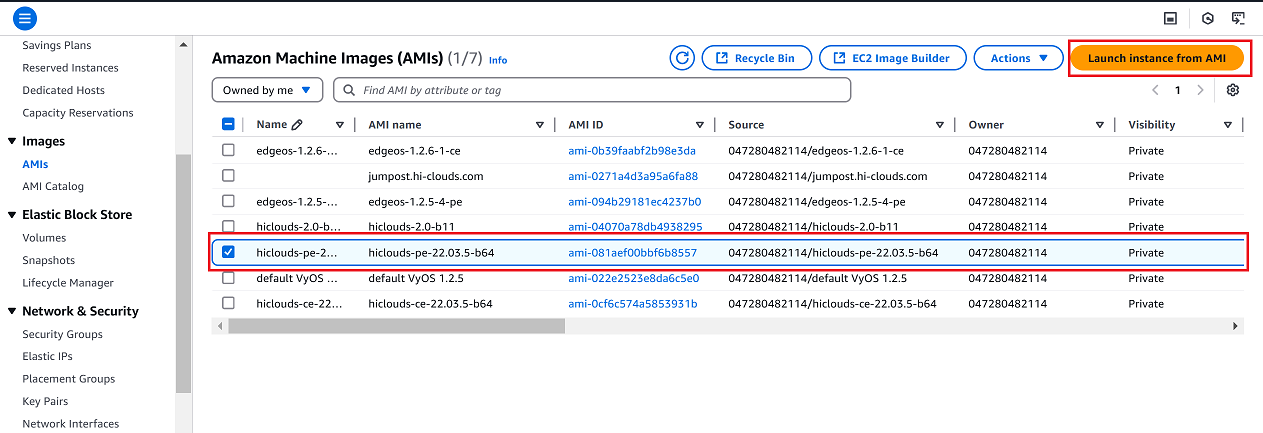
In the EC2 dashboard, select Images > AMIs from the left-hand menu.
-
Find the desired Amazon Machine Image (AMI) for the CE instance.
-
Select the checkbox next to the selected AMI and click Launch Instance from AMI on the right-hand panel.
-
Provide the following information on the instance configuration page:
-
Name: Enter a name for your instance (i.e.,
test-pe1).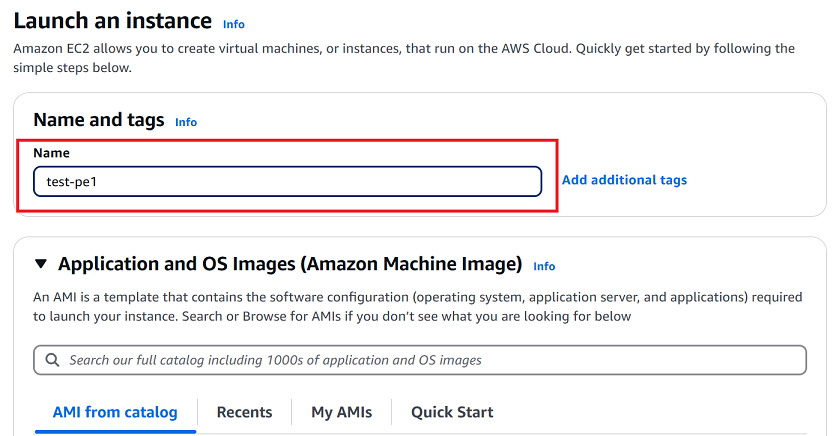
-
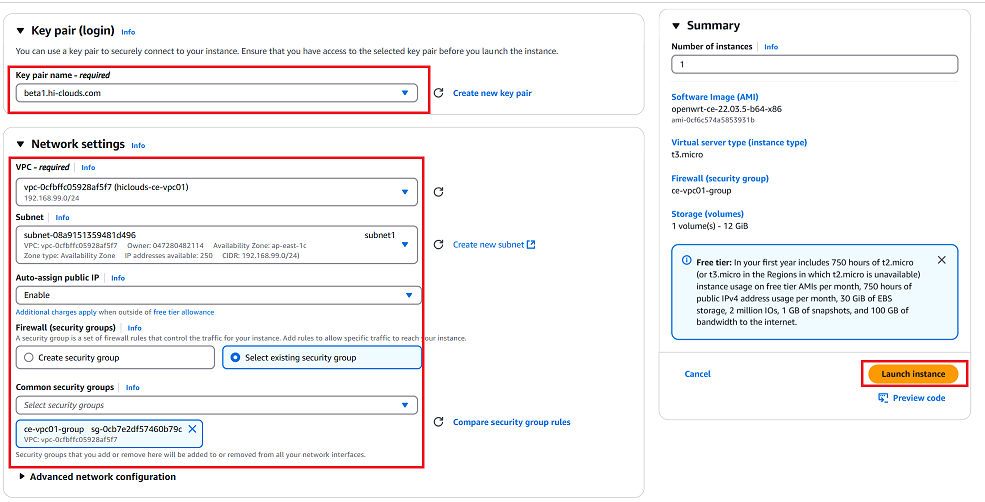
Key Pair: Select the appropriate key pair for authentication (i.e.,
beta1.hi-clouds.com). -
Network Settings:
- Click the Edit button under network settings.
- VPC: Select the desired VPC (i.e.,
vpc-0cfbffc05928aff7 (hiclouds-ce-vpco1)). - Subnet: The subnet is selected automatically by default.
- Auto-assign Public IP: Enable this option if it is disabled by default.
- Firewall (Security Group): Select an existing security group (i.e.,
ce-vpco1-group sg-0cb7e2df57460b9c).
-
-
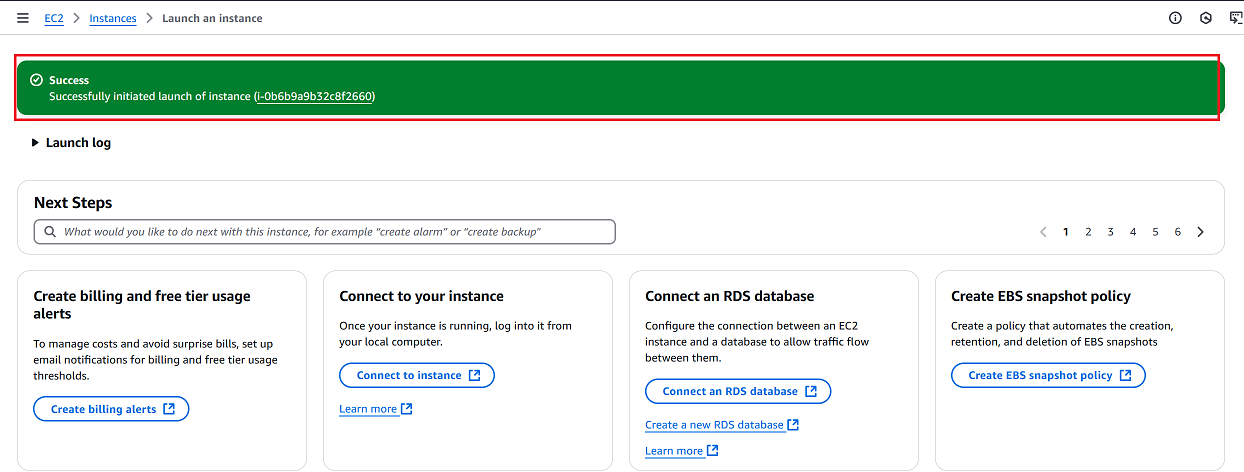
Review all details and click Launch Instance.
-
Once the instance is successfully created, you will see a confirmation message Successfully initiated launch of instance (i-0b6b9a9b32c8f2660).
-
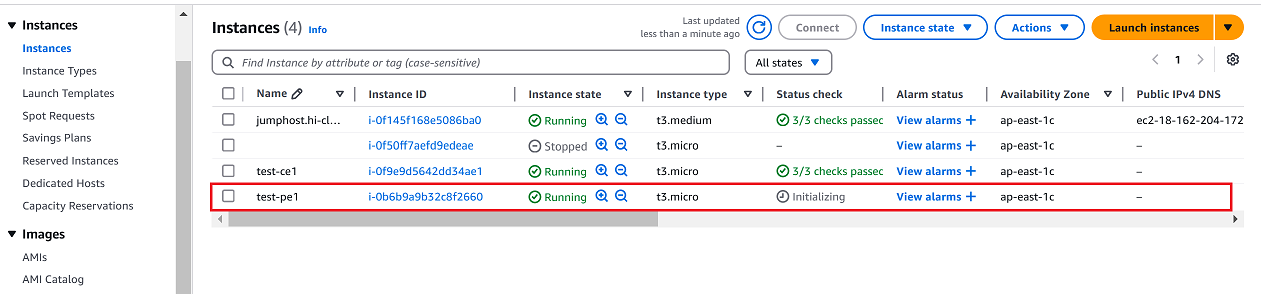
Navigate to the Instances tab.
-
Verify that the newly created instance appears in the list.
Verify the PE Instance
-
Once the PE is successfully created, proceed to the hiCLOUDS platform to verify its configuration.
-
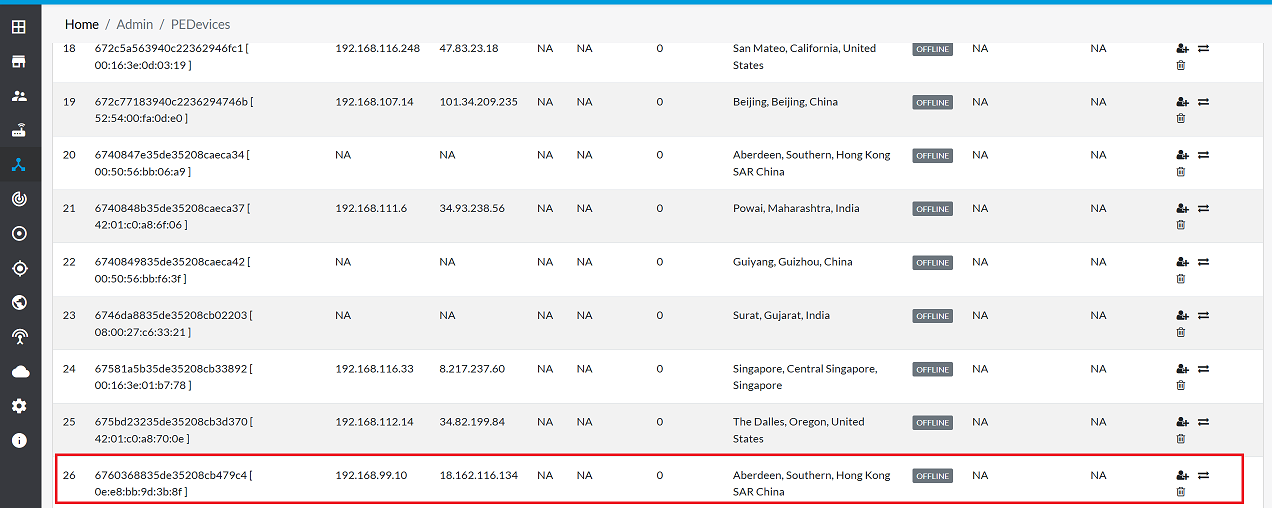
Go to Login > PE Devices > ALL.
-
Make sure that the newly created PE instance appears in the list of devices.
Important Notes for Users
- Ensure Correct Region Selection
Always verify that you have selected the correct AWS region before creating the instance. Resources created in one region are not visible or usable in another. - Use the Correct AMI Make sure you select the approved AMI provided for Cloud PE deployments. Using an incorrect AMI may cause compatibility or performance issues.
- Key Pair Must Be Saved Securely The selected key pair is required to access the instance. If you lose the key, you cannot download it again — and access will be permanently restricted.
- Security Group Configuration is Critical Ensure the selected security group allows the required ports and IP ranges. Incorrect firewall rules may block connectivity to the PE instance.
- Public IP Assignment If external access is required, confirm that Auto-assign Public IP is enabled. Otherwise, the instance will remain accessible only within the VPC.
- Verify Resources Before Launch Double-check instance type, network, storage, and key pair before clicking Launch Instance, as some parameters cannot be modified later.
- Instance Billing Warning AWS EC2 instances are billed per running hour. Stop or terminate unused instances to avoid unexpected charges.
- IAM Permissions Required The user account must have sufficient AWS permissions (EC2 Full Access or equivalent) to launch and manage instances.
- Tagging Best Practice Add meaningful tags (e.g., Project, Owner, Environment) to easily identify and manage deployed resources.
FAQs
Q:1 Can I change the instance configuration after launch?
Ans: Yes, you can modify certain settings such as instance type, security groups, and network settings through the AWS Management Console.
Q:2 What is a security group, and why is it important?
Ans: A security group acts as a virtual firewall for your instance, controlling inbound and outbound traffic. Ensure it allows required protocols and IP ranges.