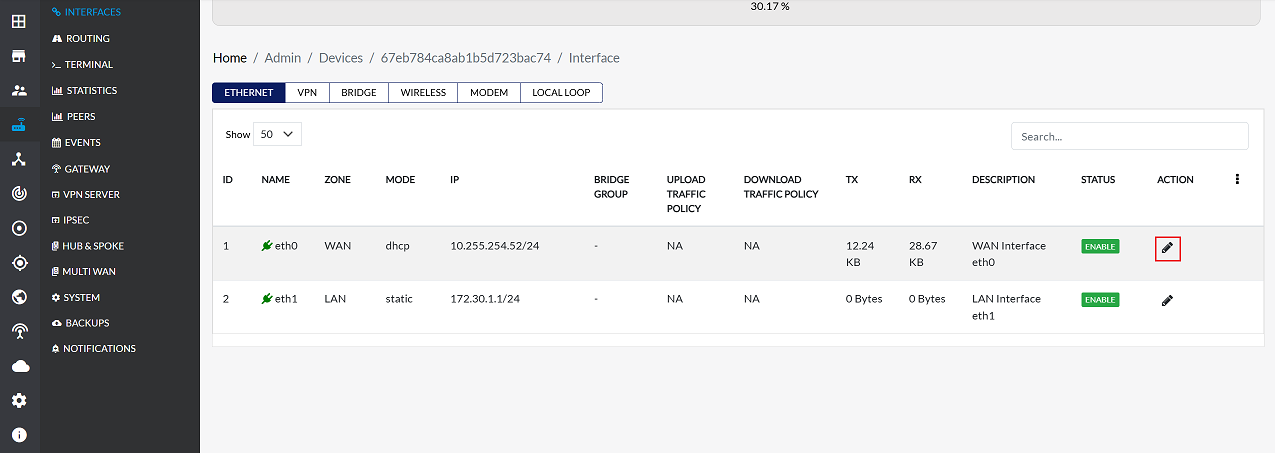
Ethernet
The Ethernet interface is used to connect CE devices to the network. This interface can be configured to suit the needs of the network such as DHCP, Static IP, or PPPoE. Each of these methods can be used to change how the device communicates on the network.
Field Descriptions
| Field Name | Description |
|---|---|
| Name | The identifier assigned to the Ethernet interface. |
| Zone | Security zone to which the interface is assigned (e.g., LAN, WAN). |
| Mode | Operational mode of the interface (e.g., static, DHCP, etc.). |
| IP | IP address(es) assigned to the interface (can be multiple). |
| Bridge Group | Specifies if the interface is part of a bridge group (used in Layer 2 bridging). |
| Upload Traffic Policy | The traffic shaping or QoS policy applied for outgoing (upload) traffic. |
| Download Traffic Policy | The traffic shaping or QoS policy applied for incoming (download) traffic. |
| Tx | Transmitted data rate or usage statistics. |
| Rx | Received data rate or usage statistics. |
| Description | Optional text to describe the purpose or role of the interface. |
| Status | Current operational status (Enabled/Disabled). |
| Action | Provides an edit icon allowing you to modify interface configurations. |
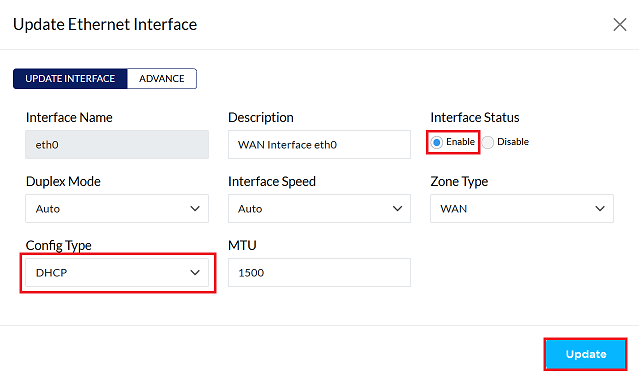
Configuring Ethernet Interface with DHCP
The Ethernet interface automatically obtains an IP address from DHCP. The DHCP server on the network gives it information such as the IP, subnet mask, and gateway.
-
Click on the Edit button for the LAN interface.
-
To configure the interface with a DHCP, follow these steps:
-
In the settings panel:
- Set Interface Status to Enable.
- Set the Config Type to Static.
- Click the Update button to apply the DHCP configuration.
-
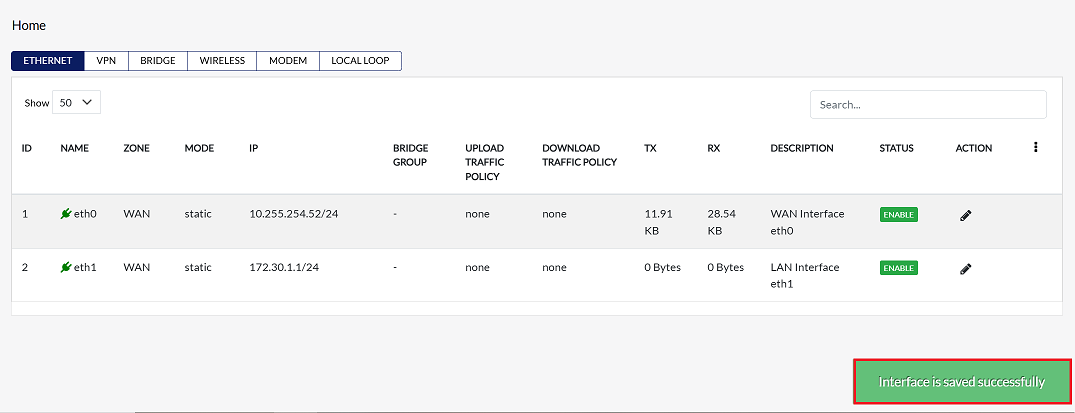
Upon clicking update a confirmation message, Interface is saved successfully will appear on the screen.
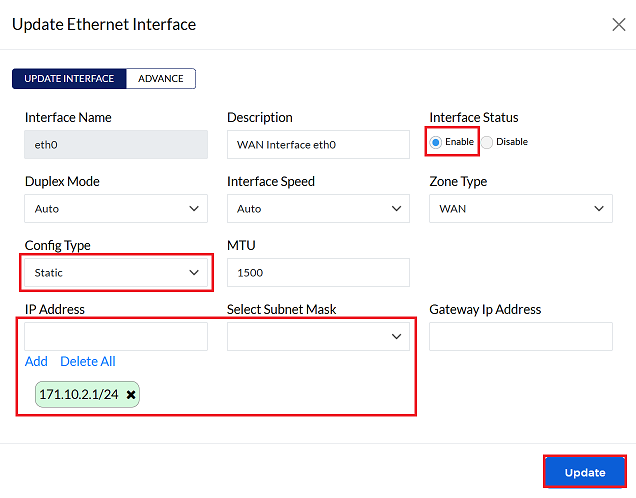
Configuring Ethernet Interface with Static IP
-
Login to the cloud platform.
-
Navigate to CE Devices > [Select CE] > Interface > Ethernet.
-
Click on the Edit button for the LAN interface.
-
To configure the interface with a static IP address, follow these steps:
-
In the settings panel:
- Set Interface Status to Enable.
- Set the Config Type to Static.
- In the IP address field, enter the desired static IP address for the interface. You can add multiple IP addresses if required.
- Select Subnet Mask (i.e: 255.255.255.0/24)
- Click on the Add button to save the details.
-
Click on the Update button to confirm changes.
-
Upon clicking update a confirmation message, Interface is saved successfully will appear on the screen.
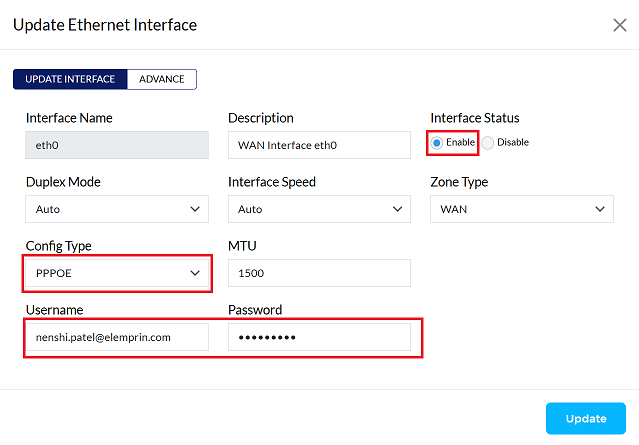
Configuring Ethernet Interface with PPPoE
IP addresses are obtained automatically from PPPoE, which connects to an ISP for the Internet. This requires a username and password.
-
Select Edit on the target Ethernet interface.
-
Set the following in the Update Ethernet Interface panel:
- Set Interface Status to Enable.
- Set Config Type to PPPoE.
- In the Username / Password fields, enter the credentials provided by your ISP.
- Click the Update button to save the PPPoE configuration.
-
Upon clicking update a confirmation message, Interface is saved successfully will appear on the screen.