Provisioned Config
This guide provides simple instructions on how to set up and manage a PPPoE connection on CE devices. It includes commands for two types of systems: OpenWRT and VyOS.
Overview
By default, all CE has its first ethernet interface as the default WAN interface, and it's configured as DHCP. This means CE is placed in a network where it can get IP from the DHCP server and get connected to the network. CE will be automatically reported to the cloud platform as long as CE can connect to the Internet.
In a few deployments, a DHCP network is not available and only requirement is to either use static IP or PPPoE. In such case, we need to preprare CE with provisioned configuration. Provisioned configuration is a configuration in which CE would retain static/pppoe network confiuration even if it gets factory reset or firmware upgrade. So when ever CE boots, It can get internet connection with configured provisioned configuration.
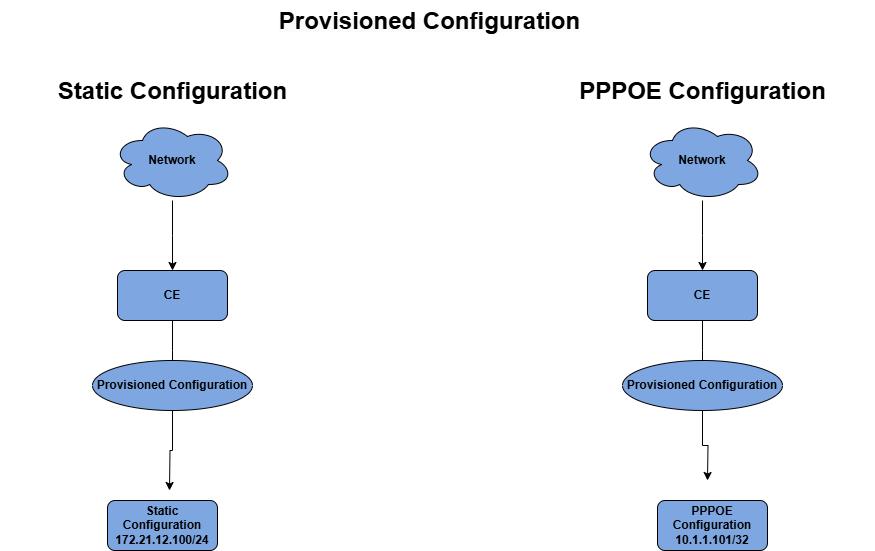
As of now, Provisioned configuration supports static and PPPoE configuration. CE provides a command line utility to configure provisioned configuration. For VyOS and and OpenWrt-based firmware, it would work same except utility names are different.
Setting Up a Network
Access the Terminal
- Open the Terminal.
Run the Command
-
Use the following SSH command to access the CE device terminal:
ssh -p <port_number> <username>@<CE_device_IP> -
Enter the following command to switch to superuser mode:
sudo su -
PPPoE Setup
OpenWRT
-
Use the following command to configure PPPoE
provisioned_config.sh -t <pppoeType> -u <pppoeUser> -p <pppoePassword> -m <mtu>- pppoeType: Type of PPPoE configuration.
- pppoeUser: The PPPoE username.
- pppoePassword: The PPPoE password.
- mtu: Maximum Transmission Unit (e.g., 1350).
-
Example Command:
provisioned_config.sh -t pppoe -u foo -p bar -m 1350
VyOS
-
Use this command to configure PPPoE
set_static -t pppoe -u <pppoeUser> -p <pppoePassword> -m <mtu> -
Example Command:
set_static -u foo -p bar -m 1350
Static IP Setup
OpenWRT
-
Configure a static IP using the command below:
provision_config.sh -t <staticType> -a <address> -m <netmask> -g <gateway> -d <nameserver>- staticType: Type of static configuration.
- address: The IP address.
- netmask: The Subnet mask.
- gateway: The gateway IP.
- nameserver: The DNS server IP.
-
Example command:
provision_config.sh -t static -a 192.168.111.6 -m 255.255.255.0 -g 192.168.111.1 -d 192.168.111.1
VyOS
-
Use this command for static IP configuration
set_static -t static -a <ip> -m <netmask> -g <gateway> -d <nameserver> -
Example command:
set_static -t static -a 192.168.111.6 -m 255.255.255.0 -g 192.168.111.1 -d 192.168.111.1
Check Internet Connectivity:
-
Use the following command to verify the connection:
ping 8.8.8.8
Register the CE on Cloud
Follow the CE-Regsitration Guide for step-by-step instructions on registering your CE device on the cloud.
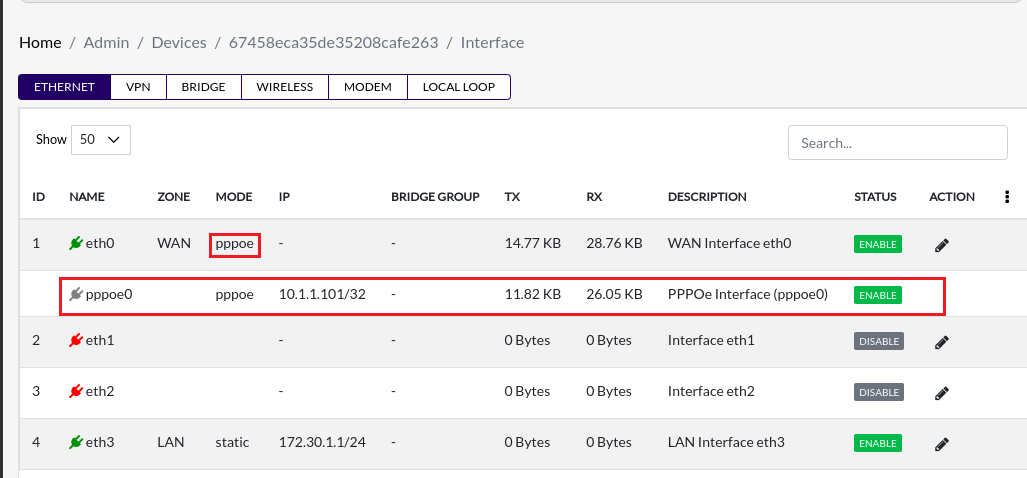
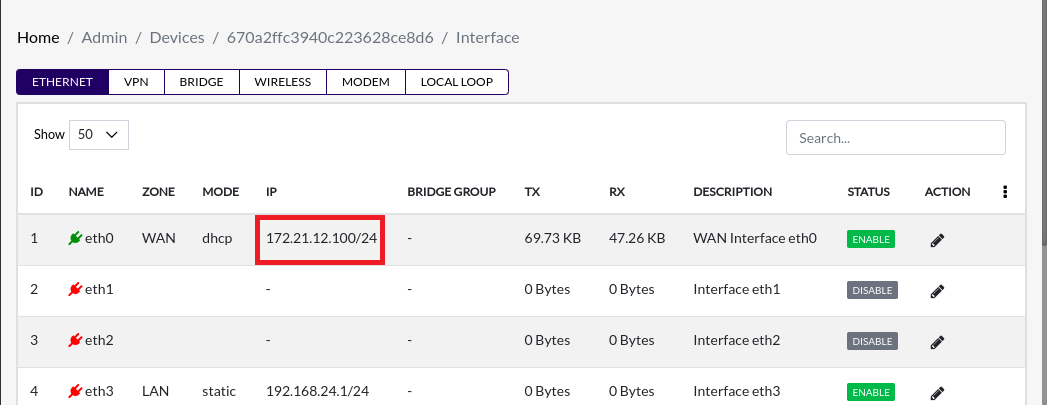
Check IP Address
The assigned IP address can be viewed through the interface menu of the device.
- PPPoE
- Static IP
File Locations
Once the configuration is set, the details will be saved in the following locations:
- VyOS:
/config/hiclouds/provisionedConfig - OpenWRT:
/etc/provisionedConfig
Example Configuration Files
static
{
  "configType": "static",
  "address": "192.168.111.250",
  "netmask": "255.255.255.0",
  "gatewayIp": "192.168.111.1",
  "nameServer": "192.168.111.1"
}
PPPoE
{
  "configType": "pppoe",
  "pppoeUser": "userName",
  "pppoePassword": "password",
  "mtu": "1350"
}
Removing the Provisioned Configuration
To remove the provisioned configuration, delete the provisionedConfig file and perform a factory reset.
VyOS
-
Delete the Provisioned Config File:
sudo rm -f /config/hiclouds/provisionedConfig -
Trigger Factory Reset:
sudo sh -c "factory_reset &"
OpenWRT
-
Delete the Provisioned Config File
sudo rm -f /etc/provisionedConfig -
Factory Reset and Reboot
sudo firstboot -y
reboot now