Two-Spoke Setup with Hub, Hub Link, PE, and CE Link with PE
This document outlines the steps to configure a two-spoke setup with a hub, link the hub to a PE device, and then link a separate CE device to the same PE.
Assign Customer Edge (CE) Devices
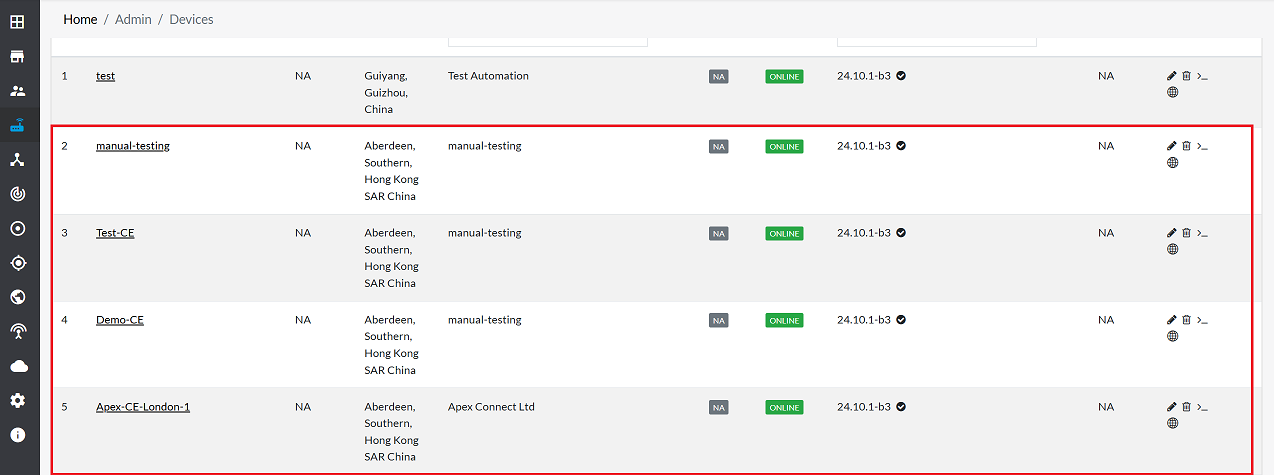
Set up four CE devices. For example: manual-testing [CE1], Test-CE [CE2], Apex-CE-London-1 [CE3], and Demo-CE [CE4]. Ensure that three of these CE devices are created within the same organization, as illustrated in the image below. To create and assign CE devices, please refer to the Assign CE device document and follow the steps provided there.
Create Hub and Spoke Configuration
Once the CE devices are assigned, creating hubs and spokes using CE devices from the same organization.
Create Hub
To create a hub, see the How to Create a Hub document and follow the instructions provided therein.
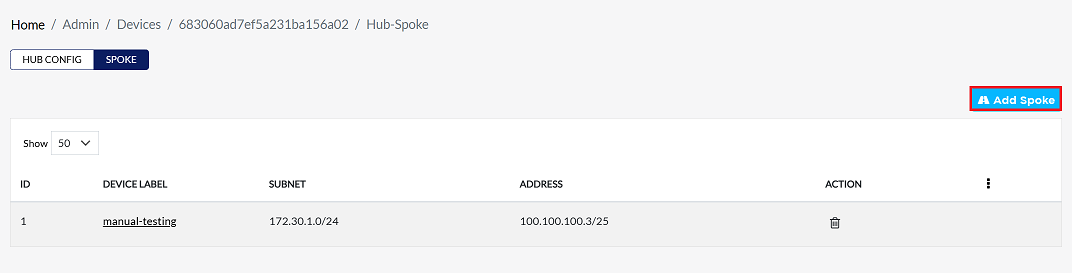
Create Two Spokes within the Same Hub
After making the hub, add two spokes to it. Both spokes should connect to the same hub.
To create a spoke, first read the Create Spoke documentation. Follow the steps in it to create the first spoke. Then, follow the additional steps in the same hub to create a second spoke.
-
Go to the Spoke tab > Add Spoke
-
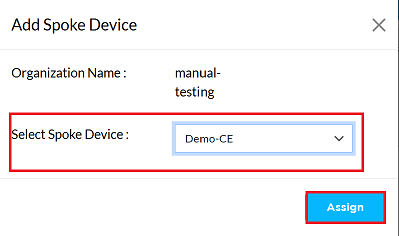
In the Select Spoke Device section, select the CE device to connect to the hub.
-
Click the Assign button.
-
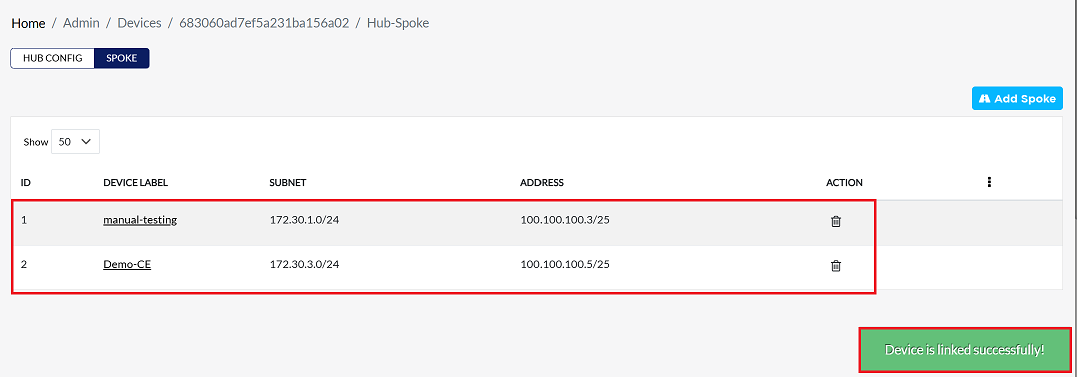
After a successful assignment, the message Device successfully linked appears on the screen, and the new spoke is displayed.
Link Hub to PE
Now that the hub and spokes are configured, link the hub to a PE device.
-
Navigate to Interface > VPN > Link PE.

- Fill in the required details:
- Region: Select the region code specific to the country (i.e., IND for India). Region codes vary by country.
- PE Device IP: Select the PE Device IP from the available options.
- Click the Assign button.
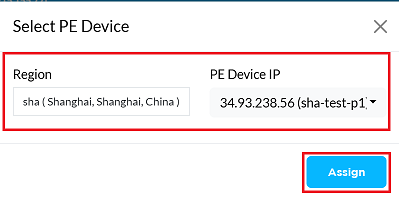
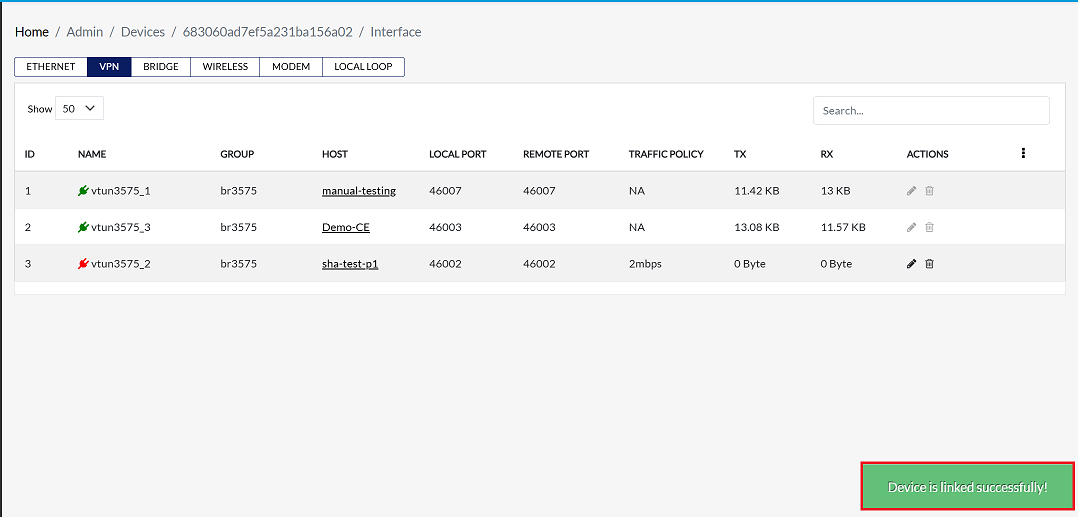
- A Device is linked successfully message will confirm the successful assignment, and the PE link will be visible.
- Fill in the required details:
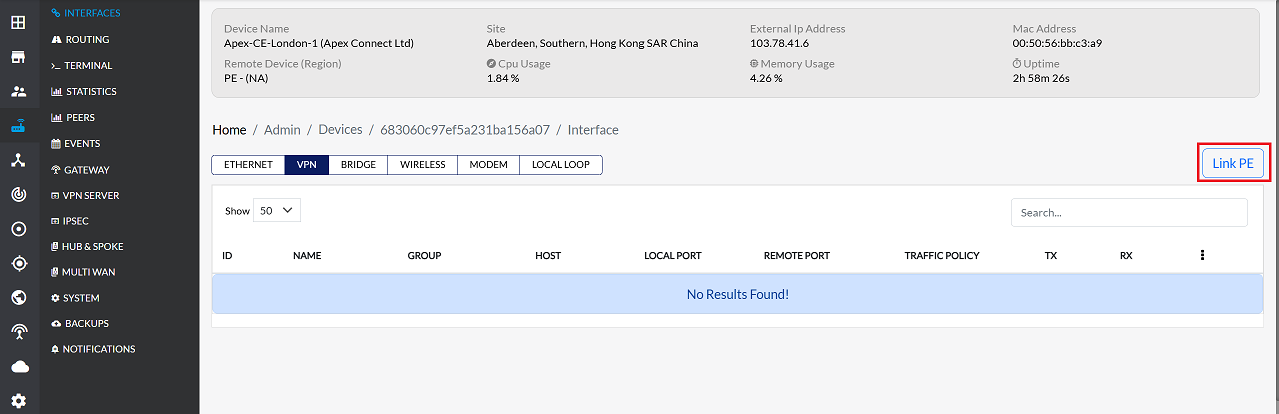
Link a Separate CE Device to the Same PE
Finally, link another CE device (not part of the hub-spoke setup, for example, Apex-CE-London-1) to the same PE device that the hub is linked to.
-
Go to the CE device list and select the desired CE device.
-
Navigate to Interface > VPN > Link PE.
-
Fill in the same information as explained above for linking the hub to the PE (Region and PE Device IP).
-
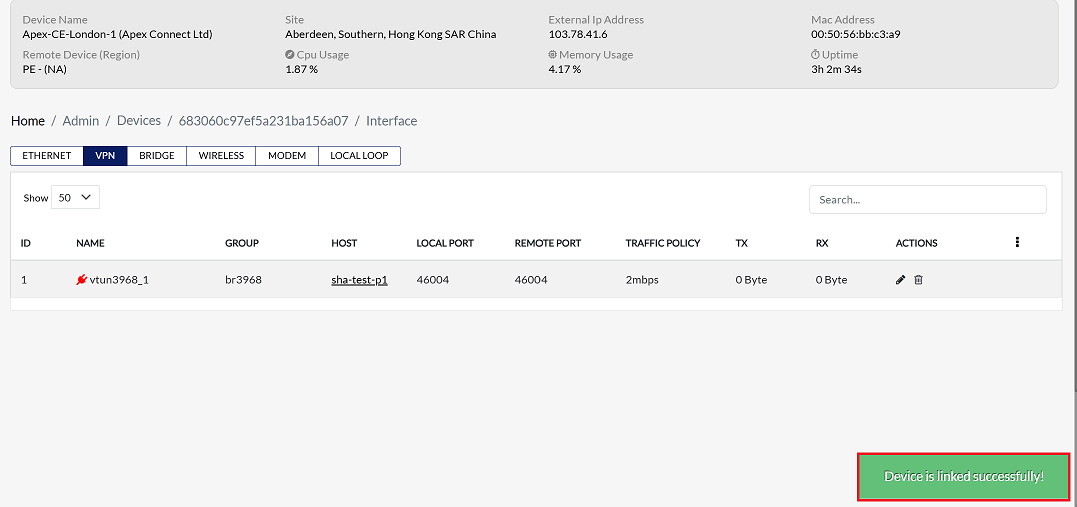
Click the Assign button.

-
A Device is linked successfully message will appear, confirming the successful PE link for this CE device.
Configure Routing
Once the devices are linked, configure the routing for networking between the fourth device and the hub device. For example, route the Apex-CE-london-1 device to the hub device (test CE).
Route CE Device IP on the Hub Device
On the Hub device, add the IP address of the Apex-CE-london-1 device to the routing process.
- Fill in the following details in the Hub device:
- IP address: Enter the IP address of the CE device (i.e., 172.30.1.0)
- Subnet mask: Enter the subnet mask (i.e., 255.255.255.0/24).
- Gateway IP Address: Select the Gateway IP Address (i.e., br25(100.100.100.2)).
- Interface: Select the Interface (i.e., br25).
- Priority: Enter the priority (i.e., 1).
- Then click on Announce Route. (Announce Route is used to route to other devices).
Route Hub Device IP on the CE Device
Similarly, on the Apex-CE-london-1 CE device, add the IP address of the Test-CE Hub to the routing process.
- Fill in the following details in the Hub device:
- IP Address: Enter the IP address of the Hub device (i.e., 192.168.1.0).
- Subnet Mask: Enter the subnet mask (i.e., 255.255.255.0/24).
- Gateway IP Address: Select the Gateway IP Address (i.e., br25(100.100.100.2)).
- Interface: Select the Interface (i.e., br25).
- Priority: Enter the priority (i.e., 1).
- For more information about routing, visit the routing doc provided here.