CE
A Customer Edge (CE) device is the primary network equipment installed at the user's premises that connects directly to the Internet Service Provider (ISP). It functions as both a router and firewall, managing data flow between internal and external networks. In addition to routing traffic, the CE handles essential network operations such as security enforcement, bandwidth control, and Network Address Translation (NAT), ensuring seamless and secure connectivity for users.
Assigning CE
Follow these steps to successfully assign an unassigned CE device to an organization:
-
Login to the system successfully.
-
Navigate to the device management section by clicking on CE Devices in the main navigation menu.
-
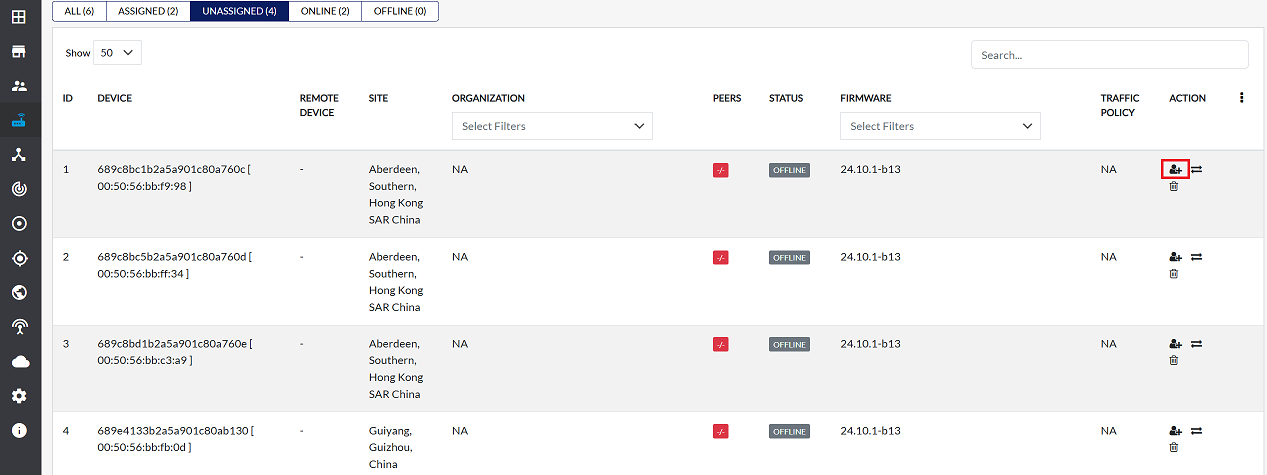
On the CE Devices page, select the Unassigned tab. This will display a list of all devices that are currently not linked to any organization.
-
Find the specific device to assign from the list and click the Assign Device option in its action field.
-
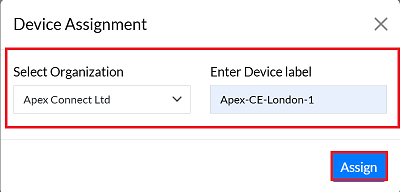
To successfully link the device to an organization, please fill in the following information carefully in the assignment form:
- Select Organization: Choose the correct organization from the dropdown menu. The device will be assigned to this entity. (e.g,: Select Apex Connected Ltd).
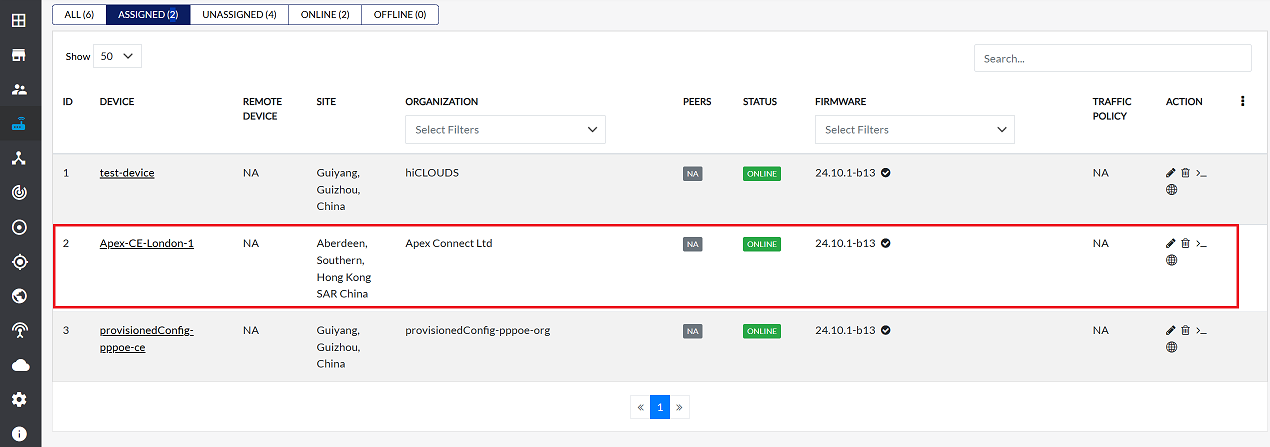
- Enter Device Label: Enter a unique and descriptive label for the device. This label helps in easily identifying the device within the system. It's recommended to include the organization name, device type, and location. (e.g,: Enter Apex-CE-London-1)
- Once all the required details are filled in correctly, carefully review the information.
-
Click the Assign button to confirm the assignment and save the data in the system.
-
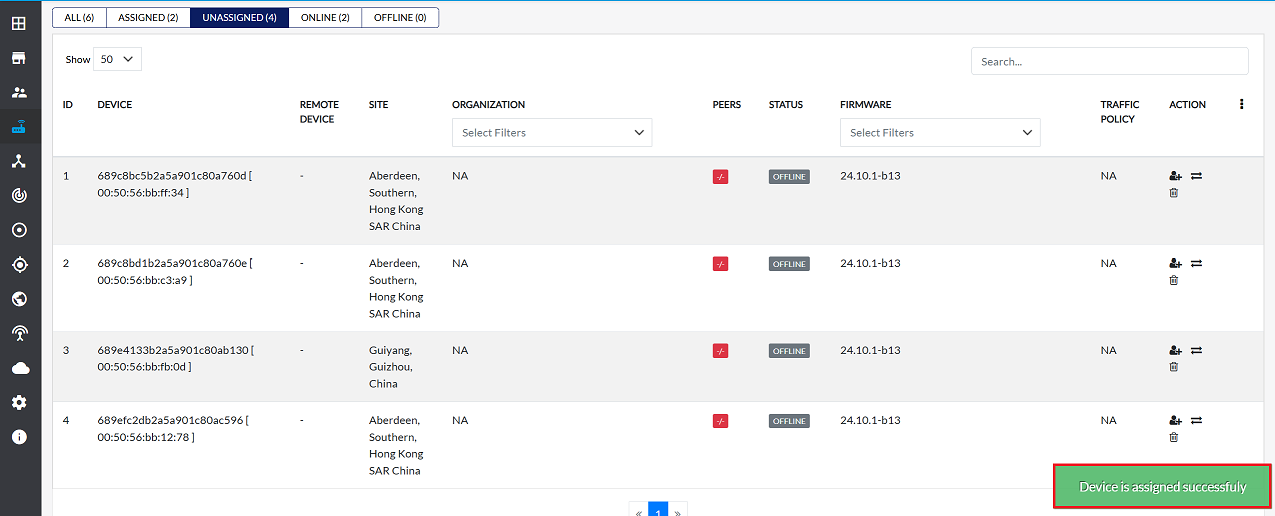
Upon successful assignment, a confirmation message will appear on the screen stating Device is assigned successfully.
-
The newly assigned device will become visible in the Assigned tab within 5 to 10 minutes as the system updates. You can verify the assignment there.
Editing assign CE
To update the details of any CE device, follow these steps:
-
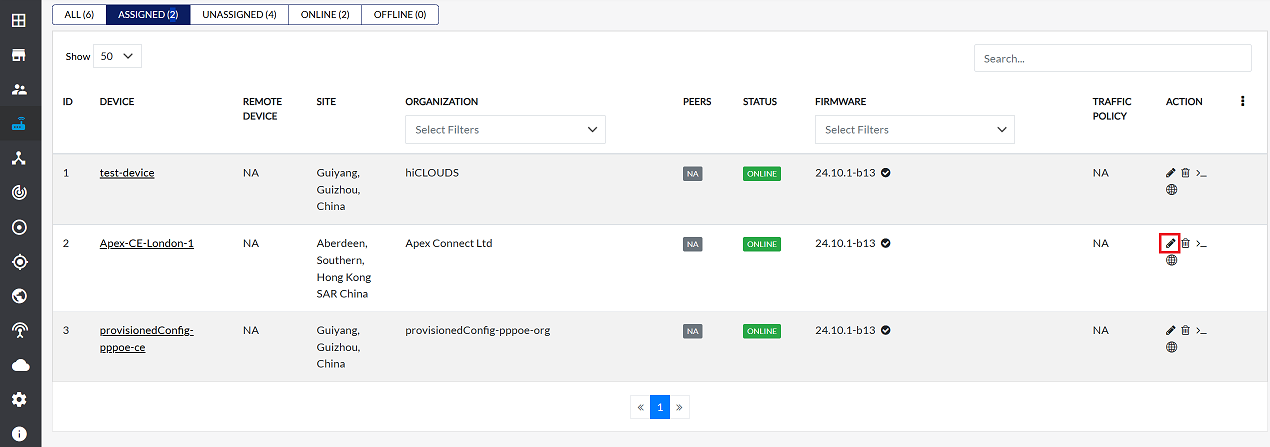
Click on the Edit option in the 'Action' column on the right side of the row of the CE device to be edited.
-
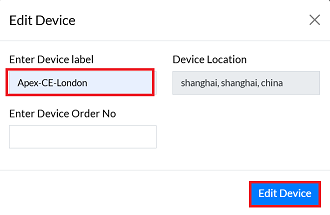
Edit the CE device details as needed. The following details can be updated:
- Enter Device Label:- If the device label needs to be changed, enter the new device label here. In this update, the device label has been changed from Apex-CE-London-1 to Apex-CE-London.
- Enter Device Location:- If the device location needs to be changed, enter the new device location here.
- Device Order Number:- This order number is generated by the NOC team and is added as part of this update.
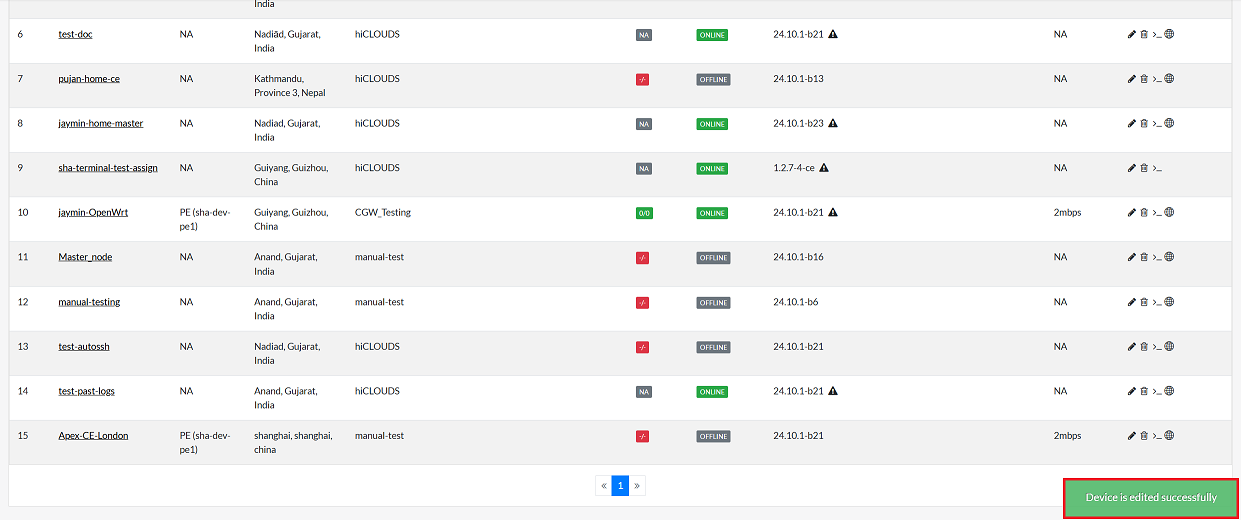
In this update, the device label has been changed from Apex-CE-London-1 to Apex-CE-London.
-
After making all the necessary changes, click on the Edit Device button to apply them.
-
Upon successful assinged, a message will appear on the screen Device is edited successfully.
Accesing terminal
To open the Terminal, follow any of the methods mentioned in the Accessing Terminal section. Choose either from the CE Device Listing or the CE Device Details page.
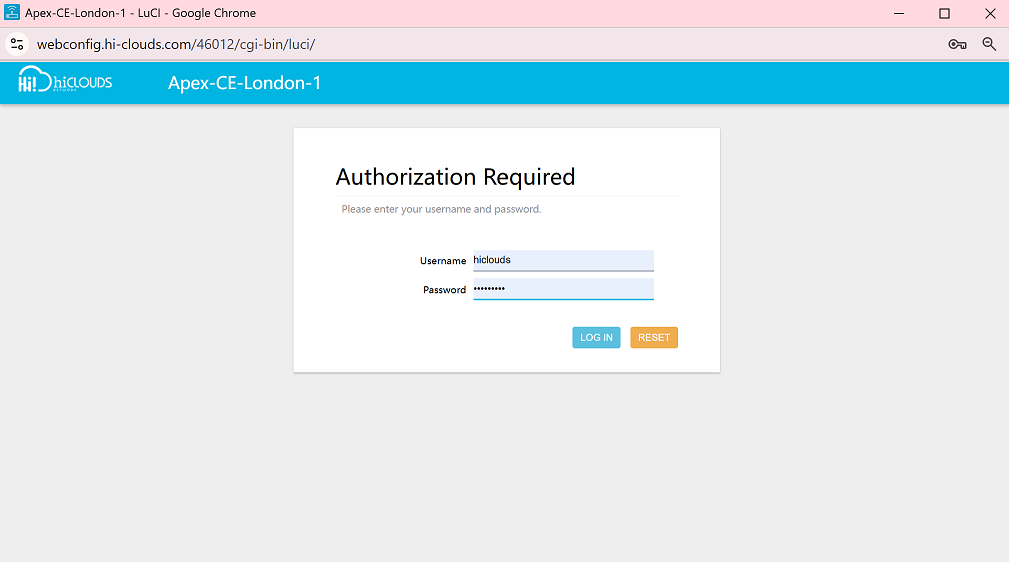
Accesing web terminal
Lusy: While OpenWrt can be managed completely using SSH and the terminal, the LuCI WebUI makes many administration tasks easier. The OpenWrt full releases, such as the current 21.02.x series, ship with the LuCI WebUI installed. But for lower-memory devices, such as those with 4MBytes Flash and/or 32MBytes of RAM, the full install may fail because of lacking sufficient Flash memory so you will have to build your own image with LuCI included. More info on this can be obtained here.
-
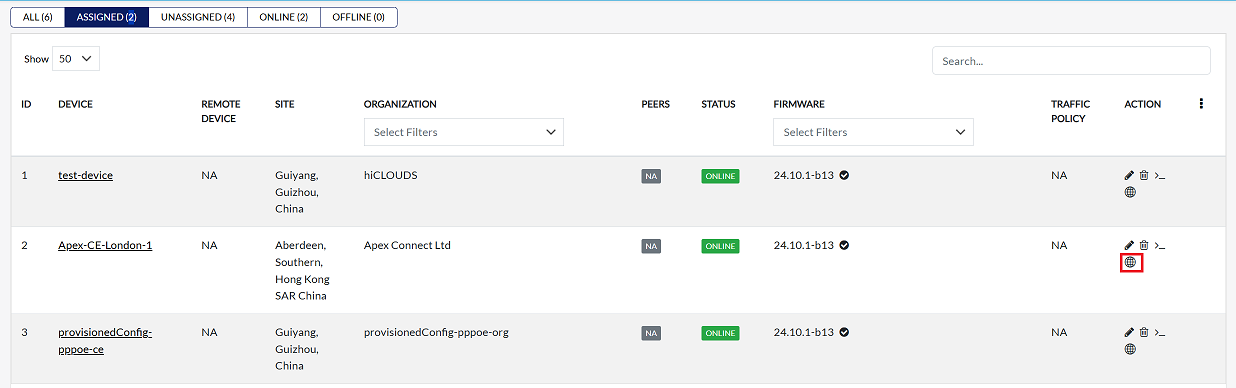
Click on the web terminal icon located on the right side of the Device.
-
Click on it and the web terminal will open.
Deleting Register CE
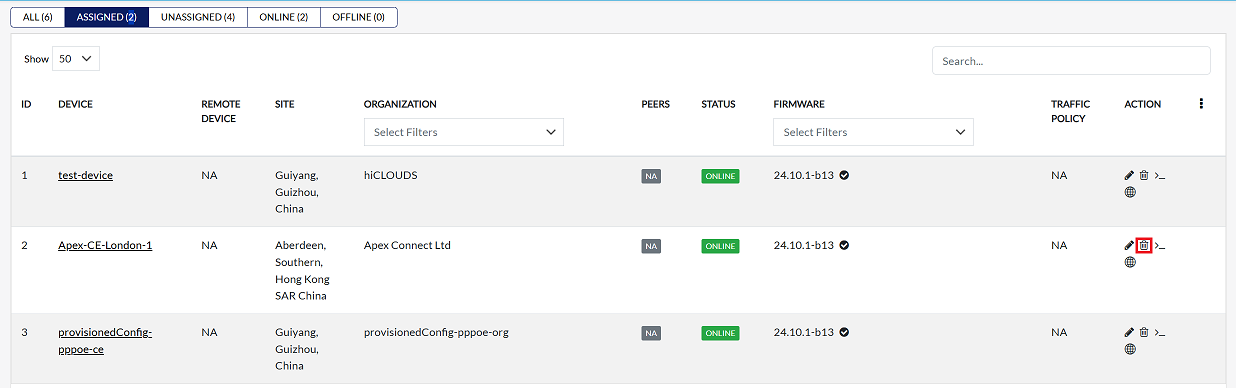
To delete any CE device, follow these steps:
- Click on the Delete option in the 'Action' column in the row of the CE device to be deleted.
-
By clicking on the Delete option, a confirmation message popup will open on the screen. This popup asks to confirm the deletion action again, which prevents accidental deletion.
- The CE device has two options available:
- Confirm Delete: If the CE device really wants to delete the information, click on the Yes button in the popup.
- Cancel Delete: If not intended to delete or clicked by mistake, click on the No button to cancel the action and keep the information safe.
- The CE device has two options available:
-
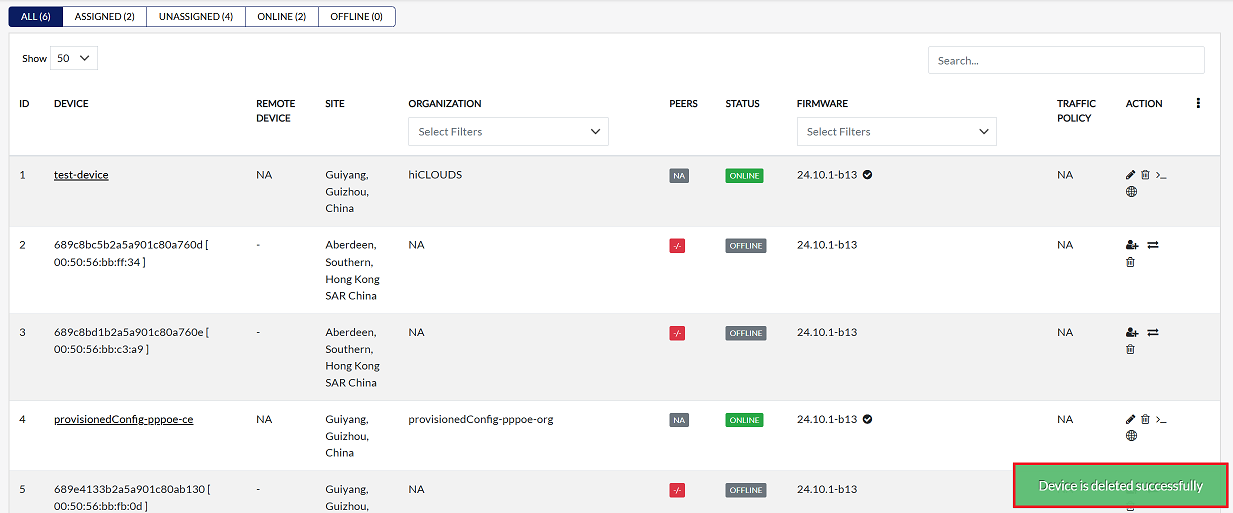
Decision taken in the image As mentioned, the Yes button has been clicked in the image. This means that the deletion action has been confirmed by the CE device and the relevant data will be removed from the system.

- After the organization has been successfully deleted, a message will appear on the screen saying Device is deleted successfully.