Tasks
This document provides a guide to creating, editing, and deleting tasks within the Diagnostic section of the Cloud Platform.
Creating a Task
-
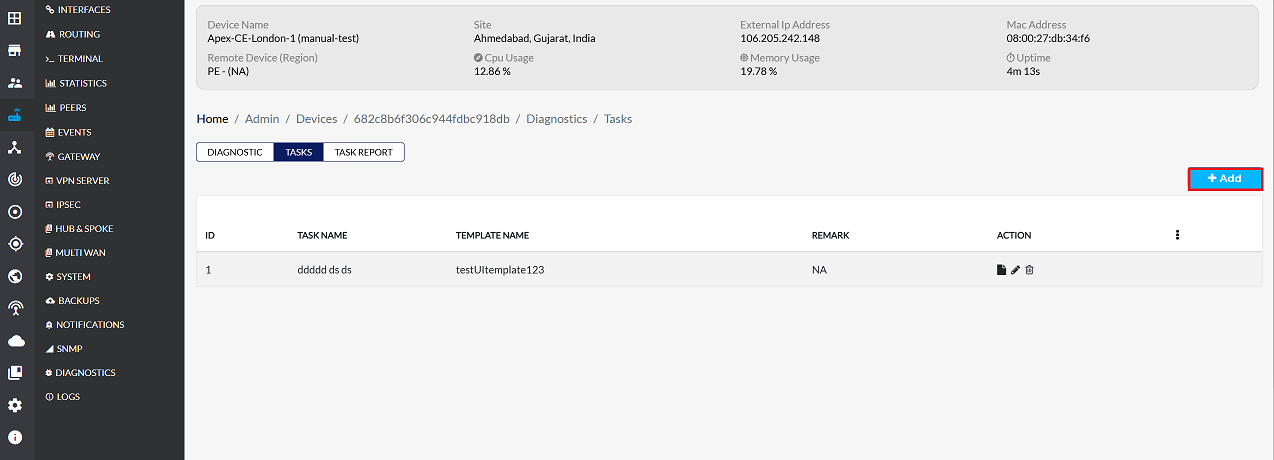
Go to the Login > CE Device > [Select CE] > Diagnostic > Tasks > Add.
-
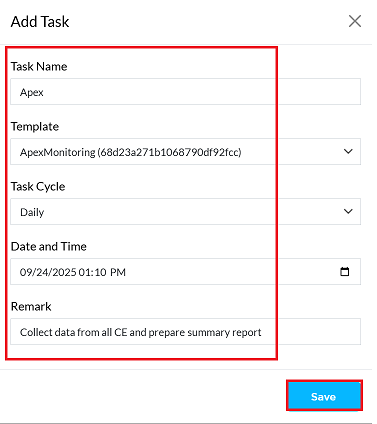
Fill in the task details that appear:
- Task Name: Enter a descriptive name for the task. For example:- Apex.
- Template: Select a template from the dropdown menu. If a new template needs to be created, refer to the Templates For this example, select ApexMonitoring(68d23a271b1068790df92fcc).
template createA template must exist before creating a task.
-
Task Cycle: Choose the frequency for the task from the dropdown. The Task cycle dropdown defines how often a task is reviewed or updated. Choosing the right frequency helps maintain progress tracking without causing unnecessary workload. The four options are:
- Daily:- To see daily updates, select daily. which provides daily task report.
- Weekly:- To see Weekly updates, select Weekly. which provides Weekly task report.
- Monthly:- To see Monthly updates, select Monthly. which provides Monthly task report.
- Quarterly:- To see Quarterly updates, select Quarterly. which provides Quarterly task report. For this example, daily is selected, but the option that best fits the needs should be chosen.
-
Date and Time:- Enter the date and time. This will be based on the CE device's local time. For example: 09/23/2025 01:10 PM.
-
Remark:- Add any relevant remarks or notes about the task. For example: Collect data from all CE and prepare summary report.
-
Click the Save button.
-
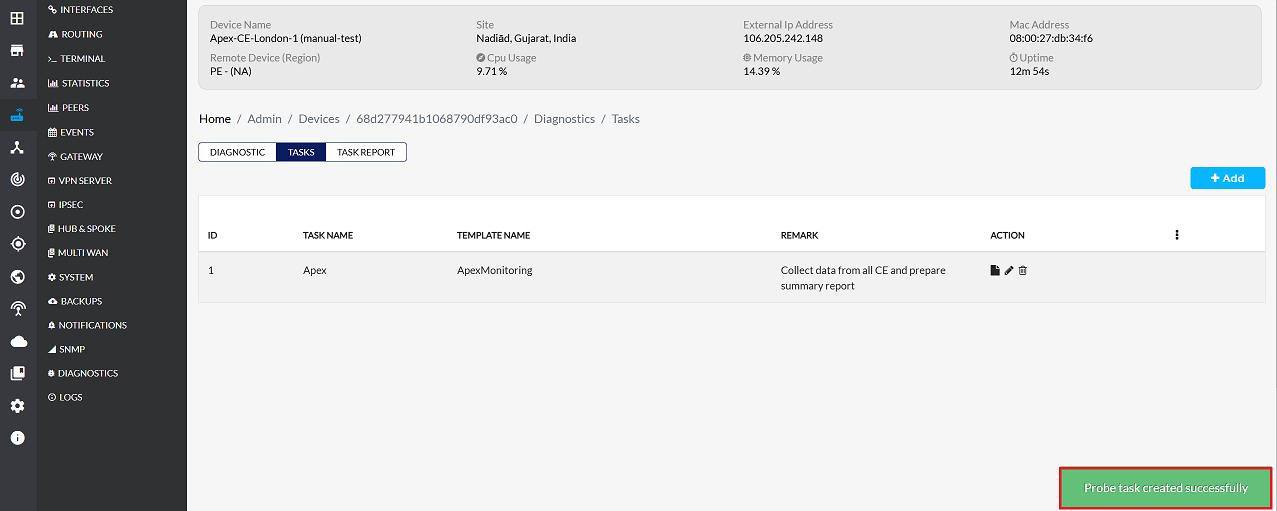
Once the task is successfully created, a message will appear on the screen stating Probe task created successfully
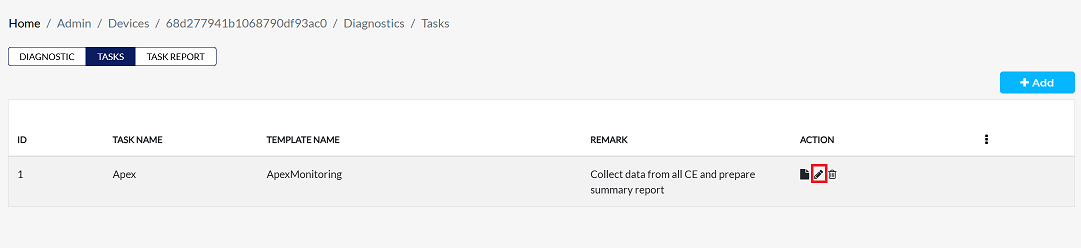
Fields and Descriptions
| Field | Description |
|---|---|
| Task Name | A name for the task. |
| Template Name | The template that defines the data to be collected. |
| Remark | A brief description of the task's purpose. |
| Action | Options to Report, Edit or Delete a task. |
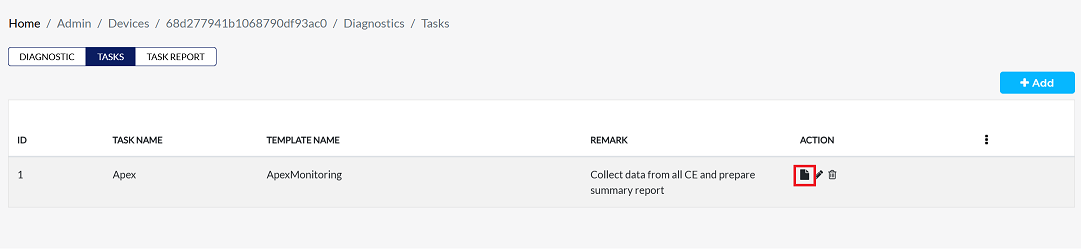
Reporting on a Task
To view the results of a task, a report can be generated.
-
On the Tasks screen, locate the task to report on.
-
Click the Report button next to the task entry.
-
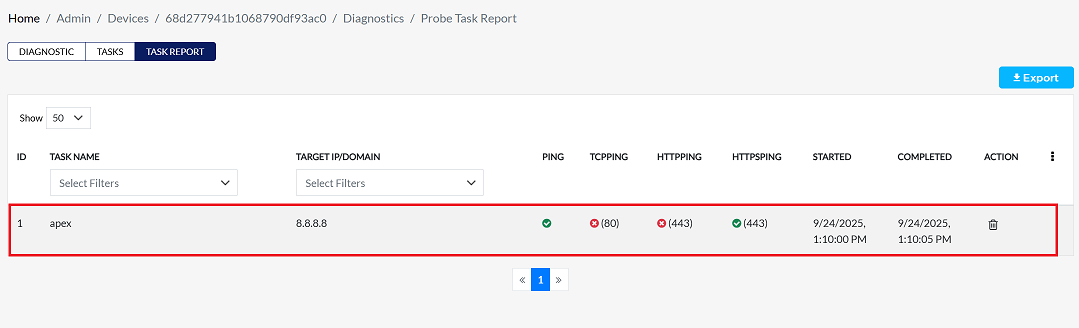
Redirected to the Task Report tab. For detailed instructions on how to view and interpret the report data, please visit the Task Report.
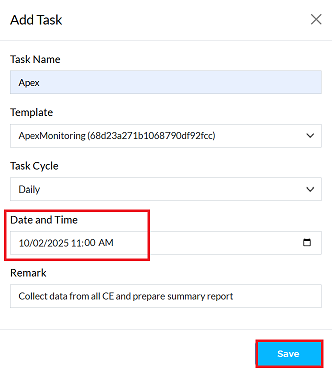
Editing a Task
To modify an existing task:
-
On the Tasks screen, locate the task to edit.
-
Click the Edit button on the right side of the task row.

-
Edit the task details as needed. The following fields can be updated:
- Task Name: If a name change is required, enter the new name here.
- Template: New templates can be added or the existing one can be changed here.
- Task Cycle: If there is a requirement to change the task cycle, it can also be updated.
- Date & Time: The scheduled date and time for the task can be changed.
- Remarks: Any new or updated remarks can be added here.
-
In this specific update, only the Date & Time was changed from 09/23/2025 01:10 PM to 10/02/2025 11:37 AM. All other fields Task Name, Template, Task Cycle, and Remark have been left unchanged as they did not require an update.
-
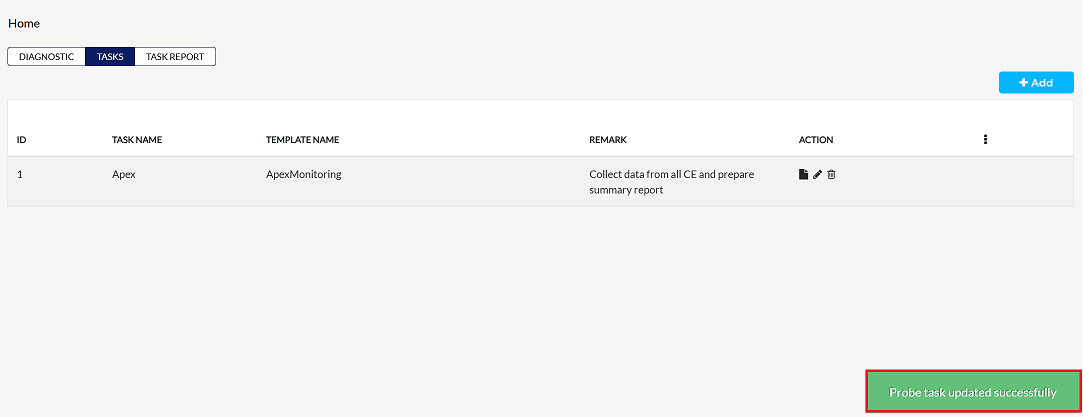
After making all the necessary changes, click Save to confirm and apply the updates.
ImportantChanges will not be applied until the Save button is clicked.
-
A confirmation message, Probe task updated successfully will be displayed upon a successful update.
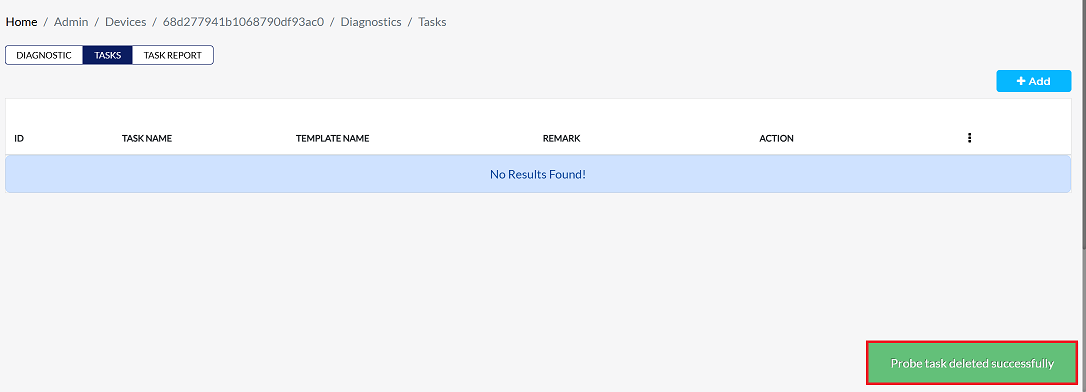
Deleting a Task
-
To delete any Task, follow these steps:
-
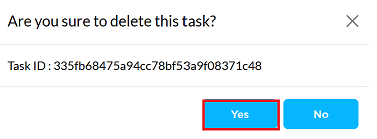
Click on the Delete option in the 'Action' column in the row of the task to be deleted.
-
By clicking on the Delete option, a confirmation message popup will open on the screen. This popup asks to confirm the deletion action again, which prevents accidental deletion.
- The task has two options available:
- Confirm Delete: If the task really wants to delete the information, click on the Yes button in the popup.
- Cancel Delete: If not intended to delete or clicked by mistake, click on the No button to cancel the action and keep the information safe.
- The task has two options available:
-
Decision taken in the image As mentioned, the Yes button has been clicked in the image. This means that the deletion action has been confirmed by the task and the relevant data will be removed from the system.
-
Upon successful deletion, a message will confirm: Probe task deleted successfully.