Replace CE
When a customer equipment (CE) device experiences a problem or failure, a replacement process can be initiated to ensure continuity of service. This process includes registering the new CE device, applying the previous device's configuration, and completing a seamless transition. This guide provides step-by-step instructions for replacing a CE device and completing login, navigation and replacement details.
Replacement Process
-
First, log in to the platform using valid credentials. After successful login, the device management dashboard appears.
-
From the dashboard, select CE Device Menu. This menu allows managing all customer devices
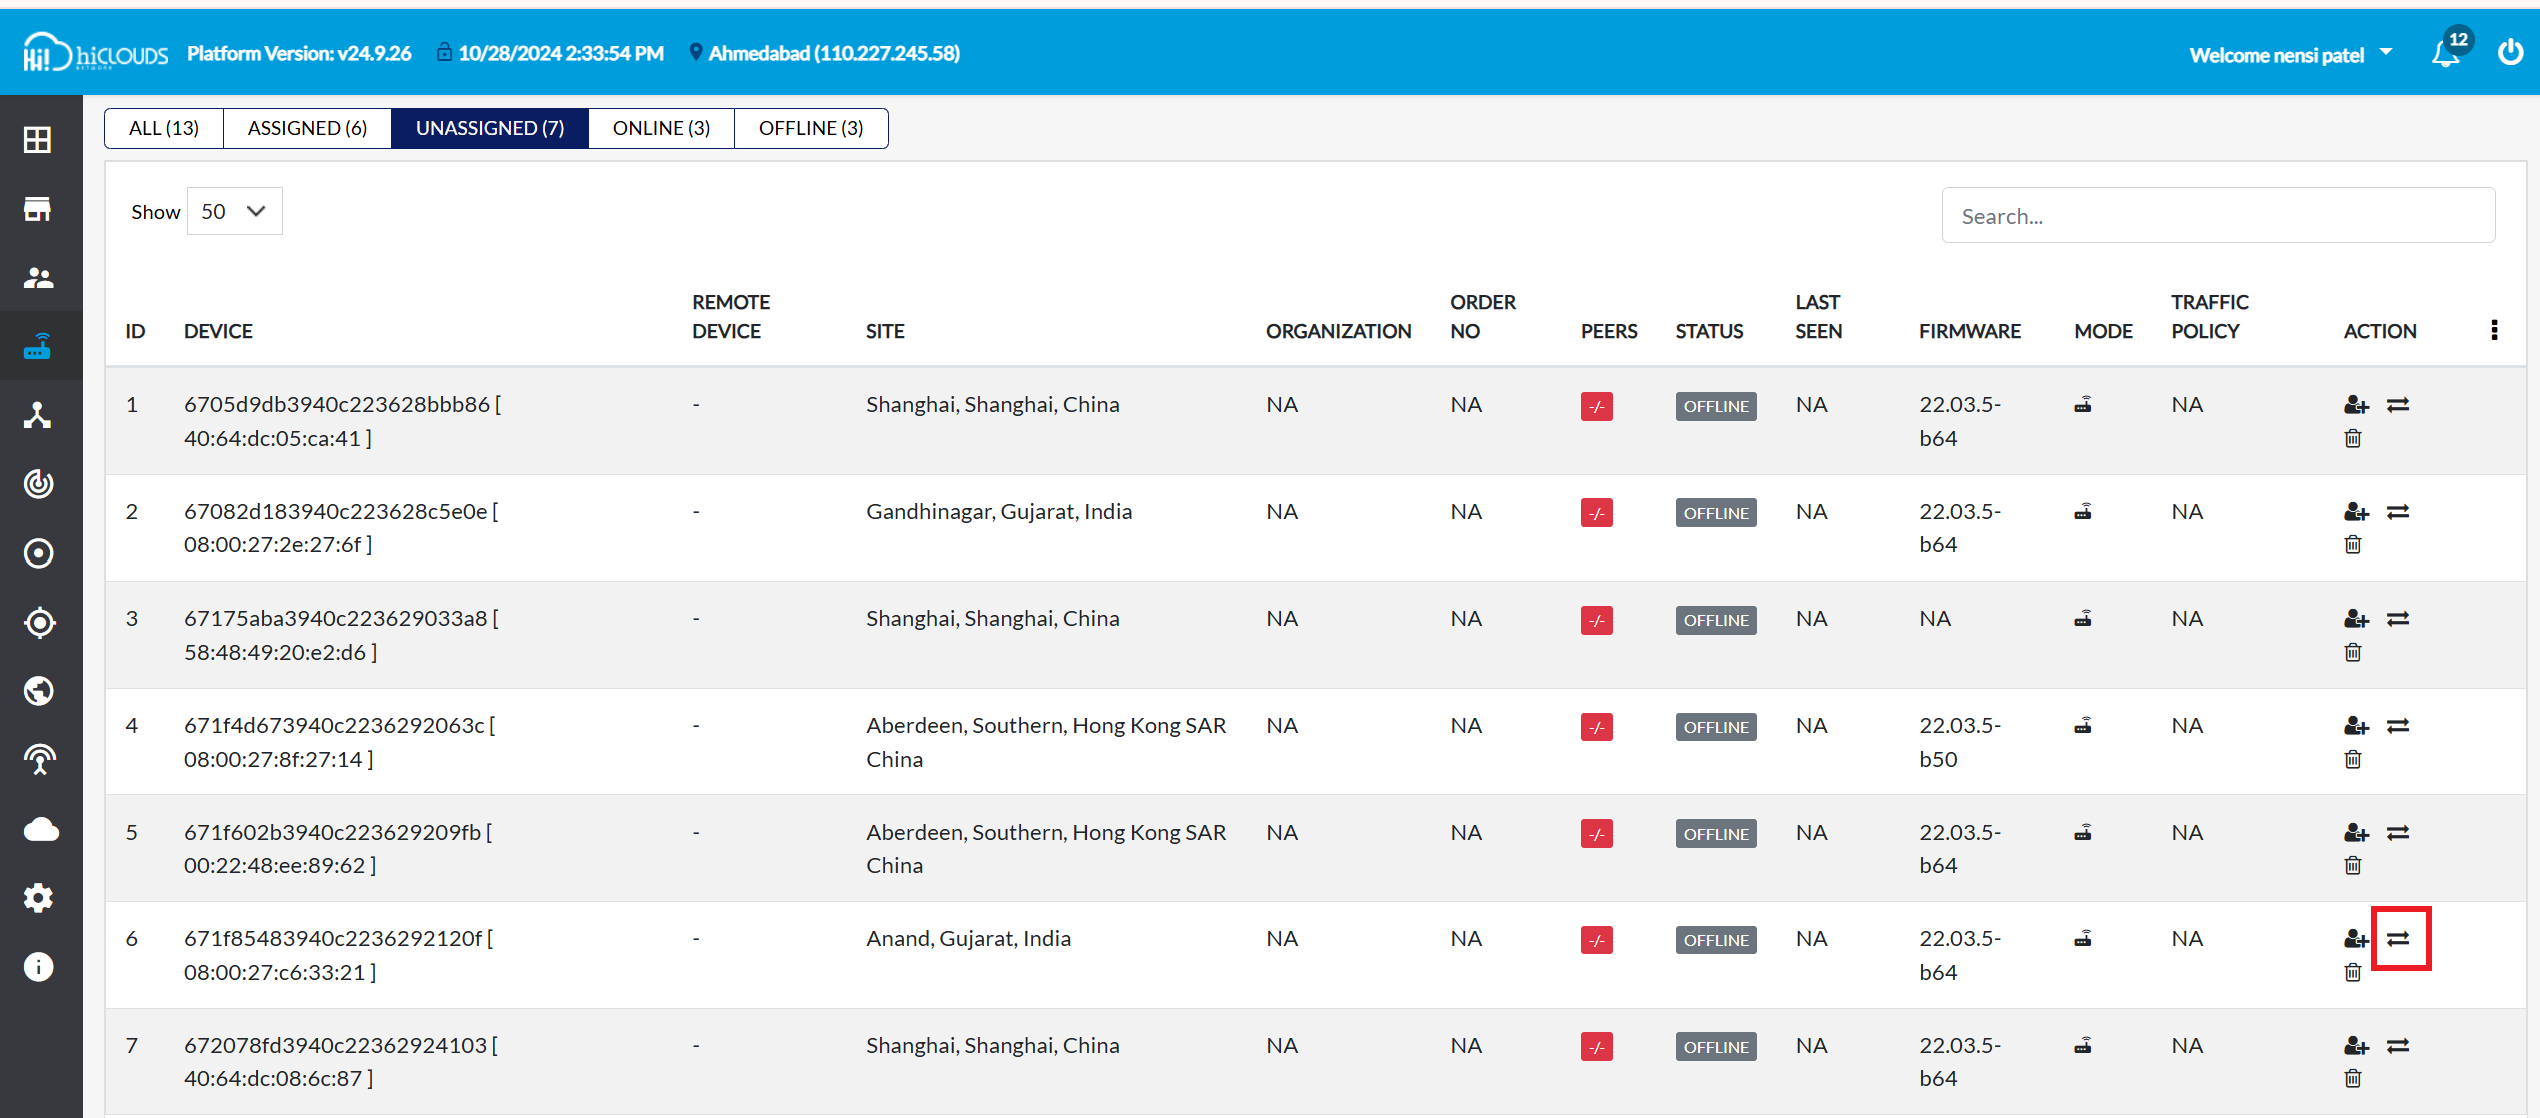
- Find a device eligible for replacement: In the CE Device menu, click the Unassigned tab. This tab will list devices that are eligible for replacement.
-
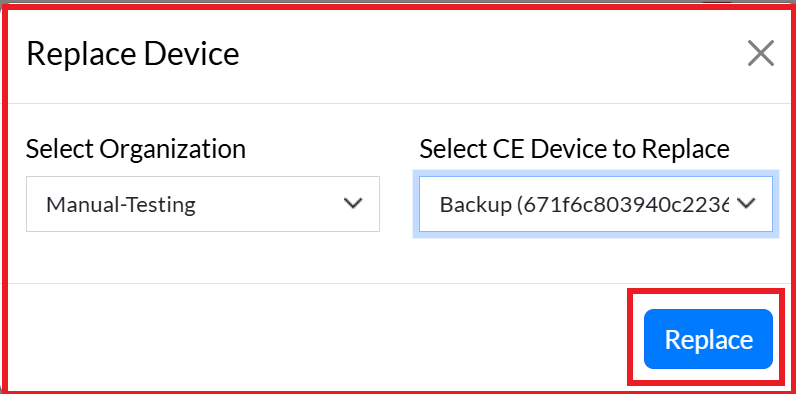
Click on the Replace CE icon on the right side opposite the device to be replaced. This opens the replacement form.
-
In the replacement form, two main details are required:
- Select Organization: Select the relevant organization from the drop-down list.
- Select CE Device to Replace: A list of defective CE devices associated with the organization selected above will be displayed here. Select the correct device from this list.
important-noteOnly devices associated with the selected organization will be displayed here.
-
After filling in both the details, click on the Replace button to finalize the process.
-
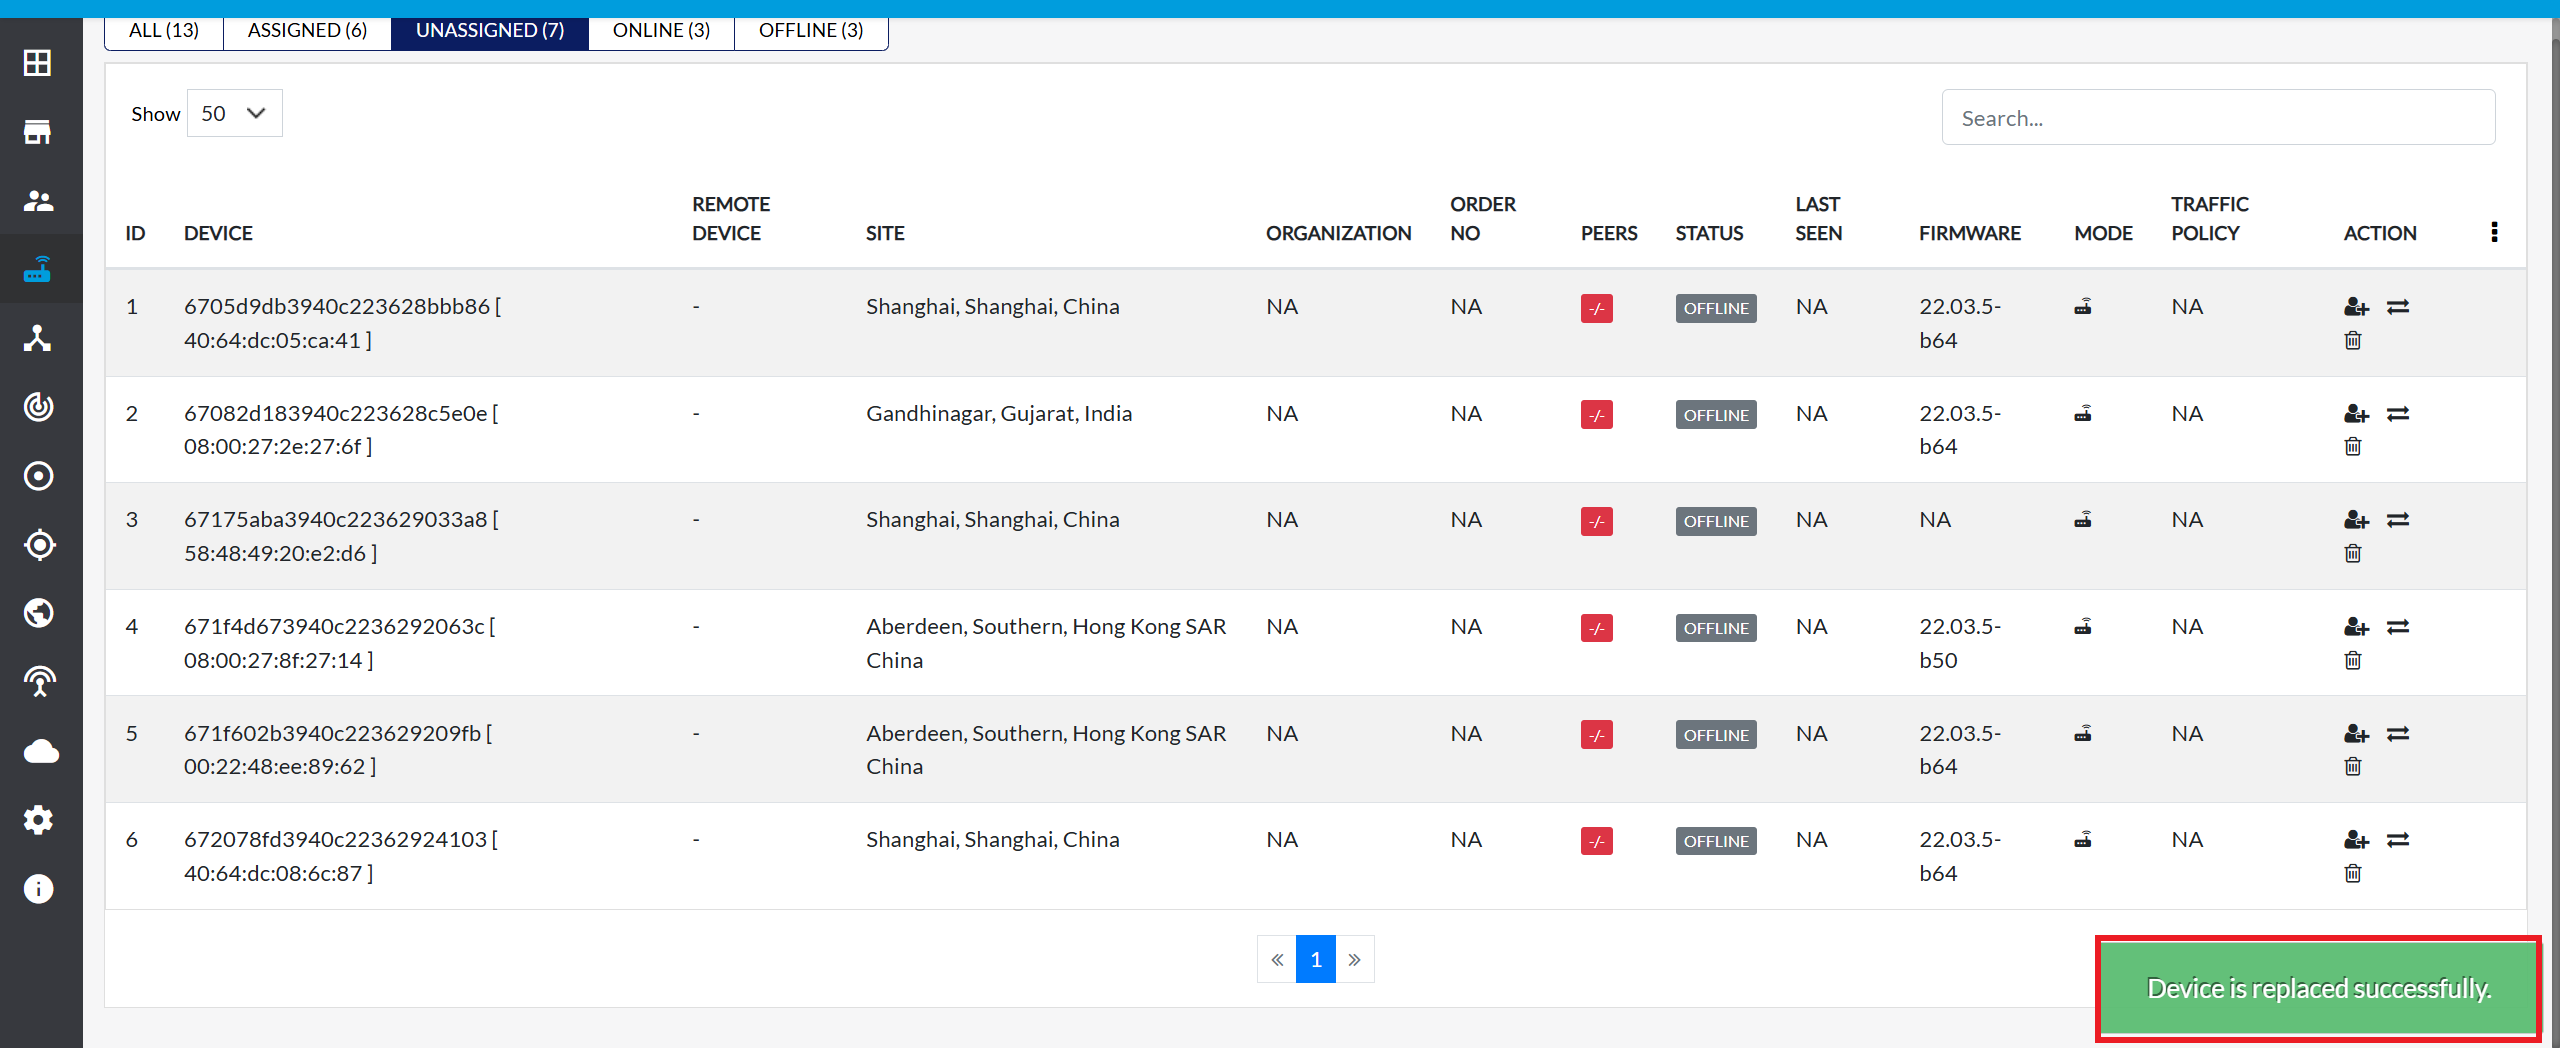
Upon successful replacement, a message will appear on the screen Device is replaced successfully.
FAQ
Q:1 How to replace CE when configured with provisionedConfig?
Q:2 Can CE be replaced with different type of CE model?
Q:3 Can CE be replaced successfully if old CE is still online?
Q:4 How to get CE listed in the "Unassigned" list?