Dynamic[BGP]
Dynamic routing is currently disseminated by BGP (Border Gateway Protocol) to network systems. The use of this protocol in complex topologies is beneficial since it usually provides scalability, reliability, and adaptability. Engaging in BGP among CE devices enables such routing decisions to be automated. This aids in optimizing a better flow of traffic and ensuring that both connected networks can communicate with each other.
The procedures for configuring BGP for three regular CE deployment models are detailed in this guide:
- IPSec Hub-Spoke CE: For the secure, encrypted capacity in the communications of hub-and-spoke topologies.
- OpenVPN Hub-Spoke Site-to-Site CE: For site-to-site transmissions using VPN technology.
- Stand-Alone CE: For independent CE devices not within a bigger topology.
IPSec Hub Spoke CE
This is a detailed guide to setting up dynamic routing (BGP) between two Spoke devices (Spoke 1 and Spoke 2) connected via IPSec VPN, allowing them to communicate directly rather than through a Hub.
Spoke 1 Routing Configuration (Connecting to Spoke 2)
- To enable Spoke 1 to connect to Spoke 2:
| Parameter | Configuration Detail | Example |
|---|---|---|
| Target IP | The LAN IP of Spoke 2 will be entered as the Router ID on Spoke 1. | Spoke 2's LAN IP |
| AS Number | A unique Autonomous System (AS) Number for Spoke 1. | 64512 |
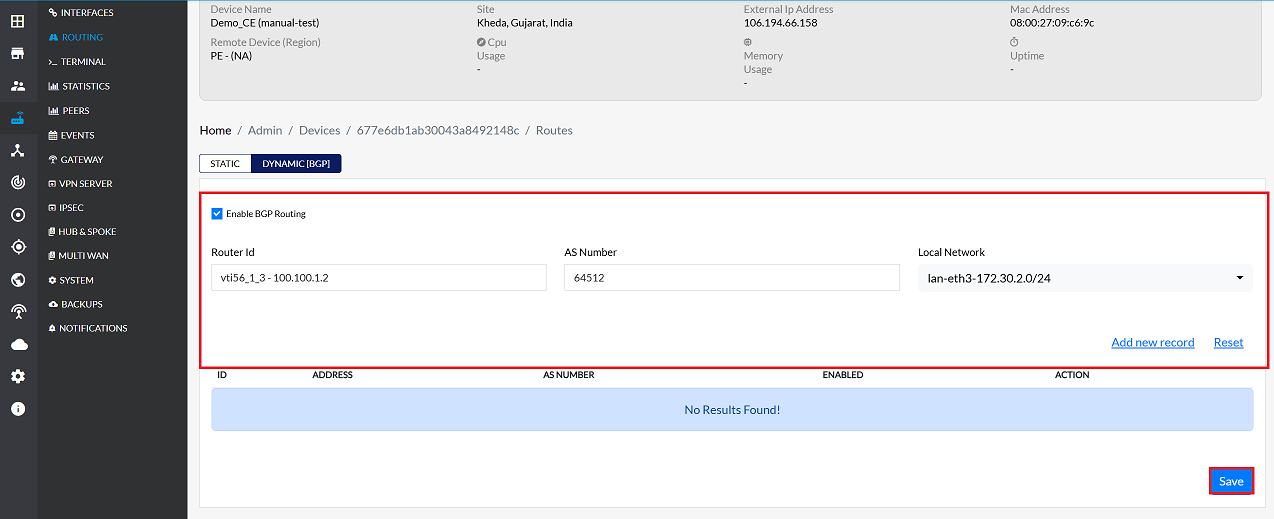
| Local Network | The interface obtained after the IPSec configuration, which contains the Gateway IP. | vti56_1_3-100.100.1.2 |
Steps for Spoke 1
-
Go to Login > CE Devices > [Select Spoke 1] > ROUTING > DYNAMIC [BGP].
-
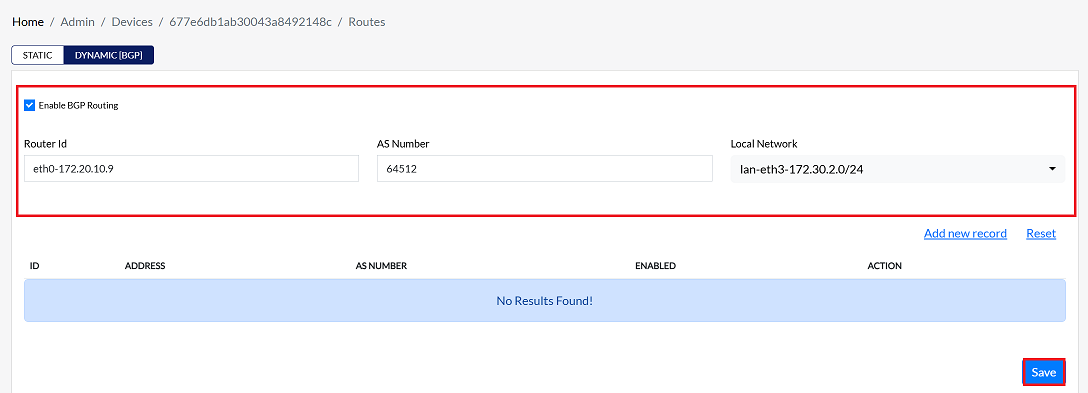
Click and check the checkbox to Enable BGP Routing.
-
Set Router ID: In the Router ID field, enter the Target IP (which is the LAN IP of Spoke 2).
-
Input AS Number: Enter the appropriate Autonomous System (AS) Number (
e.g., 64512). -
Select Local Network: Choose the relevant Local Network from the dropdown menu (
e.g., vti56_1_3-100.100.1.2). -
Click on the Save button.
Spoke 2 Routing Configuration (Connecting to Spoke 1)
- To enable Spoke 2 to connect to Spoke 1:
| Parameter | Configuration Detail | Example |
|---|---|---|
| Target IP | The LAN IP of Spoke 1 will be entered as the Router ID on Spoke 2. | Spoke 1's LAN IP |
| AS Number | A unique Autonomous System (AS) Number for Spoke 2 (different from Spoke 1 if using eBGP). | 64513 |
| Local Network | The interface obtained after the IPSec configuration, which contains the Gateway IP. | vti56_1_3 - 100.100.1.2 |
Steps for Spoke 2
-
Go to Login > CE Devices > [Select Spoke 2] > ROUTING > DYNAMIC [BGP].
-
Click and check the checkbox to Enable BGP Routing.
-
Provide the following information in the respective fields.
- Set Router ID: In the Router ID field, enter the Target IP (which is the LAN IP of Spoke 1).
- Input AS Number: Enter the appropriate Autonomous System (AS) Number (e.g., 64513).
- Select Local Network: Choose the relevant Local Network from the dropdown menu (e.g., vti56_1_3-100.100.1.2).
-
Click on the Save button.
-
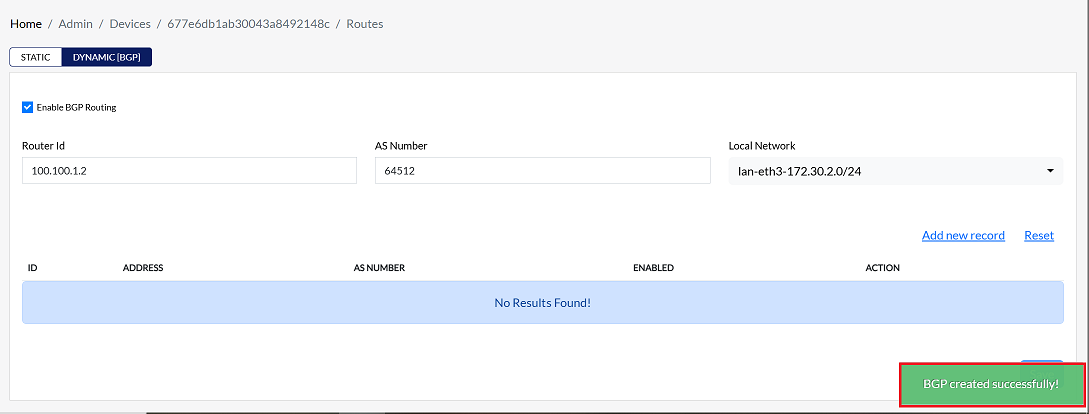
After saving the configuration on both Spoke devices, you will see a confirmation message of BGP created successfully. After a few moments, the BGP session should be in the "Established" state, and both Spokes will be able to exchange routes to each other's networks, providing Spoke-to-Spoke connectivity.
OpenVPN Hub Spoke site-to-site CE
This guide details the process of configuring Border Gateway Protocol (BGP) routing on two Customer Edge (CE) devices, Spoke 1 and Spoke 2, to establish a secure site-to-site connection using the Hub-Spoke topology.
The key principle is that the LAN IP address of the peer device acts as the Router ID (Target IP) on the device being configured.
Prerequisite: Before proceeding with BGP configuration, the Hub-Spoke configuration must be completed. This configuration creates a local network (a bridge and gateway IP) that is necessary for the routing process.
Configuration for Spoke 1 (Connecting to Spoke 2)
-
Go to the Login > CE Devices > [Select CE] > ROUTING > DYNAMIC[BGP].
-
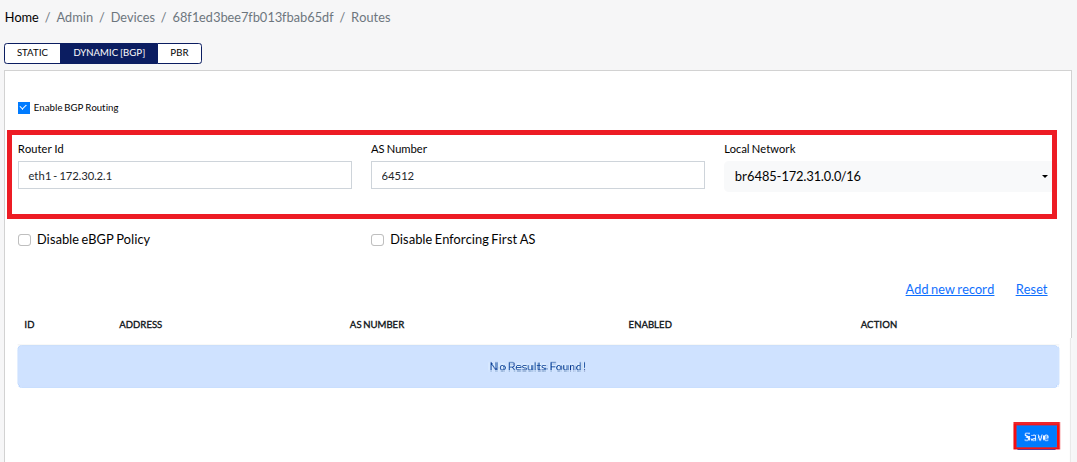
Click and check the checkbox to Enable BGP Routing.
-
Provide the following information in the respective fields.
- Router Id:- Enter the LAN IP of Spoke 2 (the target device). Example: eth1-172.30.2.1
- AS Number:- Enter the appropriate Autonomous System (AS) Number. (
e.g: 64512.) - Local Network:- Select the appropriate local network from the dropdown menu (created during the Hub-Spoke configuration). (
e.g:- br6485-172.31.0.0/16.) - Click on the Save button
- Upon successfully configuration, a confirmation message will appear BGP created successfully
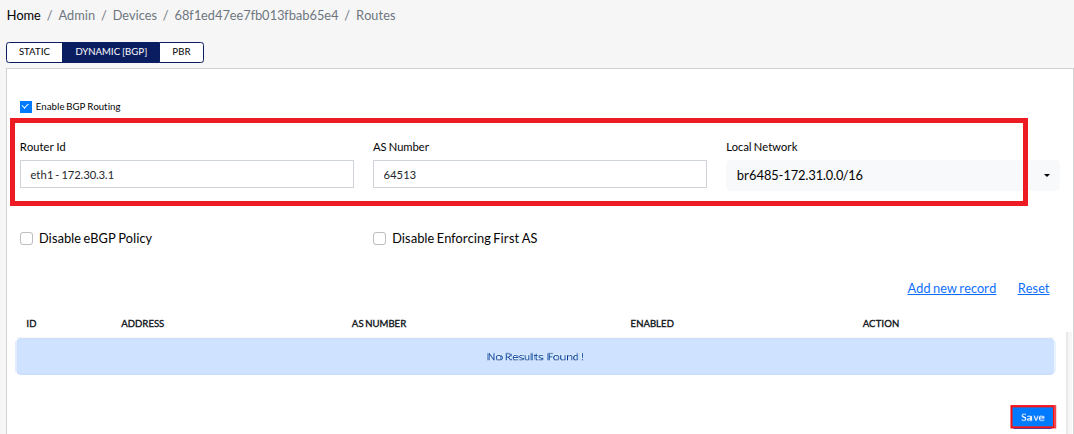
Configuration for Spoke 2 (Connecting to Spoke 1)
-
Go to the Login > CE Devices > [Select CE] > ROUTING > DYNAMIC[BGP].
-
Click and check the checkbox to Enable BGP Routing.
-
Provide the following information in the respective fields.
- Router Id:- Enter the LAN IP of Spoke 2 (the target device). (
e.g: eth1-172.30.3.1) - AS Number:- Enter the appropriate Autonomous System (AS) Number. (
e.g: 64512.) - Local Network:- Select the appropriate local network from the dropdown menu (created during the Hub-Spoke configuration). (
e.g:- br6485-172.31.0.0/16.) - Click on the Save button
- Upon successfully configuration, a confirmation message will appear BGP created successfully
- Router Id:- Enter the LAN IP of Spoke 2 (the target device). (
Stand-Alone CE
-
Go to the Login > CE Devices > [Select CE] > ROUTING > DYNAMIC[BGP].
-
Enable BGP Routing: Check the box labeled Enable BGP Routing.
-
Provide the following information in the respective fields.
- Router ID: Enter the unique Router ID for this CE device. This ID is essential as it identifies the device within the BGP network and is typically represented as an IP address.
- AS Number:- Input the Autonomous System (AS) Number. This public or private number is crucial for BGP peering and routing, as it uniquely identifies the network to the external world.
- Local Network:- Select the appropriate local network from the dropdown menu. This step advertises the specific network connected to the CE device.
- Click on the Save button
- Upon successfully configuration, a confirmation message will appear BGP created successfully