PE
This document explains how to assign, modify, and delete a system's PE (Provider Edge) device. It also explains how to use the terminal to view device settings and troubleshoot problems.
Prerequisites
Before using PE devices, you must create a region. To learn how to create a region, please see the Create Region documentation. Regions are necessary because they define the rules for assigning IP addresses (internal and external) to PE devices.
Assigning a PE Device
Follow these steps to successfully assign an unassigned PE device to a site.
-
Login to the system successfully.
-
Navigate to the device management section by clicking on PE Devices in the main navigation menu.
-
On the PE Devices page, select the Unassigned tab. This will display a list of all devices that are currently not linked to any organization.
-
Find the specific device to assign from the list and click the Assign Device option in its action field.

-
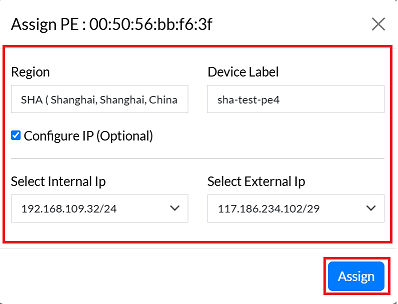
In the "Assign Device" section, the following information must be provided:
-
Region: Enter the geographical region where the device is located. You will type the region, it will appear in the list below, and you will be able to select from there.
-
Device Label: Give a simple and understandable name to identify a specific device.
-
Configure IP (Optional): Check this box to manually configure IP addresses.
- If checked, the following fields become mandatory.
- Select Internal Ip: Choose the internal IP address from the dropdown menu.
- Select External Ip: Choose the external IP address from the dropdown menu.
- If checked, the following fields become mandatory.
-
Click on the Assign button.
-
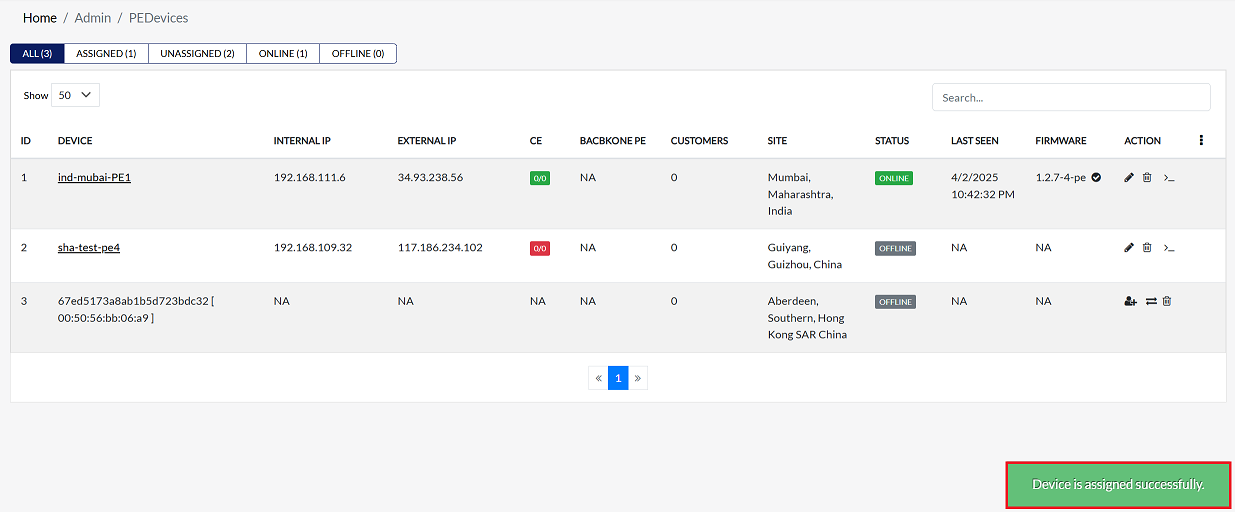
By clicking on Save Config, a message will appear on the screen indicating that the Device is assined successfully.
-
If you want to assign multiple PEs (Provider Edges) to the same region, you will need to add a new external IP and internal IP address to that region, and then you can assign a new PE to the same region. To add a new IP, follow the same procedure as before.
Accessing Device Terminal
A command has to be written to connect to CE and a terminal is required for that.
-
Click on the pen located on the right side of your Device.
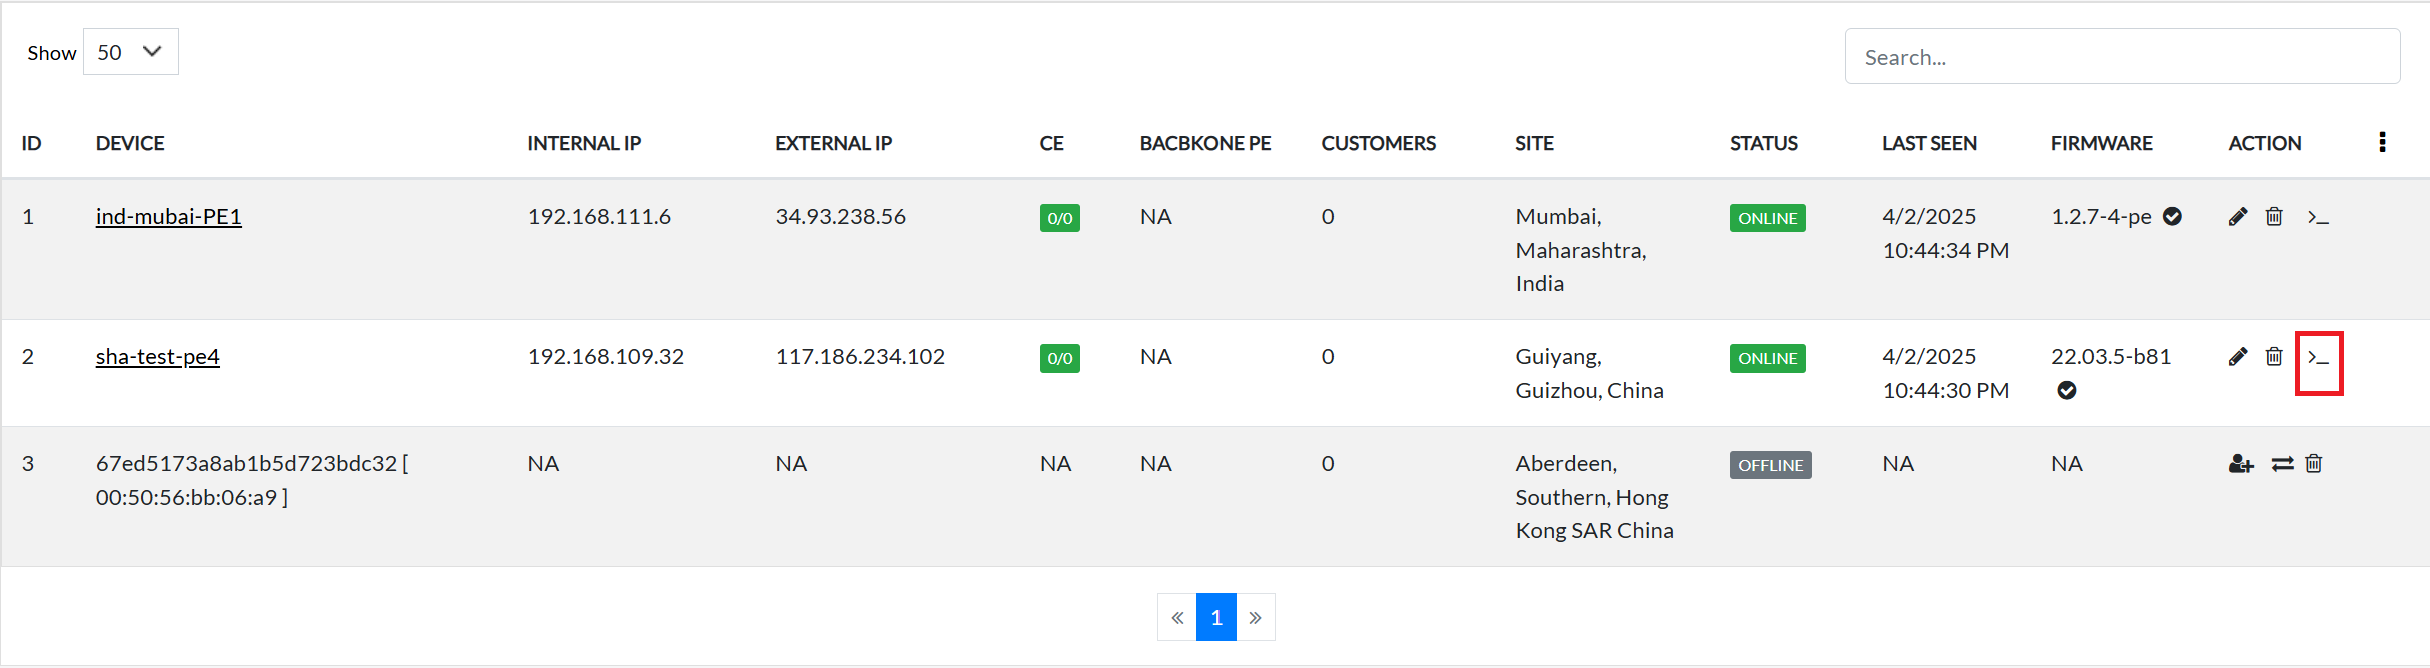
-
Click on it and the terminal will open.

Editing Device
To update the details of any PE device, follow these steps:
-
Click on the Edit option in the 'Action' column on the right side of the row of the PE device to be edited.
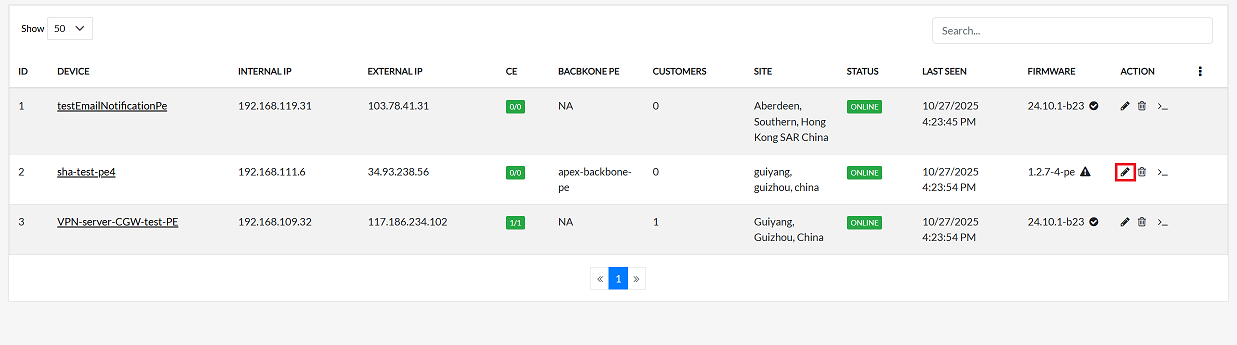
-
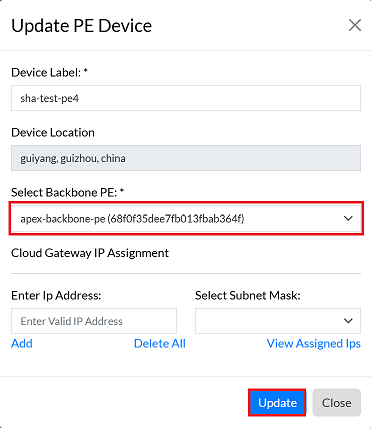
Edit the PE device details as needed. The following details can be updated:
- Device Label: If a change to the device's identifier is required, enter the new device label here.
- Device Location: Update the device's physical location. Enter the new location as required.
- Select Backbone PE: This option allows changing the Backbone PE (Provider Edge) device associated with the current device. For example, a new Backbone PE like apex-backbone-pe may be selected and added during this configuration update.
- Cloud Gateway IP Assignment: Select the desired method for IP address assignment for the cloud gateway to implement changes to the IP configuration.
- Enter IP Address: If a specific IP address change is required (and applicable based on the Cloud Gateway IP Assignment method), manually enter the new IP address here.
- Select Subnet Mask: Choose the appropriate subnet mask from the available options to align with the new IP configuration.
-
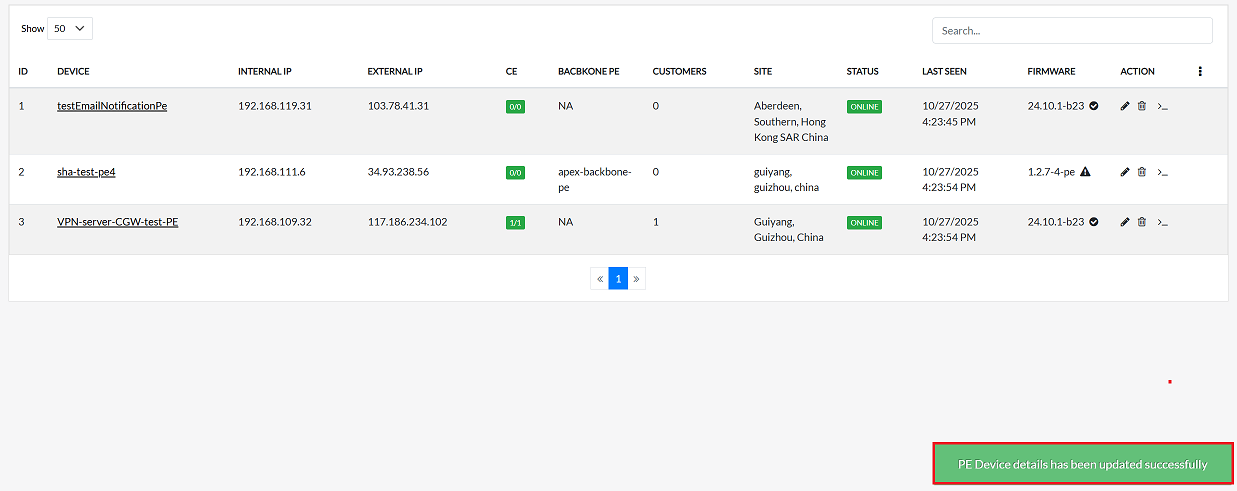
After making all the necessary changes, be sure to update or update the configuration to apply them to the device.
-
By clicking on update Config, a message will appear on the screen indicating that the PE Device details has been updated successfully.
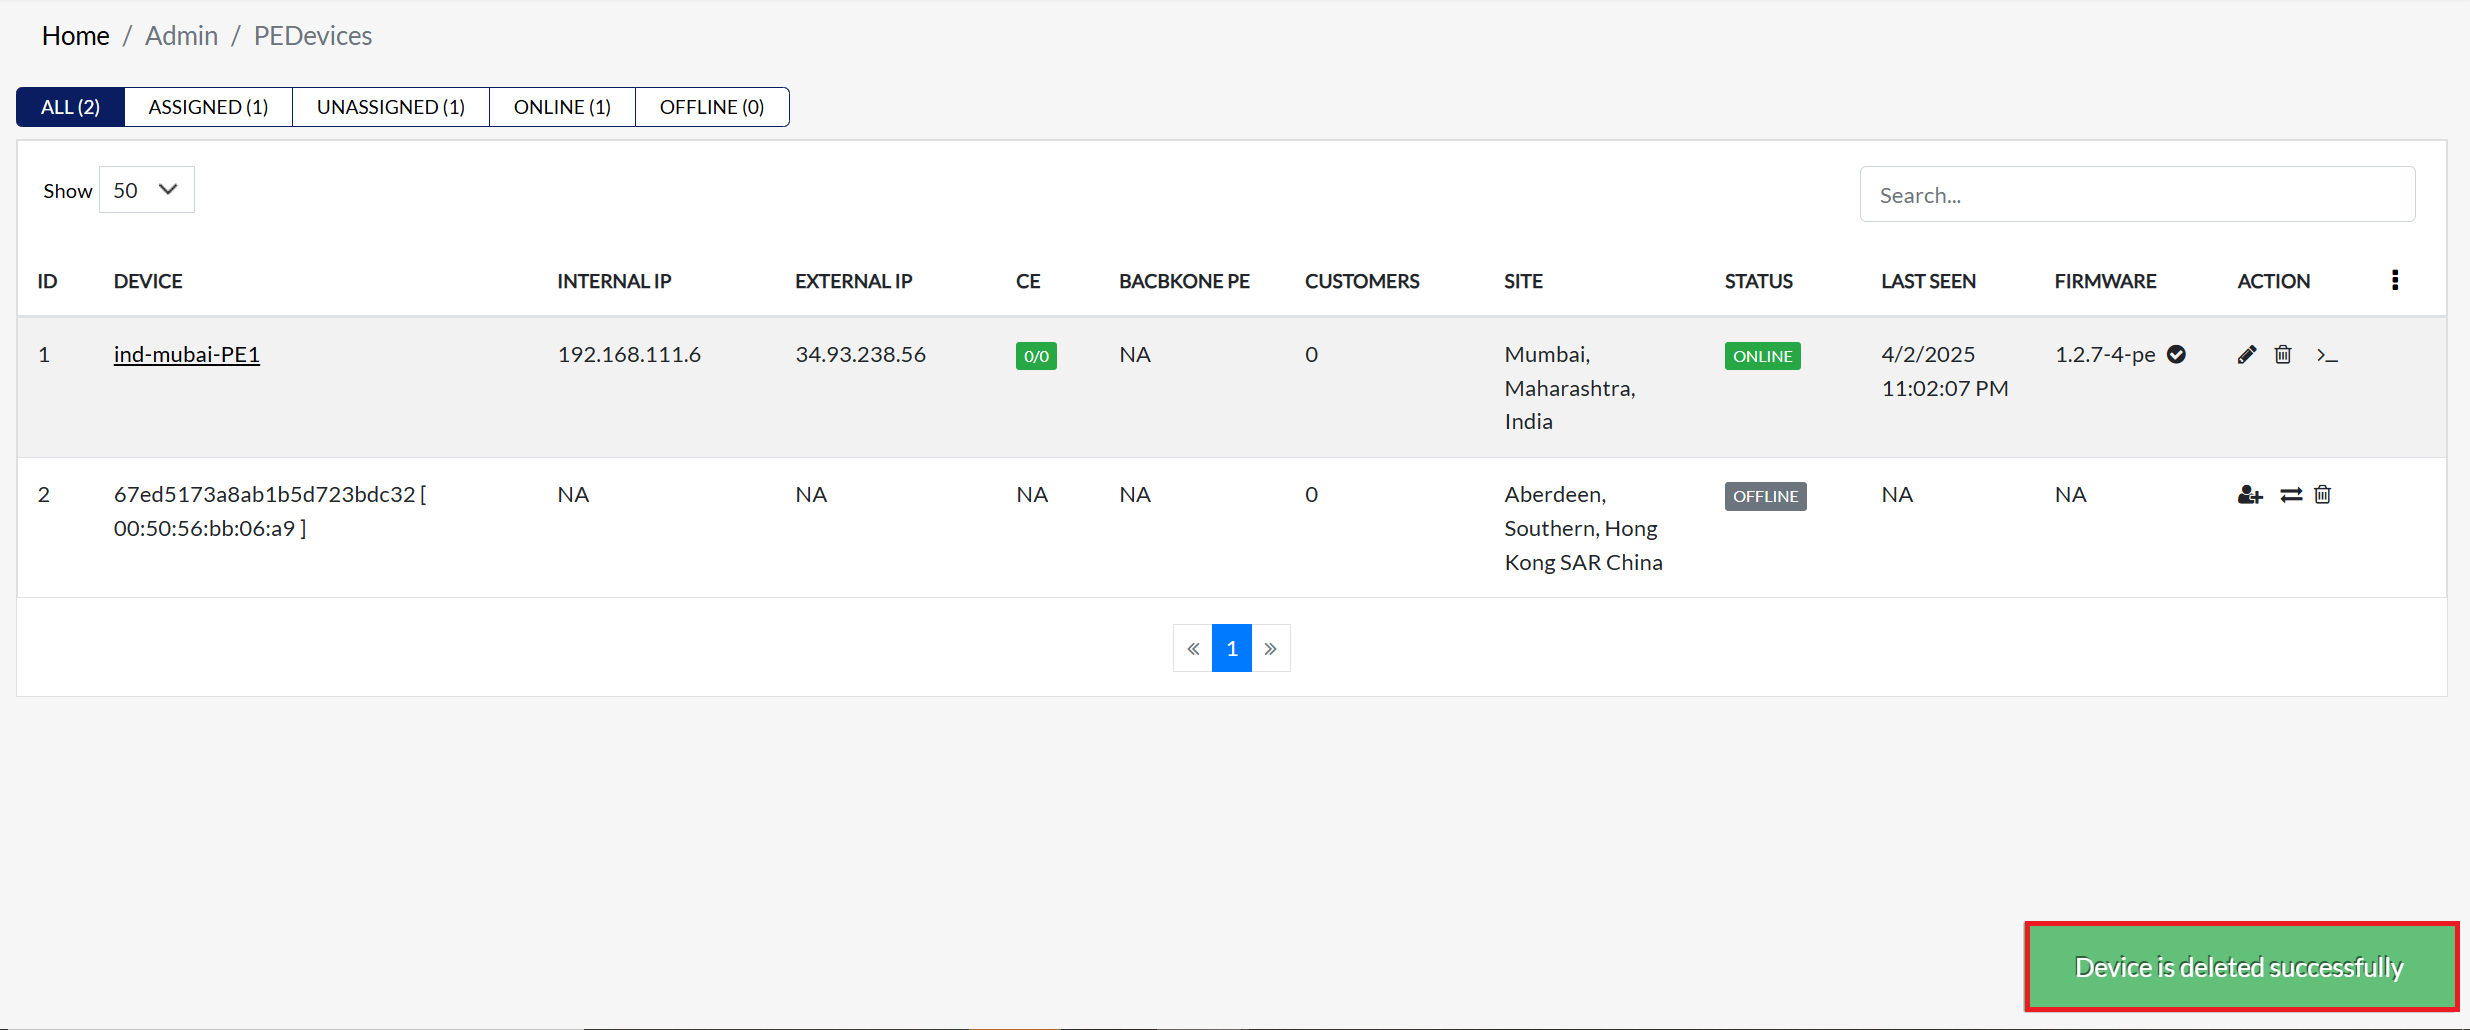
Deleting Device
To delete any PE device, follow these steps:
-
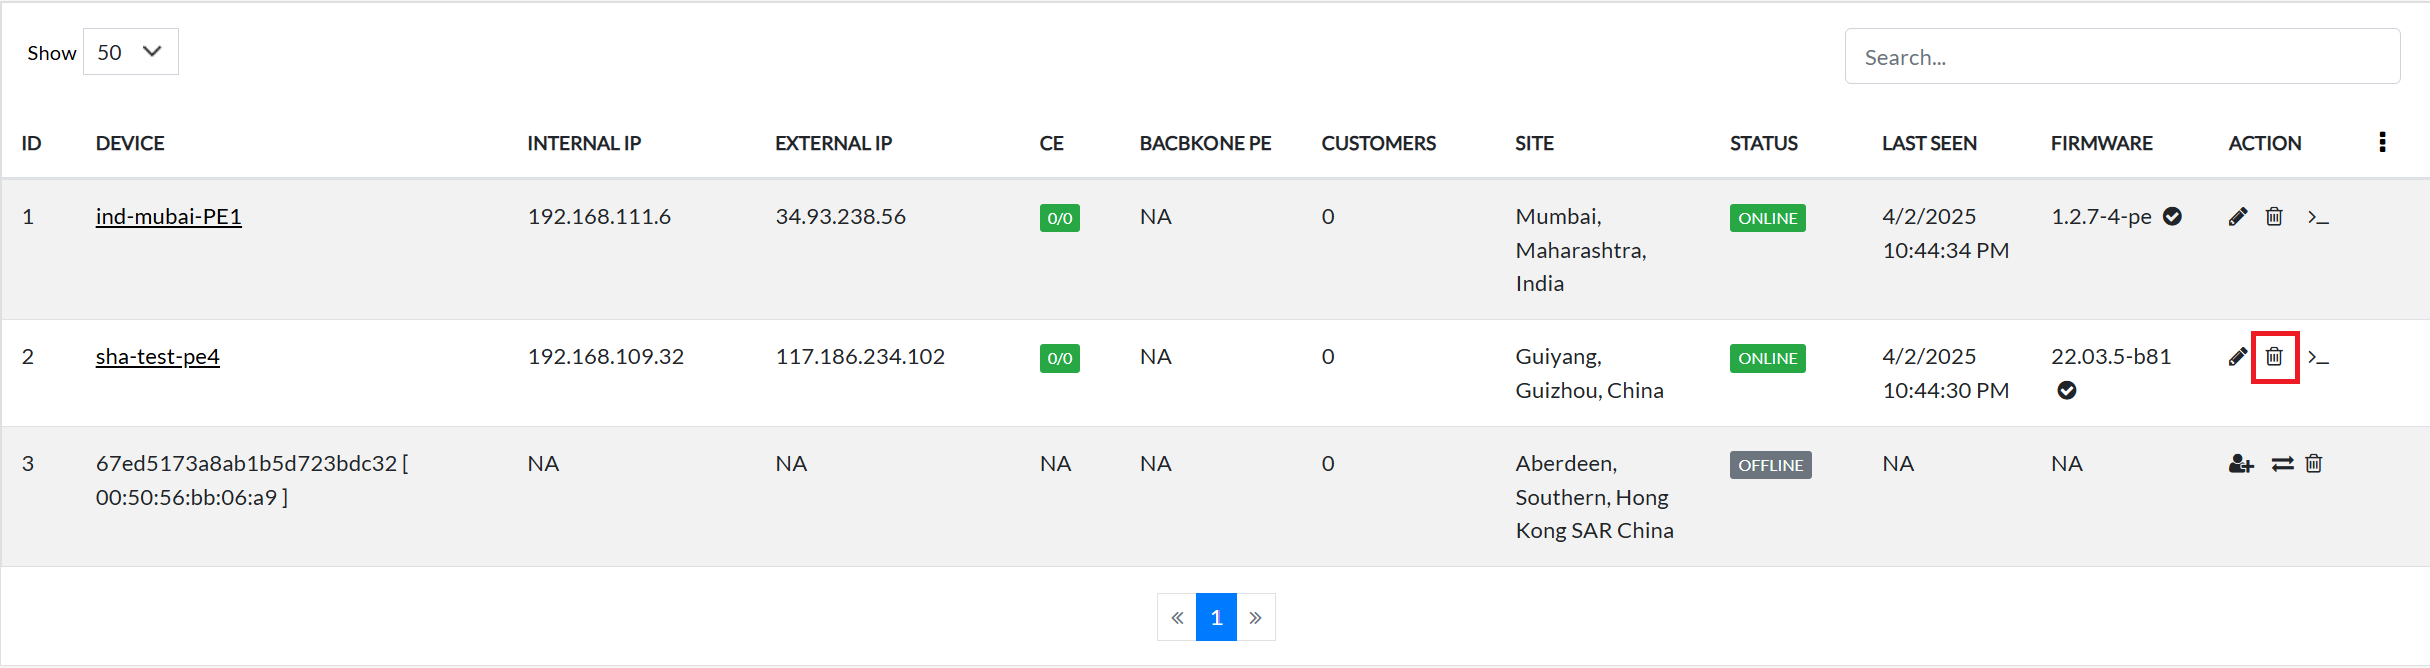
Click on the Delete option in the 'Action' column in the row of the PE device to be deleted.
-
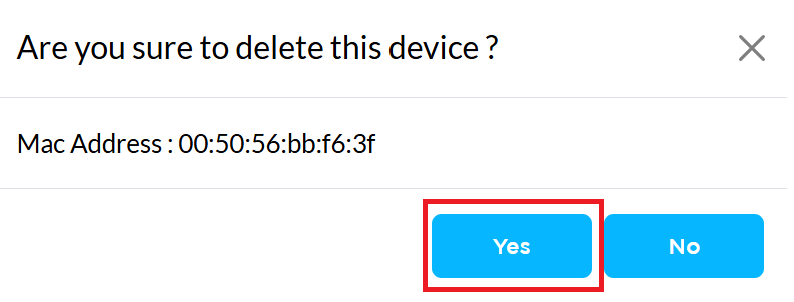
By clicking on the Delete option, a confirmation message popup will open on the screen. This popup asks to confirm the deletion action again, which prevents accidental deletion.
-
The PE device has two options available:
- Confirm Delete: If the PE device really wants to delete the information, click on the Yes button in the popup.
- Cancel Delete: If not intended to delete or clicked by mistake, click on the No button to cancel the action and keep the information safe.
-
Decision taken in the image As mentioned, the Yes button has been clicked in the image. This means that the deletion action has been confirmed by the PE device and the relevant data will be removed from the system.
-
Once deleted, a confirmation message will be displayed Device is deleted successfully.