VPN User
These users are designated as Remote Access Users, allowing them to securely connect to the organization’s network through VPN. Their access enables authorized personnel to work from external locations while maintaining data security and controlled permissions.
Creating VPN User
Follow the steps below to create a new Vpn user:
-
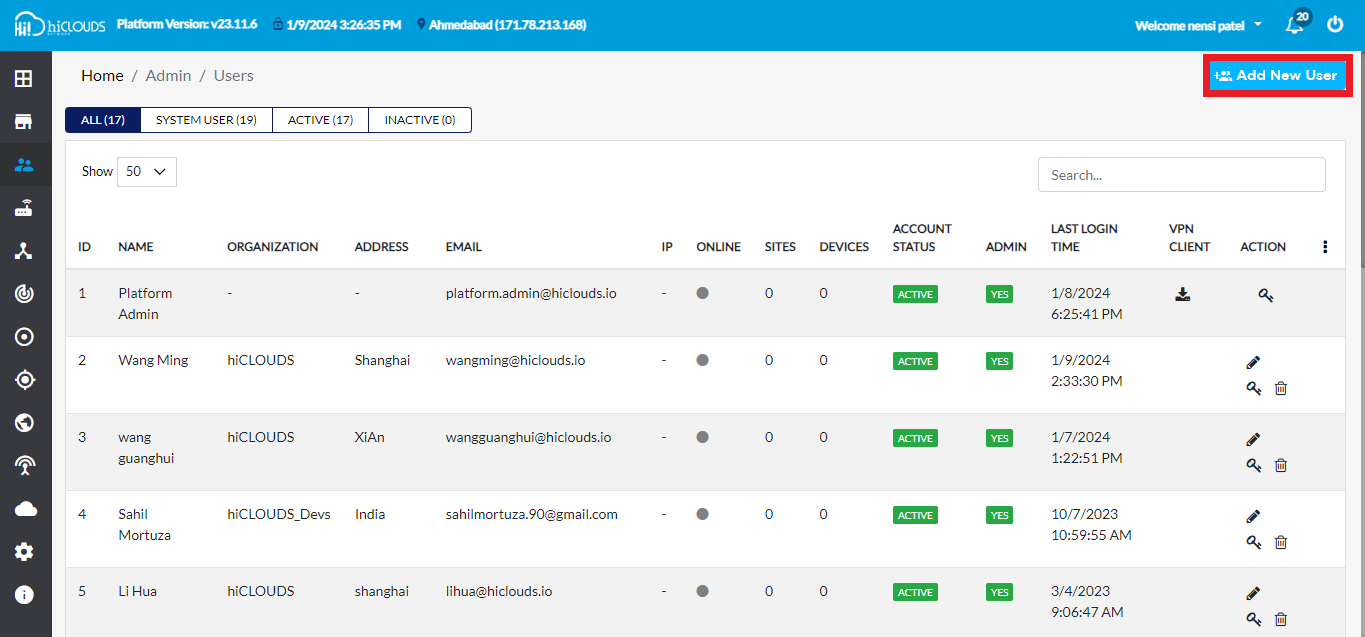
In the user listing grid, click the Add button in the upper right corner.
-
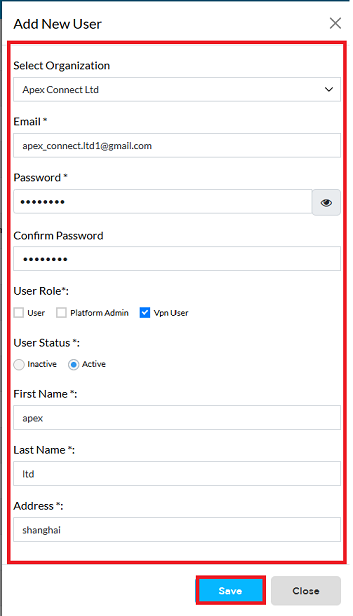
To successfully create a new VPN user account in the system, please follow the steps below and fill in the required information carefully:
- Select Organization: Choose the organization this user belongs to from the dropdown list (e.g:- If the user works for Apex Connect Ltd, select Apex Connect Ltd).
- Email Id: Enter the user's unique and valid Email ID. This will typically be used as their login username (e.g:- apex_connect.ltd1@gmail.com).
- Password: Create a secure Password for the new user.
- Confirm Password: Re-enter the password exactly as typed in the previous step to Confirm Password and ensure accuracy.
- User Role: Select the appropriate User Role from the available options. The options are typically (1) User, (2) Platform Admin, and (3) VPN User. For a standard user account, click on the VPN User role.
- User Status: Define the operational status of the account by selecting User Status.
- To allow the user to log in immediately, click on Active.
- Multi factor authentication:- Multi-factor authentication (MFA) adds an extra layer of security by requiring a second verification step in addition to your password to verify your identity. This prevents unauthorized access to your account, even if someone knows your password. To enable multi-factor authentication for added security, click the checkbox next to Enabled.
- First Name: Enter the user's First Name (i.e: Apex).
- Last Name: Enter the user's Last Name (i.e: ltd).
- Address: Enter the user's physical or primary Address (i.e: Shanghai).
- After filling in all the required details correctly, carefully check all the information entered to ensure it is accurate and complete. Once confirmed, click on the Save button to store the new VPN user's data in the system and complete the account creation process.
-
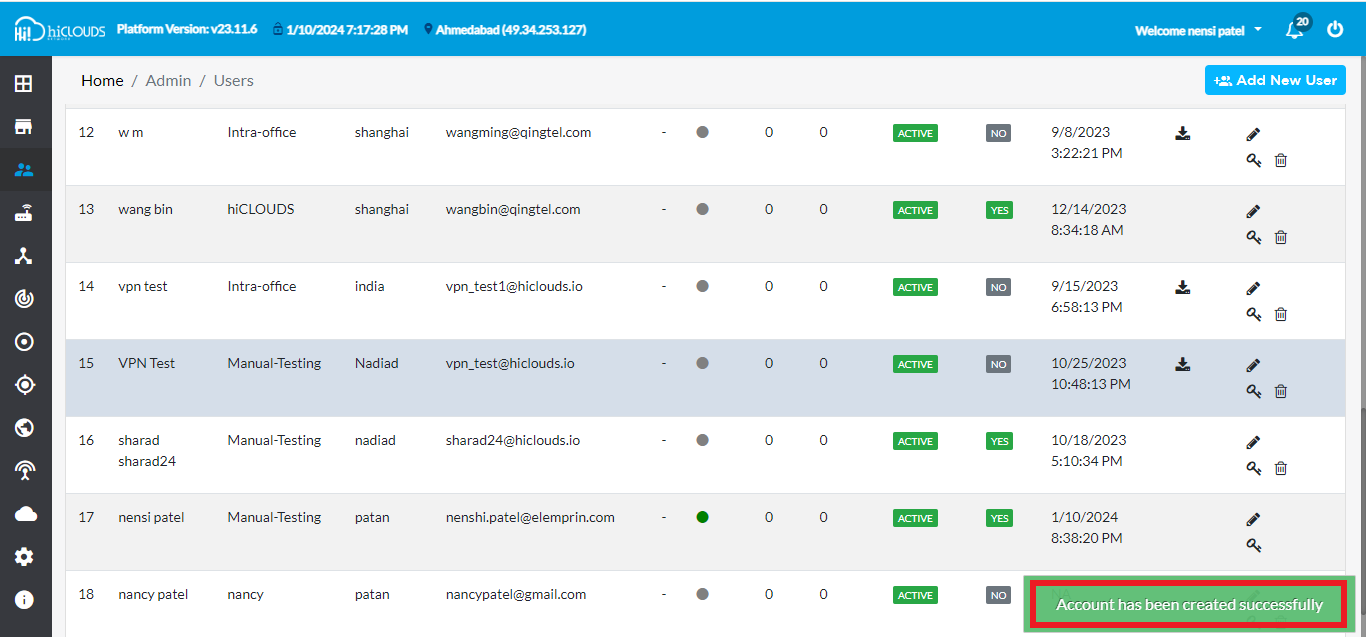
After the user is successfully created, a message will appear on the screen saying Account has been created successfully.
-
After that Will be able to view the new User ID.