Update Interface
This guide provides step-by-step instructions for configuring the VPN interface on your device. It covers setting up encryption, managing traffic bandwidth, enabling SOCKS proxy settings. This will help you ensure a secure and optimized VPN connection for your network.
Steps to Configure the Update Interface
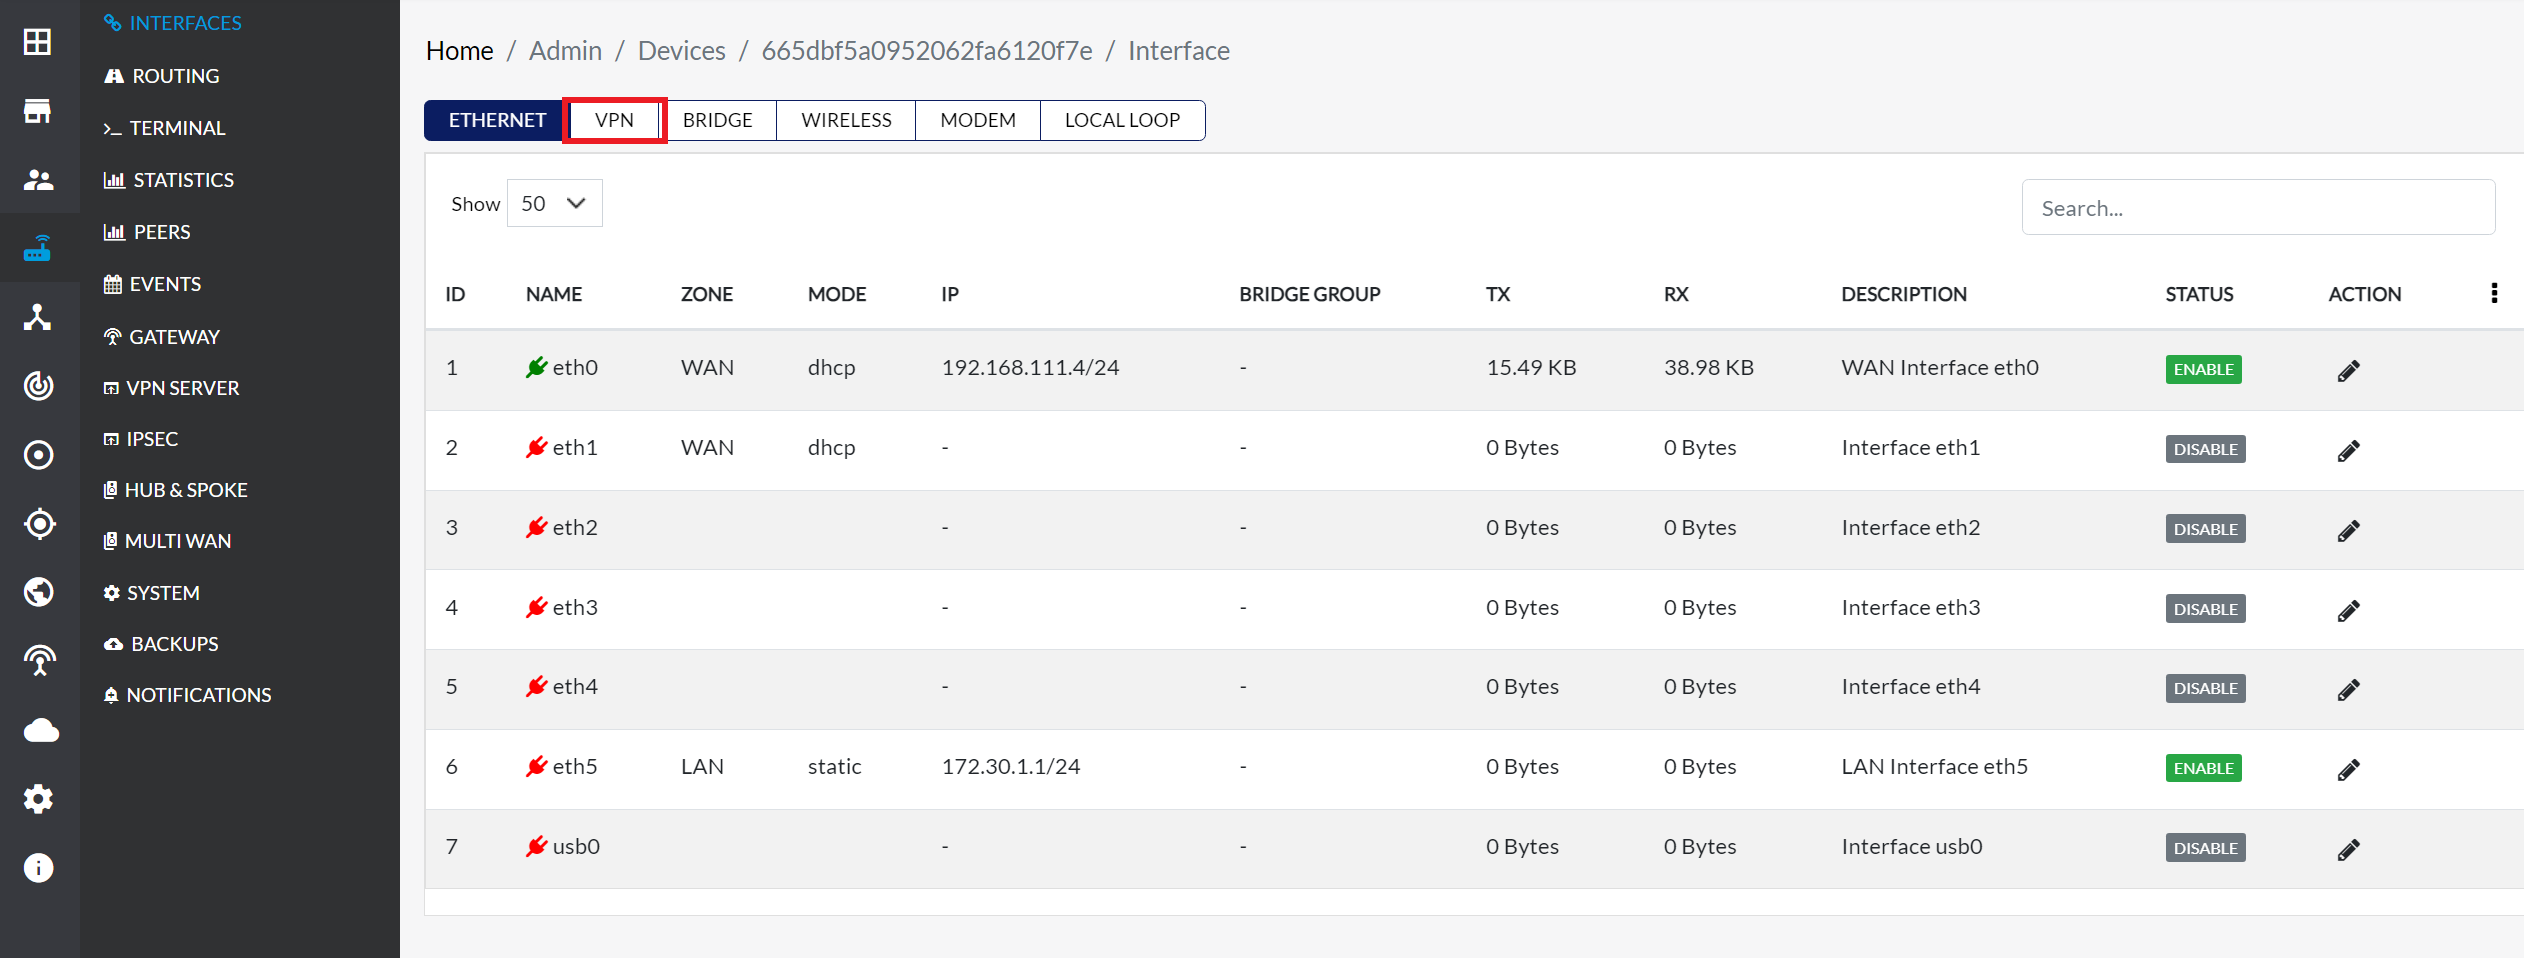
Navigate to the VPN Interface Section
-
Navigate to Login > CE Device > [Select CE] > Interface > VPN Tab.
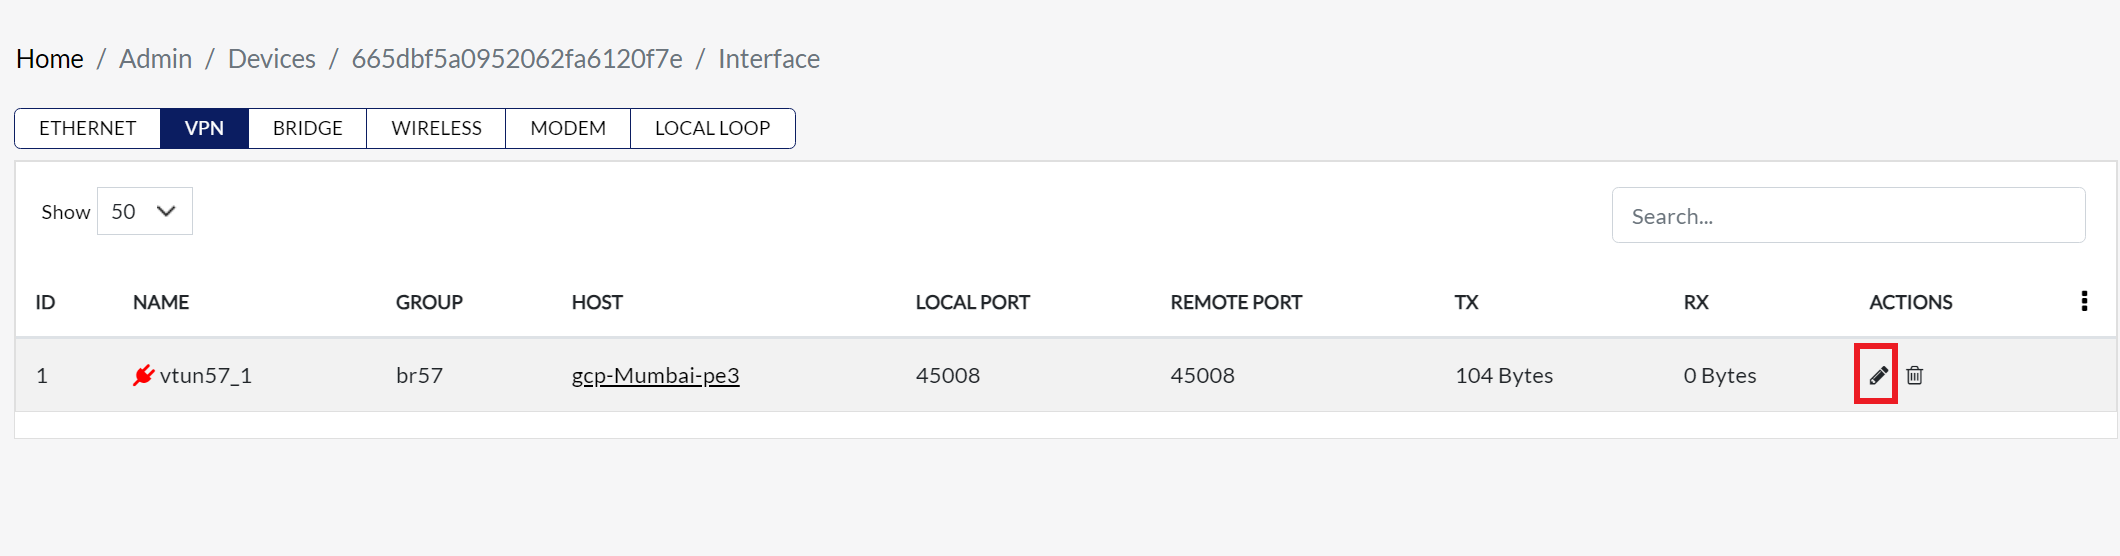
Edit the VPN Interface
-
Click the Edit button associated with the VPN interface. This will open the VPN Interface Settings modal dialog, where user can modify the configurations.
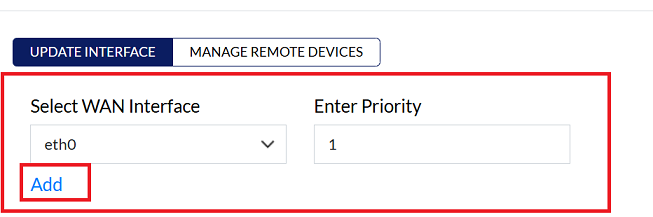
Updating VPN Interface Settings
- Once the user clicks Edit, the Update VPN Interface Model dialog will appear, allowing you to configure various settings.
1. WAN Interface and Priority
- This option allows you to assign a priority level to the WAN interface that will handle the VPN connection. Higher-priority interfaces will be preferred for VPN traffic.
procedure
-
WAN Interface: Select WAN Interface from the dropdown menu.
-
Priority: Enter the priority level in the input box next to the dropdown.
-
Click on Add button.
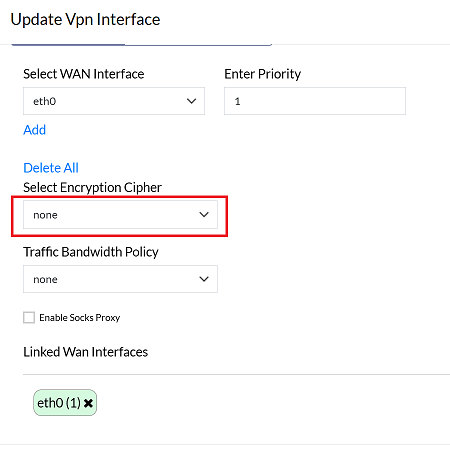
2. Configure Encryption Settings
- Encryption ensures the privacy and security of data transmitted over a VPN connection. Depending on your needs, you can choose different levels of encryption.
procedure
-
Choose an encryption cipher from the available options:
- Default: The standard option.
- None: For setups where encryption is not required.
- AES-256-CBC: A secure encryption option.
3. Configure Traffic Bandwidth Policy
- Bandwidth limits control the amount of data that can pass through the VPN interface, helping to manage network traffic and optimize performance.
procedure
- Users can use the Traffic Bandwidth policy dropdown to select the appropriate bandwidth limit based on their traffic requirements.
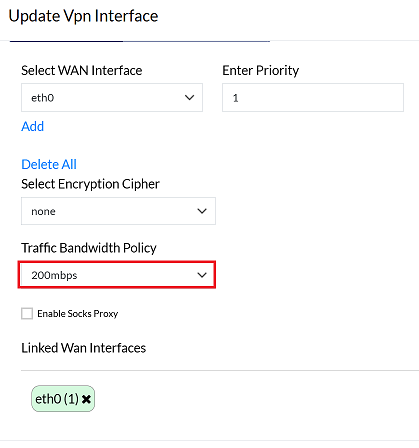
If the VPN interface does not achieve the desired speed due to encryption overhead, selecting "None" for encryption can enable an end-to-end connection at maximum speed. If maximum speed is not required, you may retain the default encryption settings. :::
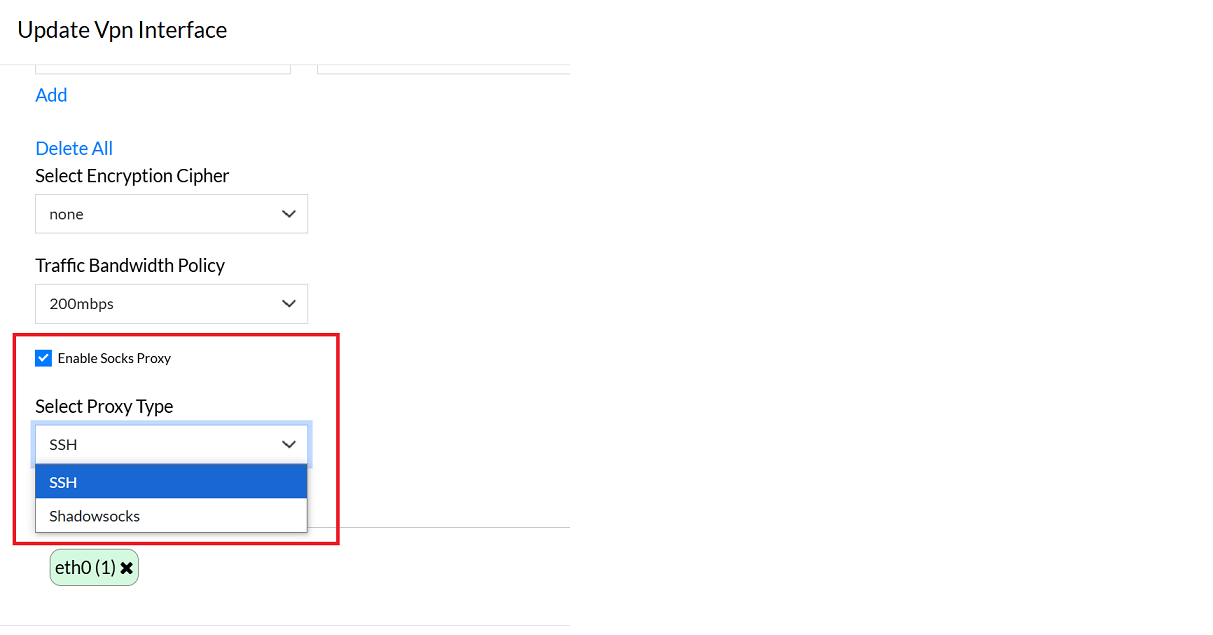
4. Enable Socks Proxy
-
A SOCKS proxy allows VPN traffic to be routed through a proxy server, providing an additional layer of security and privacy. You can choose the type of proxy for your connection, with two available options: SSH and Shadow SOCKS.
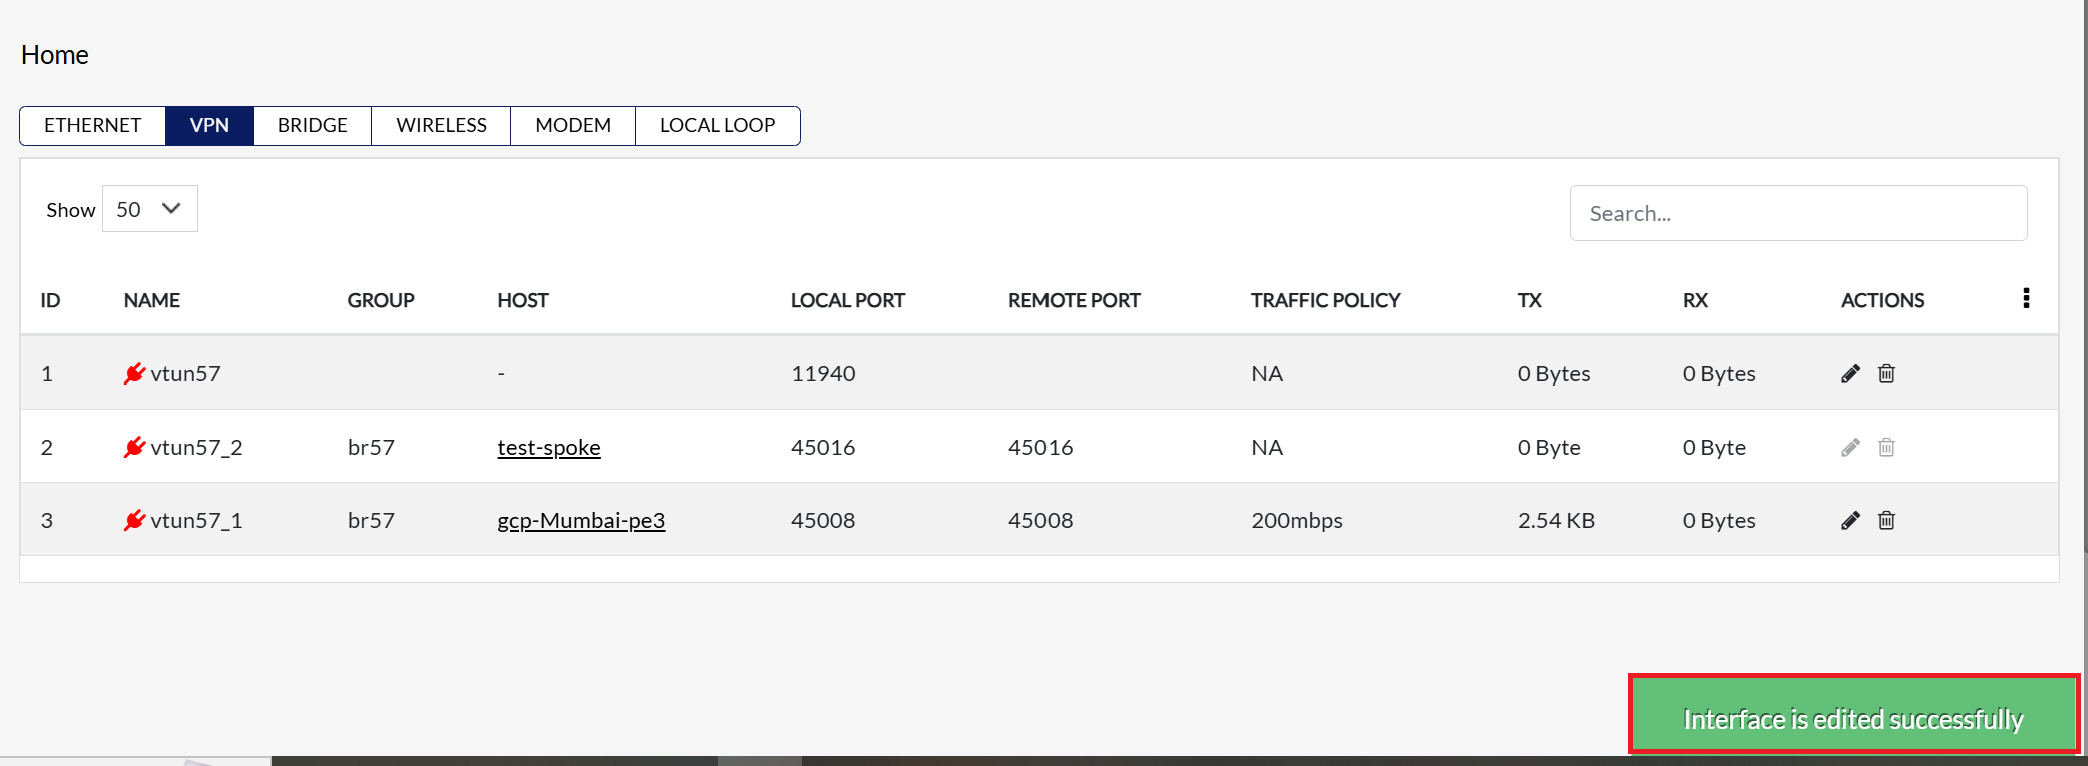
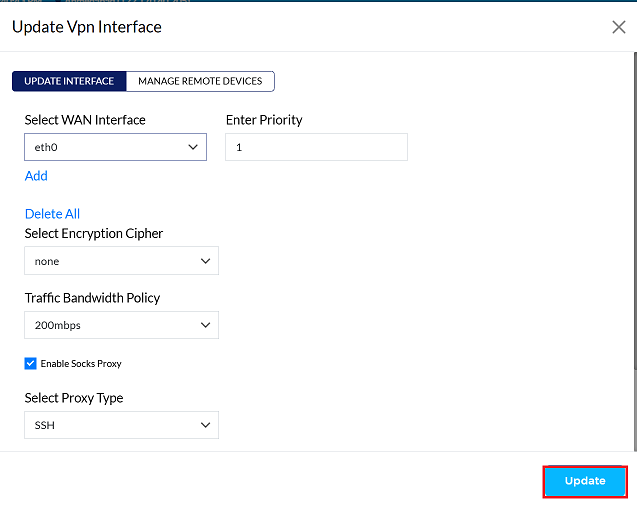
Save the Configuration
-
Click on the Update button to save the changes.
Confirm the Update
-
By clicking on Update, a message will appear on the screen indicating that the Interface is edited successfully