Authentication
The feature of VPN server authentication allows the user to select a preferred authentication method allowing secure and controlled access to the network. Whether you need to integrate with a directory service like LDAP or choose to use office365 credentials, this configuration ensures the flexibility and security to suit your organizational needs.
Follow the steps below to enable and configure authentication settings on the vpn server.
Enabling VPN Server Authentication
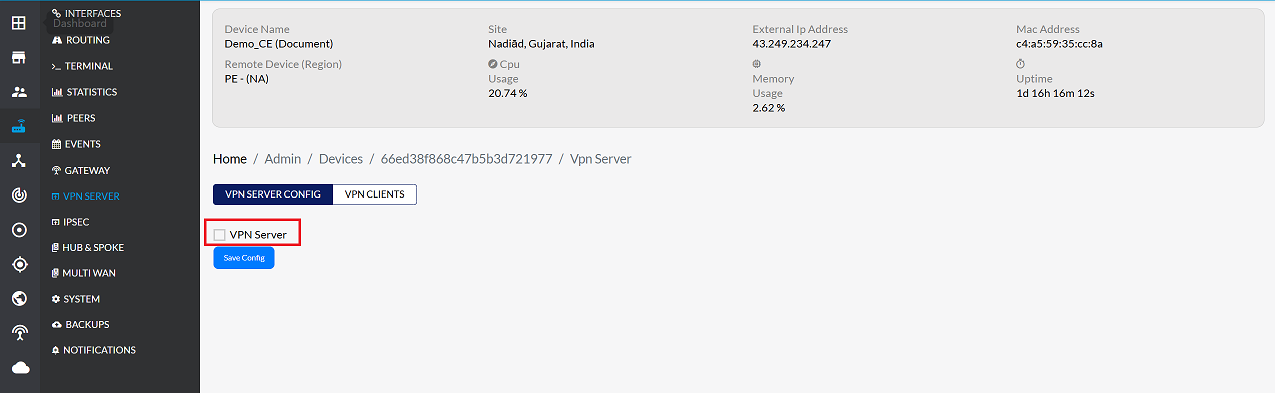
Access VPN Server Settings
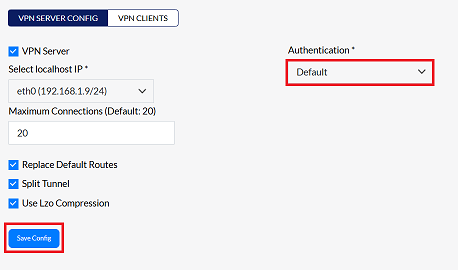
- Go to the Login > CE Device > [Select CE] > VPN Server.
Enable the VPN Server
-
Check the box next to the VPN server option to enable it.
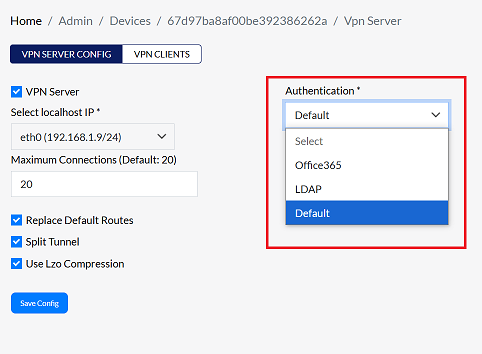
Set Authentication Type
-
Go to the Authentication section.
-
Choose the desired authentication type from the available options:
- Office365:- Connect using Office365 authentication.
- LDAP:- Use LDAP directory services for authentication.
- Default:- Use the system's standard authentication method for Platform VPN Users.
1. Office365
-
If Office365 is selected, complete the following fields:
- Tenant ID:- Enter the Tenant ID. This is a unique identifier for your organization within Office365. (i.g:- 12345-abcd-67890-efgh)
- Client ID:- Enter the Client ID. : The client ID is associated with the registered application in Azure Active Directory. (i.g:- abc123-clientID-xyz456)
- Client Secret:- Enter the Client Secret. This is a secret key generated when registering the application in Azure Active Directory. It is used to authenticate the application. Ensure this is kept secure.
login-infoIf Office365 authentication is selected, login requires an Office365 username & password.

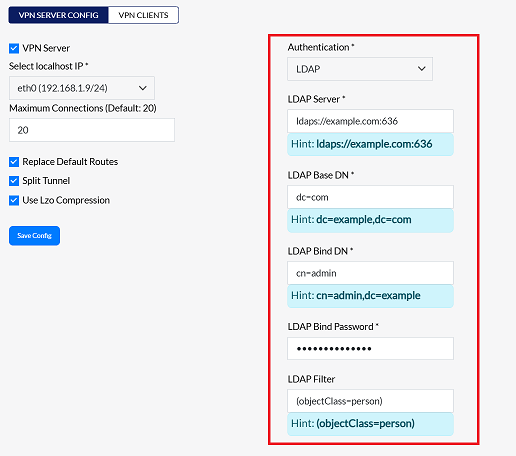
2. LDAP
-
If LDAP is selected, fill in the following fields:
- LDAP Server:- Enter the LDAP Server. Specifies the hostname or IP address of the LDAP server to which the system will connect. This is the entry point for querying the LDAP directory. (i.g:- ldap://100.100100.100:portno)
- LDAP Base DN:- Enter the LDAP Base DN. Defines a base Distinguished Name (DN) for LDAP queries. This is the root context from which all searches are performed. (i.g:- dc=com)
- LDAP Bind DN:- Enter the LDAP Bind DN. Specifies the distinguished name (DN) of the user that will connect to the LDAP server for authentication. Bind DN is used for operations that require credentials. (i.g:- cn=admin)
- LDAP Bind Password:- Enter the LDAP Bind Password.
- LDAP Filter:- Enter the LDAP Filter. The filter used to define the scope of the query. (i.g:- objectClass=person)
login-infoIf LDAP authentication is selected, login requires an LDAP username & password.
3. Default
-
If Default is selected, the system platform will use its standard authentication method for VPN users.
-
After selecting the desired authentication method, click Save Config to apply the changes.
The authentication type selected will determine the availability of certain configuration options. Make sure you choose one that aligns with your security policies.
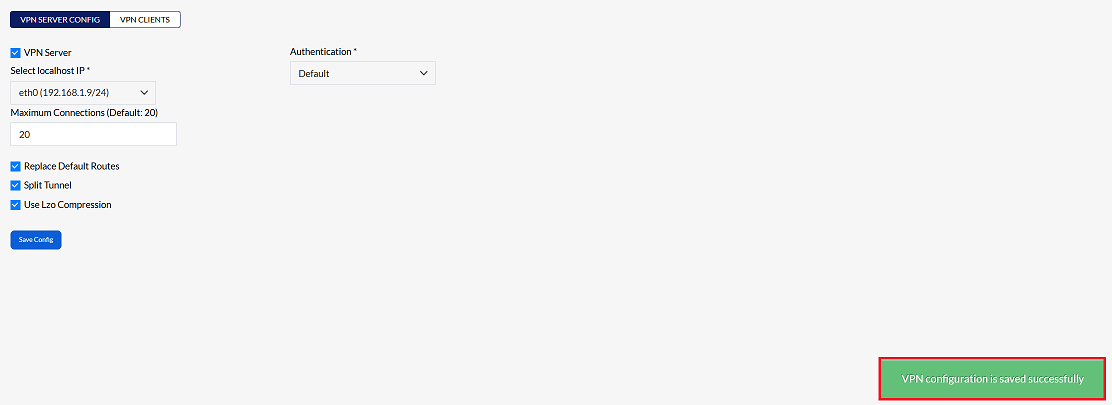
Confirmation Message
-
By clicking on Save Config, a message will appear on the screen indicating that the VPN configuration is saved successfully.