DHCP Server
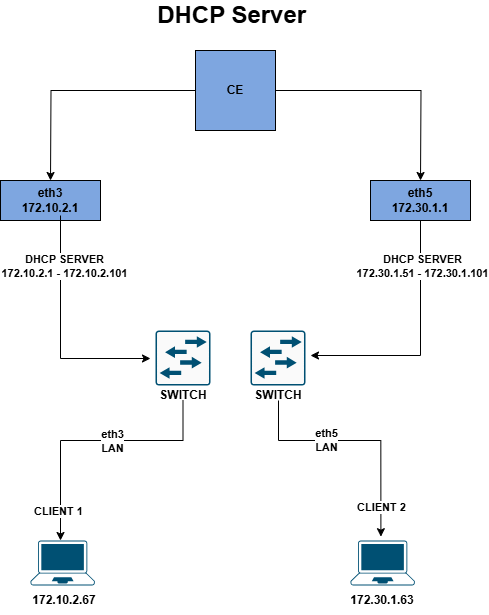
This guide explains how to configure a DHCP server for multiple LAN interfaces, enabling automatic IP address assignment to devices connected to the same network. It includes easy-to-follow steps to set up and test the configuration.
Overview
A DHCP server automatically assigns IP addresses to devices in a network, simplifying network management. By configuring a DHCP server on the LAN interface, client devices can automatically connect to the network without manually setting IP addresses.
Steps to Configure the LAN Interface
Access the Interface Settings
To begin configuring the LAN interface for DHCP, follow these steps:
- Login to the cloud platform.
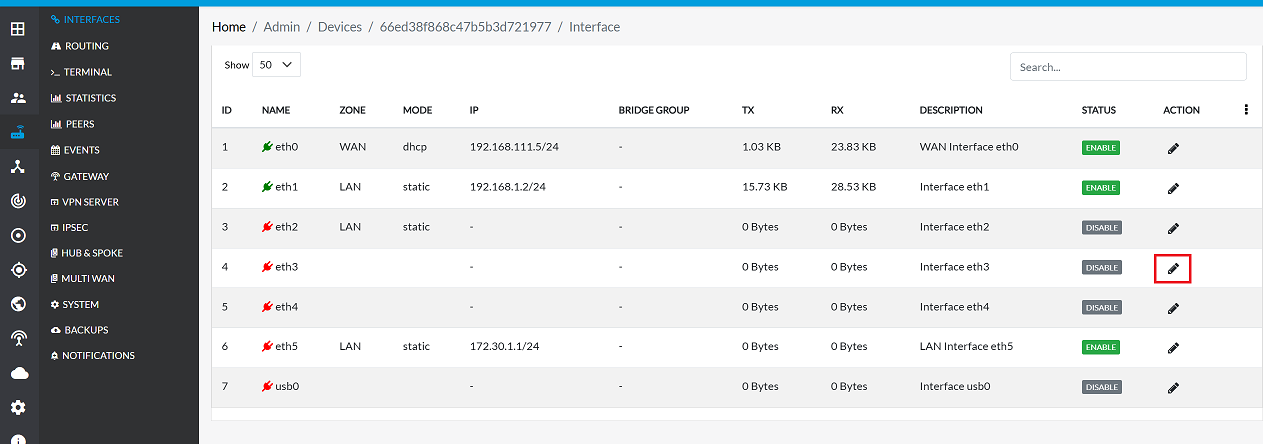
- Navigate to CE Devices > [Select CE] > Interface > Ethernet.
Edit the LAN Interface
Once in the Ethernet interface settings, proceed with the following steps:
-
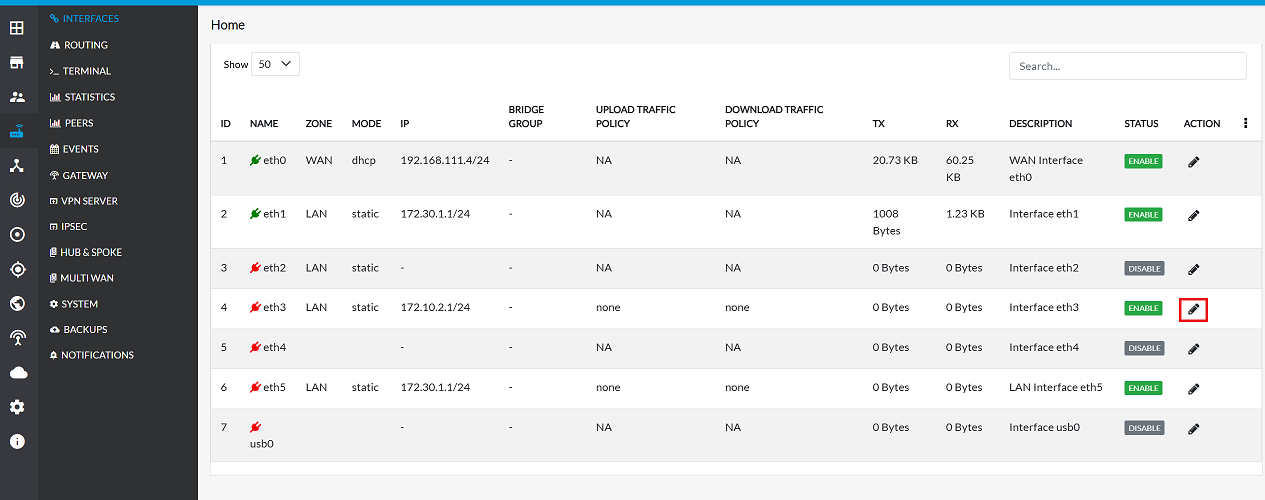
Click on the Edit button for the LAN interface.
Set the Configuration Type
-
To configure the interface with a static IP address, follow these steps:
-
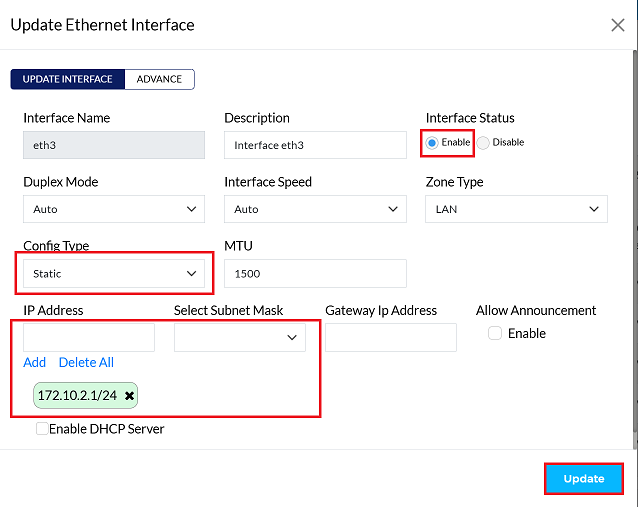
In the settings panel:
- Set Interface Status to Enable.
- Set the Config Type to Static.
- Assign an appropriate IP Address for the interface. (eg: 172.10.2.1)
- Select Subnet Mask (eg: 255.255.255.0/24)
- Click on the Add button to save the details.
-
Click on the Update button to confirm changes.
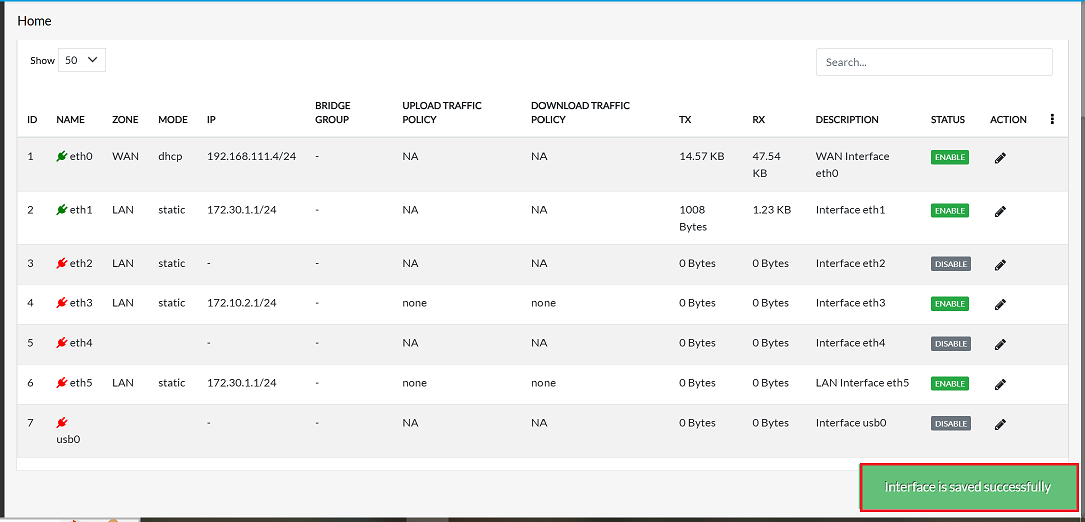
Confirmation Message
-
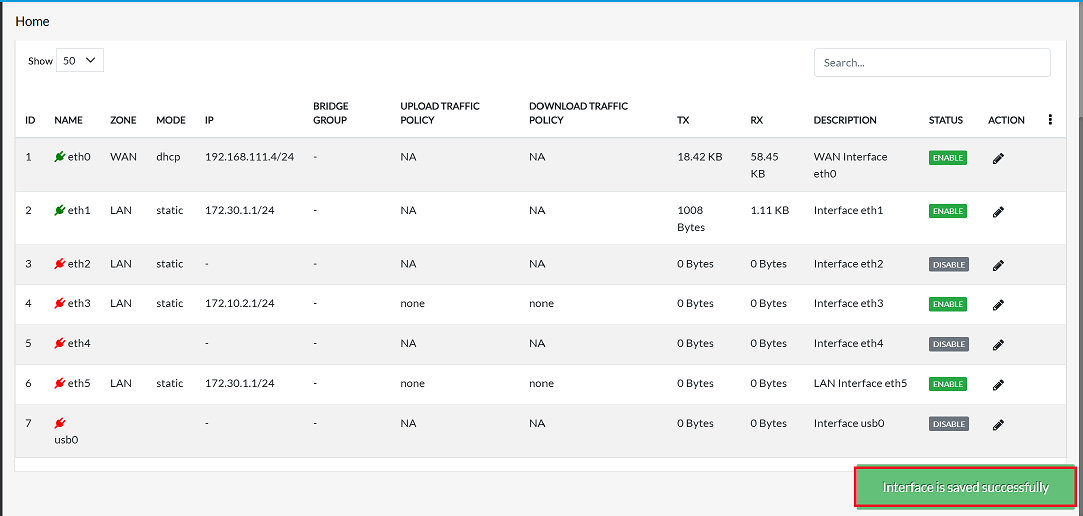
Upon clicking update, a confirmation message, Interface is saved successfully will appear on the screen.
Enable DHCP Server and Configure New Range
Edit the LAN Interface
Once the LAN interface is configured with a static IP, the next step is to enable the DHCP server:
-
Click on the Edit button for the LAN interface.
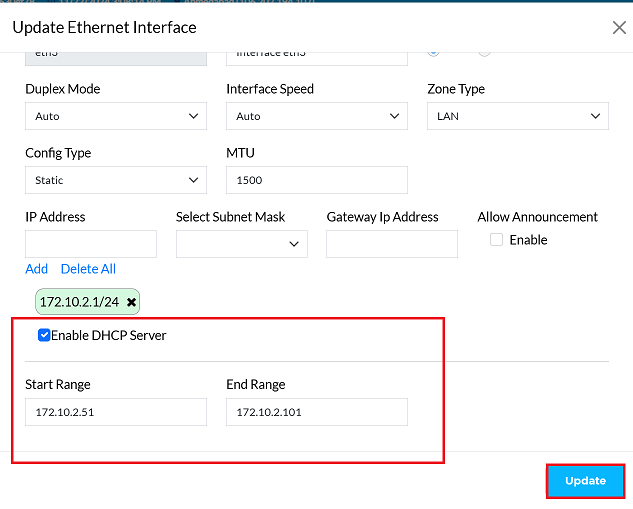
Enable DHCP and Configure Range
In the DHCP settings section, the DHCP server settings can now be configured as follows:
-
Enable DHCP: Check the DHCP Server option.
-
Set IP Range:
- Enter the Start Range (e.g., 172.10.2.51 ).
- Enter the End Range (e.g., 172.10.2.101).
-
Click on the Update button.
-
Upon clicking update, a confirmation message, Interface is saved successfully will appear on the screen.
Client PC Configuration
- To ensure the DHCP server is working as expected:
- Connect client PCs to the configured LAN ports.
- Verify that:
- The client receives an IP address within the configured DHCP range (e.g., 172.10.2.51 to 172.10.2.101).
- Internet connectivity and Default Gateway (CGW) settings are functional.
- Use the
ipconfigorifconfigcommand on the client PC to view the assigned IP address and gateway.